Instagram Reels & Short-Form Video Marketing PLR Course 36k Words
in Instagram PLR , PLR eCourses , PLR List Building Reports , Premium PLR , Premium PLR Reports , Premium White Label Brandable PLR Coaching Courses , Private Label Rights Products , Social Media PLRChoose Your Desired Option(s)
has been added to your cart!
have been added to your cart!
#instagramreels #shortformvideo #videomarketing #plrcourse #socialmediamarketing #contentcreation #plrcontent #onlinemarketing #creatortools
Instagram Reels & Short-Form Video Marketing PLR Course – 36,000 Words
Master Instagram Reels and Short-Form Videos to Grow Your Brand, Audience, and Profits
Short-form videos are taking over social media. Instagram Reels, TikTok, and YouTube Shorts are dominating feeds worldwide, and brands that master these formats are seeing explosive growth.
The Instagram Reels & Short-Form Video Marketing PLR Course is a complete, beginner-friendly training program that shows you step-by-step how to create, edit, and scale Reels and short-form videos for maximum engagement and results. With 36,000 words of actionable content, this course is perfect for entrepreneurs, social media managers, coaches, marketers, and PLR resellers who want to deliver high-value training without creating content from scratch.
Whether your goal is to increase followers, drive engagement, or monetize your content, this PLR course provides the full blueprint to succeed in the fast-paced world of short-form video marketing.
Introducing the…
Instagram Reels & Short-Form Video Marketing
Why Short-Form Video is Essential
The digital landscape is shifting rapidly. Videos under 60 seconds now outperform long-form content in reach, engagement, and conversions. Here’s why your audience—and your business—can’t ignore short-form videos:
- Higher Engagement: Reels are more likely to be shared, liked, and commented on than static posts.
- Algorithm-Friendly: Platforms prioritize short-form content for discovery, pushing your videos to new viewers.
- Easy Repurposing: Create once, distribute everywhere: Instagram, TikTok, YouTube Shorts, and Facebook Reels.
- Brand Authority: Engaging videos position you as an expert or influencer in your niche.
- Revenue Potential: Drive traffic, leads, and sales directly from short-form content.
This course doesn’t just explain theory—it equips learners with hands-on skills, strategies, and workflows to create Reels that capture attention, grow audiences, and convert viewers into customers.
What You Get in This Course
This course is organized into five action-packed modules, each containing four lessons, making it easy for learners to progress from beginner to pro.
Module 1: Getting Started with Instagram Reels & Short-Form Content
Goal: Build a strong foundation and understand why Reels and short-form videos are crucial for your brand.
- Lesson 1: Why Short-Form Video is Taking Over
Explore why Reels, TikTok, and Shorts dominate social media. Learn the psychology behind why viewers love short, snackable content. - Lesson 2: Navigating Instagram Reels
Step-by-step walkthrough of the Reels interface, features, and functions so you can confidently create content from day one. - Lesson 3: Types of Content That Perform Best
Discover trending formats like tutorials, challenges, storytelling, and behind-the-scenes clips. Learn which types attract the most views and engagement. - Lesson 4: Setting Clear Goals for Your Reels Strategy
Define your target audience, brand voice, and purpose. Are you creating content for awareness, engagement, or sales? Plan for success from the start.
Module 2: Planning & Scripting Your Reels
Goal: Create short-form content that captures attention and converts viewers into followers and customers.
- Lesson 1: The Content Planning Blueprint
A simple 3-step formula to brainstorm, validate, and organize content ideas tailored to your niche. - Lesson 2: Writing Scroll-Stopping Hooks
Learn how to grab attention in the first 3 seconds—because if viewers don’t stop scrolling, nothing else matters. - Lesson 3: Storytelling in 30 Seconds
Structure Reels with a beginning, middle, and call-to-action. Storytelling drives emotional connection and increases engagement. - Lesson 4: Creating a Content Calendar for Reels
Plan 7–14 days of content in advance, ensuring consistency and removing the stress of daily posting.
Module 3: Filming & Editing Your Reels Like a Pro
Goal: Produce professional-quality videos without expensive equipment.
- Lesson 1: Filming Basics with Just Your Phone
Tips for lighting, angles, framing, and setups. You’ll look professional even without a studio. - Lesson 2: Using Instagram’s Built-in Editing Tools
Trim, cut, align, add text, stickers, and effects—all inside the app. Learn techniques that make your Reels stand out. - Lesson 3: Music, Trends, and Voiceovers
Use trending sounds, voiceovers, and audio effects to increase reach and keep viewers engaged. - Lesson 4: Advanced Editing Tools & Apps
Explore apps like CapCut, InShot, and Canva to elevate your Reels with creative transitions, effects, and professional polish.
Module 4: Growing with Instagram Reels
Goal: Understand platform dynamics and strategies to expand your reach, followers, and engagement.
- Lesson 1: Understanding the Reels Algorithm
Learn what factors influence the algorithm and how to optimize content for virality. - Lesson 2: Hashtags, Captions & Keywords That Work
Craft captions that drive interaction and use hashtags strategically to reach your target audience. - Lesson 3: Engaging with Your Audience
Boost engagement by replying to comments, using polls, and encouraging community interaction. - Lesson 4: Analyzing Insights & Metrics
Measure performance with Reels analytics, identify what works, and refine your content strategy for better results.
Module 5: Monetizing & Scaling with Short-Form Video
Goal: Turn Reels into a growth engine for your business or personal brand.
- Lesson 1: Building a Personal Brand with Reels
Position yourself as an expert or creator in your niche, building trust and authority. - Lesson 2: Driving Sales Through Reels
Add CTAs, promote products or services, and link content to your store or online offerings. - Lesson 3: Collaborations, Influencers & Partnerships
Leverage joint ventures and influencer collaborations to grow faster and reach new audiences. - Lesson 4: Repurposing & Scaling Content
Reuse Reels across TikTok, YouTube Shorts, and Facebook Reels to maximize exposure and save time.
What Learners Will Achieve
By completing this course, your audience will:
- Confidently create and edit Reels that attract attention
- Increase followers and engagement across social media platforms
- Grow brand authority and influence in their niche
- Drive sales and monetization opportunities through short-form content
- Repurpose content efficiently to maximize reach and impact
This course is not just theoretical—it’s a practical, step-by-step system that empowers learners to plan, produce, publish, and profit from short-form video content.
Bonus Materials
- Checklist – 677 Words: A simple, actionable guide to implementing strategies from every module
- FAQs – 851 Words: Answers to common questions and obstacles faced by Reels creators
- Salespage – 1,002 Words: Ready-to-use copy for resale or marketing
Who Can Profit From This PLR Course?
This PLR product is ideal for:
- Social media managers seeking ready-to-use training materials
- Entrepreneurs and coaches building digital courses or workshops
- PLR resellers looking to bundle, repurpose, or sell high-quality content
- Bloggers and marketers wanting lead magnets or premium guides
- Small business owners ready to grow their brand with Reels
With PLR rights, you can rebrand, sell, bundle, or repurpose the course in multiple formats, including videos, workbooks, e-classes, or membership content.
How to Use and Profit from This PLR Course
Here are practical monetization strategies:
- Sell the complete course as a digital download or online program ($197–$497)
- Break into mini-guides or reports ($10–$20 each)
- Bundle with other PLR products for premium packages ($47–$97)
- Convert into a multi-week eClass ($297–$497)
- Setup a membership site for recurring revenue
- Transform into audio, video, or workbook formats for higher value
- Use excerpts as lead magnets or blog posts to grow your email list
- Launch a dedicated site using this course and flip it for profit
Licensing Terms
What You CAN Do:
- Sell the course as-is or with minor edits
- Rebrand by rewriting 75%+ to claim copyright
- Break into smaller guides, e-classes, or membership content
- Bundle with other PLR products
- Use excerpts for blogs, lead magnets, or social media campaigns
What You CANNOT Do:
- Pass PLR rights to customers
- Offer 100% affiliate commissions (max 75%)
- Give the complete course away for free
- Include full content in existing orders without purchase
Why Buy Quality PLR?
- Professionally written, 36,000-word course ready for immediate use
- Bonus materials for instant marketing and delivery
- High-demand niche: Instagram Reels, short-form video, social media growth
- Save months of writing while providing premium content your audience will love
The Bottom Line
The Instagram Reels & Short-Form Video Marketing PLR Course is a turnkey solution for anyone who wants to:
- Teach Reels creation to clients or audience
- Monetize short-form video expertise quickly
- Save time and resources by using high-quality, ready-to-sell content
Sell it. Teach it. Scale your business. Profit.
Take advantage of this all-in-one PLR course and help your audience master Instagram Reels and short-form video marketing today!
has been added to your cart!
have been added to your cart!
Here A Sample of the Instagram Reels & Short-Form Video Marketing PLR Course
Module 1: Getting Started with Instagram Reels & Short-Form Content
Goal: Build a strong foundation and understand why Reels & short-form videos matter.
Lesson 1 – Why Short-Form Video Is Taking Over
(For international course creators — friendly, step-by-step training instructions and descriptions)
Overview (short):
Short-form video — think Instagram Reels, TikTok, YouTube Shorts and similar formats — has reshaped how people discover, learn, and buy. In this lesson you will explain why this format is dominant, and you will guide learners to see how short videos can become the central engine of a course creator’s audience, authority, and revenue strategy. Below is a practical, step-by-step lesson plan you can follow in the classroom or use to build an on-demand module.
Learning outcomes (what learners will be able to do after this lesson)
- Explain the primary reasons short-form video outperforms many other content formats for discovery and engagement.
- Identify how short videos fit into a global course-selling funnel (awareness → trust → conversion).
- List 6 actionable content formats for short video that course creators can use immediately.
- Recognize key performance indicators (KPIs) relevant to short-form content and how they map to business goals (audience, lead gen, revenue).
Lesson plan: step-by-step training instructions
Step 1 — Open with context (10 minutes)
- Start by framing the problem you solve as a course creator: attention is fragmented across platforms, buyers scroll quickly, and trust must be built fast.
- Provide a short, global snapshot: people watch video on mobile, attention windows are short, and platforms reward content that keeps people watching. Use simple international markers such as %, $, €, £, ₹ when illustrating business impact (for example: “A small increase of 10% watch-through can lift organic reach and potentially increase course signups by measurable amounts.”).
- Keep this segment conversational: speak in plain terms and avoid platform jargon unless you’ll define it.
Step 2 — Explain the five structural reasons short-form is winning (25 minutes)
Walk through each reason slowly, showing one slide or demo per point. After each reason, give a micro-exercise: ask learners to note one way this maps to their course content.
- Attention economy and format fit
- Reason: People prefer quick, actionable content they can consume anywhere. Short videos are optimized for pockets of time (commutes, breaks).
- Teaching point: Short videos match human micro-attention cycles and mobile behavior. Course creators can turn 1 lesson idea into many 15–60 second pieces.
- Algorithmic amplification
- Reason: Platforms reward content that generates immediate engagement (watch time, likes, shares, comments). Small creators can get disproportionate reach compared with older follower-based models.
- Teaching point: Explain how platforms try to surface new, engaging content to users — and why that levels the playing field.
- Low barrier to creation
- Reason: A smartphone and a simple plan are enough; production costs are low. This democratizes content creation across countries and budgets.
- Teaching point: Emphasize iteration over perfection: quick tests beat waiting for a polished video.
- Native trends and sound design
- Reason: Built-in music and trends create hooks that are easy to adopt, increasing virality potential.
- Teaching point: Show how a trending sound can be localized: translate captions, adapt cultural references, and keep the core idea relevant.
- Repurposing and multi-platform leverage
- Reason: One short video can live on Instagram, TikTok, YouTube Shorts, Facebook Reels and be embedded in email or course landing pages. This multiplies reach with minimal extra effort.
- Teaching point: Map one piece of content to five distribution points and show how each platform’s nuances change presentation slightly.
Step 3 — Practical demonstration: dissect 3 template formats (15 minutes)
Demonstrate and annotate three short-form templates that work internationally. For each template, show an example script and distribution idea.
- Micro-lesson (educational hook → tip → micro CTA)
- Script example: “Want to double your course completion? Do X. Here’s how in 30 seconds.”
- Use: Authority building and lead magnet promotion.
- Transformation reveal (before → after → how)
- Script example: “Before: low engagement. After: 3 changes that increased completion by 25%.”
- Use: Social proof and credibility.
- Cultural micro-story (local example → universal lesson → CTA)
- Script example: “In [country], students struggle with Y. Here’s a small fix you can try today.”
- Use: Local resonance that translates globally with subtitles.
Step 4 — Group activity: map your course to short-form ideas (20 minutes)
- Break learners into small groups (or use breakout rooms). Ask each group to choose one course module and generate five short-form video ideas: one micro-lesson, one testimonial clip, one behind-the-scenes, one myth-busting piece, and one quick tip.
- Each group presents one idea, including proposed hook, length (15–45s), and a one-line CTA (e.g., “Link in bio for the free worksheet”).
- Instructor provides quick feedback on clarity of hook and viability across regions.
Step 5 — Cover global considerations and localization best practices (15 minutes)
- Language and subtitles: Always caption. For international reach, add translated captions for top target markets. Short videos need readable on-screen text; keep sentences short.
- Cultural sensitivity: Avoid idioms that don’t translate. Use universal metaphors (sports, food, time) carefully; test locally.
- Music and copyright: Note that trending sounds vary by region and copyright rules differ; focus on platform-provided tracks to keep it safe.
- Accessibility: Use clear audio, large fonts, and enough contrast for viewers watching silently. This boosts watch-through and shares globally.
Step 6 — Metrics that matter and simple measurement (10 minutes)
- Reach / Views: Good for awareness.
- Average watch time / retention: Primary signal for algorithms. Aim to keep people watching to the end.
- Saves and shares: Indicate value and help distribution.
- Comments and DMs: Show engagement and open lines to sell or invite to webinars.
- Click-throughs (bio link, landing page): Track conversions (emails, free trials). Use short, consistent CTAs.
Show how these metrics map to business outcomes: reach → more leads; watch time → more organic reach; clicks → signups → sales (€ / $ / £ / ₹ conversions).
Step 7 — Assign a short, practical homework (do not call it “next steps”)
Give a single, focused task learners can complete in 48 hours:
- Create one 30-second micro-lesson from something in their course.
- Include a scroll-stopping hook in the first 3 seconds, subtitles, and one CTA (e.g., “Download the checklist — link in bio”).
- Upload the video privately or to the class platform for peer feedback.
This keeps practice immediate and tangible.
Instructor notes & facilitation tips
- Keep explanations concrete: use numbers or simple comparisons (e.g., “A 30-second video posted three times a week can produce 12+ micro-touchpoints per month with your audience.”).
- Emphasize iteration: encourage learners to test variants of hooks and thumbnails.
- Bring regional examples: if you teach a mixed international cohort, ask participants to share a successful short video from their country and analyze why it worked.
- Be mindful of timezones and network speed when assigning homework that requires uploads.
Common learner questions (and short answers to use live)
- Q: “Do I need a big budget?” — A: No. Start with a smartphone, natural light, and a clear hook. Production quality helps, but clarity and value beat polish.
- Q: “What length is best?” — A: 15–60 seconds is optimal. Aim for the shortest version that fully delivers the idea.
- Q: “How often should I post?” — A: Consistency matters more than frequency. Start with a realistic cadence: 2–3 short videos per week and iterate.
Pitfalls to warn learners about
- Overproduction delays: Don’t hold content back waiting for perfection. Test quickly.
- Copying without adapting: Copying trends without localizing leads to shallow results. Adapt the hook and cultural references.
- Weak CTA or no funnel: Short videos should either build authority or funnel viewers to a next step (email list, webinar, sales page). Don’t post aimlessly.
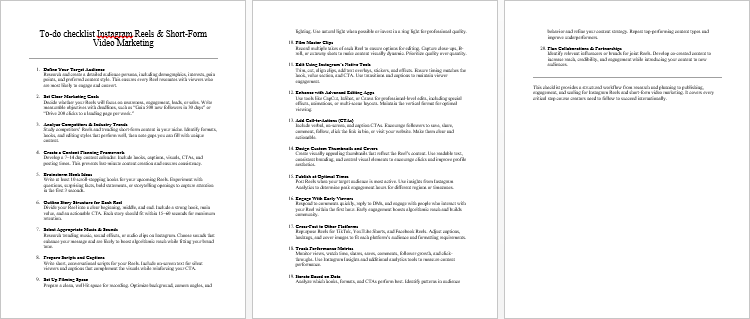
Quick checklist to close the lesson (for learners)
- I can explain why short-form video works (attention, algorithm, low barrier, reuse).
- I have five short-form ideas for one course module.
- I can create a 30-second micro-lesson with a hook, value, and CTA.
- I know which three KPIs I’ll monitor in the first 30 days.
Tone & delivery suggestions
Speak conversationally, use short sentences, and treat this lesson as a mixture of lecture + lab. Encourage learners to think like micro-teachers: every 30 seconds must teach, entertain, or move a viewer closer to action. Use international signs like €, $, £, ¥, ₹ and % when illustrating business outcomes, but avoid local assumptions about platforms or payment methods.
This lesson gives course creators the “why” and the first practical moves they need. Keep it hands-on and globally aware so creators leave confident that short-form videos are not a fad but a durable, high-leverage channel they can use to grow audiences and sell courses worldwide.
Lesson 2 — Navigating Instagram Reels
Step-by-step walkthrough of the Reels interface, buttons, and features so you feel confident using it
(For international course creators — friendly, clear, practical)
Overview
This lesson takes you inside the Instagram Reels editor and publishing flow. You will learn what each button and panel does, why it matters for course creators, and how to use the tools to produce clean, discoverable short videos. Read this as a hands-on map: you should feel able to open the Reels camera, record or upload clips, edit them, add audio and text, set a cover, and publish — all with confidence.
Learning outcomes
After this lesson you will be able to:
- Identify the main areas of the Reels interface and what each control does.
- Record or upload clips, trim and reorder them, and use basic production tools (timer, speed, align).
- Add music or voiceover, apply effects, and pin text or stickers for timed display.
- Configure caption, cover, sharing and privacy options for publishing, and know where to find basic insights.
How to get to Reels (quick orientation)
There are two common entry points:
- From your main feed: tap the plus icon or the Reels camera depending on your app version.
- From the Reels tab on a profile: open the Reels area then tap the camera/record icon.
Once you open the Reels camera you will typically see a single recording screen with tool icons around the edges and a large circular capture button at the bottom. If you prefer to start with an existing clip, use the gallery icon (usually near the capture button) to import video from your device.
The Reels camera — layout and core controls (step by step)
Think of the Reels camera as three zones: tools (usually at the side or top), the capture area (center), and the timeline / publish controls (bottom). The exact layout can vary slightly between devices and app versions, but the functions described below are standard.
1. Capture button and basic recording
- Capture button: Tap to record short clips or press and hold to record continuous footage. Some versions allow tap-to-record for single short clips.
- Gallery / Upload: Tap the small square near the capture button to import one or more existing videos or photos from your device. This is how you repurpose course clips or slides.
- Front/back camera toggle: Switch between selfie and rear camera. Use a rear camera for higher quality, selfie for talking-head style.
Tip: If you plan a multi-step demo (text on screen, short demo, close-up), record several short clips rather than one long take — it makes editing easier.
2. Time / Length selection
- Use the length control to choose how long your Reel can be. Many creators select short durations for quick tips or slightly longer for mini-lessons. The app typically offers several preset length options you can toggle between before recording.
3. Audio / Music
- Search and add music: Tap the audio icon (music note) to browse platform tracks, trending sounds, or saved audio. Using platform-provided tracks avoids copyright problems.
- Original audio: When you record your own voice or sounds, Instagram creates “original audio” that can be credited to you. Decide whether you want others to reuse it — that setting is available after publishing.
- Voiceover: After you finish assembling clips, you can record a voiceover on top of the video. This is great for course creators who want a clear, consistent explanation layered over on-screen actions.
Tip for international creators: If you teach in multiple languages, consider publishing multiple versions that use localized audio and translated on-screen text.
4. Speed control
- The speed tool lets you record slower or faster than real time. Use 0.5x for slow-motion demonstrations or 1.5x–2x to compress a process into a quick highlight. Speed changes can also create dynamic effects for transitions.
5. Effects / AR filters
- The effects or “sparkle” tool opens a library of AR filters, green-screen backgrounds, and visual overlays. Use green-screen to place course slides behind you, or face filters sparingly to add personality. You can search and save favorite effects for regular use.
6. Timer & Countdown
- The timer schedules an automatic start, giving you a 3–10 second countdown so you can position yourself before recording. Useful for hands-free demonstrations and exact timing.
7. Align / Transition helper
- The align tool (often shown as overlapping squares) helps you line up objects across clips for seamless jump cuts or outfit changes. Record, tap align, change position, then record again for smooth transitions.
8. Layout / Multi-panel
- The layout option lets you split the frame (grid) to record multiple panels, useful for side-by-side comparisons or before/after sequences. It’s handy for quick contrast or showing steps simultaneously.
Editing your clips — assemble, trim, reorder
After recording or importing:
- Tap Preview or the right-arrow to enter the editing screen.
- The editor usually shows a clip bar or small thumbnails representing each recorded segment. Use these to:
- Trim: Shorten the start or end of a clip by dragging handles.
- Split: Cut a clip into two pieces for finer edits.
- Delete: Remove unwanted segments.
- Reorder: Drag thumbnails to change the sequence.
Pro tip: For tutorials, keep clips focused: an introduction clip, a demo clip, and a CTA clip. Trim aggressively — short, well-cut clips keep viewers watching.
Adding text, stickers and effects with timing
- Text: Tap the text tool, type your overlay, and then set where the text appears and for how long by dragging the text layer on the clip timeline. Text can be used for hooks, translations, or timestamps.
- Pinning text/stickers: You can pin text to an object so it moves with it (e.g., pin a label to a product). This anchors the overlay to a point in the video.
- Stickers and calls-to-action: Add poll stickers, quiz elements (if available), or countdown stickers when promoting live workshops. Note: some interactive stickers are limited to Stories — check availability in your app.
Accessibility note: Enable auto-generated captions or add manual subtitles. Many viewers watch without sound; on-screen text dramatically improves retention and reach.
Voiceover, audio mixing and captions
- Add voiceover: In the editing screen, find the voiceover tool to record narration. Record in a quiet room and watch audio levels.
- Mixing: Adjust the balance between background music and voiceover so your voice is clear. Use the volume slider in the audio panel.
- Captions: Turn on auto-captions where available, then correct errors manually. For international learners, add translated captions or separate language versions.
Cover image, caption, hashtags and tagging
Before publishing you’ll set metadata:
- Cover: Choose a frame from the video or upload a custom image to serve as the thumbnail that appears on your profile grid and in feeds. A clear cover with readable text in the center performs better.
- Caption: Write a concise caption that complements the Reel. Include a clear call to action (CTA) — for example, “Find the full lesson in my course” or “Sign up for the live workshop.”
- Hashtags: Add relevant hashtags to increase discoverability; combine broad and niche tags that match your topic.
- Tag people: Tag collaborators or students featured in the video if relevant.
- Location: Add a location if the content benefits from local context (useful for region-specific offers).
Publishing options: Choose whether to also share to your main feed, to Facebook (if connected), or to keep it in Reels only. Toggle comments and remix/duet settings depending on whether you want others to interact or build on your content.
Save, save as draft, and publishing
- Save draft: If you’re not ready to publish, tap “Save Draft.” You can return later to edit or finish. Drafts are stored locally in the app under your Reels composer.
- Save to device: Save a copy to your camera roll for backup or cross-posting to other platforms.
- Publish: When you publish, the Reel appears in Reels and — if selected — on your profile grid.
Where to find insights and basic analytics
After publishing, monitor performance via Insights:
- Open the Reel, tap the three dots or analytics option, then view metrics such as plays (views), likes, comments, saves, shares, and accounts reached. Some views include average watch time and retention — key signals the platform uses to recommend content.
For a course creator, watch these KPIs:
- Watch time / retention: Tells you if viewers watch through your mini-lessons.
- Saves and shares: Often predict deeper interest or intent to revisit content.
- Profile visits and link clicks: Indicate movement into your funnel (email list, course landing page).
Localization and accessibility settings inside the editor
- Captions and translated text: Add subtitles or duplicate Reels for different languages, each with localized captions and cover frames.
- Alt text: For accessibility, you may be able to set alt text on cover images — a helpful practice for learners using screen readers.
- Silent viewing optimization: Place important words and hooks in large, readable text during the first 1–3 seconds to capture viewers who watch without sound.
Troubleshooting common interface issues
- Upload fails / stuck: Check network connection and app storage permissions; try saving to device then re-uploading.
- Audio out of sync after trimming: Re-import the trimmed clip, or re-record the voiceover in the editor.
- Drafts disappeared: Drafts are stored locally — switching devices or reinstalling the app may remove them. Export a copy before major changes.
- Feature not visible: Instagram tests features widely; if an icon is missing, update the app or wait — some features roll out regionally.
Quick checklist for confidence before publishing
- I can access Reels camera and upload existing clips.
- I know how to trim, split, and reorder segments.
- I can add music or record a voiceover and adjust mix levels.
- I can add text, set on/off timing, and pin overlays to objects.
- I have selected or uploaded a clear cover image and written a concise caption with a CTA.
- I set sharing preferences and toggled interactivity (comments/remix) intentionally.
- I can view basic insights after publishing to evaluate watch time and engagement.
Final instructor tips
- Walk learners through the interface live — there’s no substitute for showing the buttons in real time.
- Encourage experimentation: teach one micro-lesson, publish, review insights, and tweak.
- Remind international creators to think about subtitles and covers that work across cultures and devices; use €, $, £, ₹ as examples when discussing conversion or pricing in different markets to illustrate international implications without assuming a single currency.
Use this lesson to demystify the buttons. When learners can identify what every control does and why it exists, Reels stops feeling like a maze and becomes a simple studio for teaching short, powerful lessons.
Lesson 3 — Types of Content That Perform Best
Learn about trending video formats like tutorials, challenges, storytelling, and behind-the-scenes clips
(For international course creators — friendly, step-by-step course instructions and descriptions)
Overview
Short-form video succeeds because it is fast to consume, highly shareable, and excellent at building trust quickly. For course creators, the right mix of formats can attract new learners, demonstrate expertise, and move viewers into a learning funnel. This lesson breaks down four top-performing formats — tutorials, challenges, storytelling, and behind-the-scenes — and gives you step-by-step templates, production tips, localization notes, and KPIs to measure. Use these as practical blueprints you can copy, adapt, and repeat.
Learning outcomes
By the end of this lesson you will be able to:
- Choose the right short-form format for a learning objective (awareness, engagement, conversion).
- Write tight 15–60 second scripts for each format using proven templates.
- Film and edit each format efficiently on a smartphone.
- Localize content with subtitles and culturally relevant details while tracking the metrics that matter.
1) Tutorials — teach something useful, fast
Why tutorials work
People come to short video to learn a single thing quickly. Tutorials deliver immediate value and build credibility: one helpful micro-lesson can convert a casual viewer into an email subscriber or course buyer.
Step-by-step tutorial template (15–45 seconds)
- Hook (0–3s): A one-line promise. Example: “Double student completion rates with one simple checklist.”
- Demonstration (3–25s): Show the exact action, step or rule — speak while showing or use captions.
- Reinforce (25–35s): Quick recap or result statement: “Do this and completion goes up.”
- CTA (35–45s): One clear action: “Download the free worksheet (link in bio)” or “Join the mini-webinar — €19 / $19 / ₹1,599.”
Script example
- Hook: “Want learners to finish your course? Try this 3-step checklist.”
- Demo: “Step 1: short daily tasks. Step 2: progress badges. Step 3: 2-minute weekly recap.”
- CTA: “Grab the full checklist via the link in my bio.”
Production tips
- Use close-ups for hands-on demonstrations.
- Add text overlays for each step so viewers can follow without sound.
- Keep lighting even and audio clear; use a lavalier mic if available.
Editing notes
- Keep each step to 5–8 seconds.
- Use jump cuts to remove pauses; add a subtle sound or cut on action to keep pace.
Localization
- Add translated captions for top target markets.
- Swap local examples (units, currencies, norms). For pricing examples show multiple currencies (€ / $ / £ / ₹) to signal global relevance.
KPIs
- Watch time / retention (aim for >50% average if possible).
- Saves (indicates future reference intent).
- Link clicks / profile visits (funnel movement).
2) Challenges — participation + virality
Why challenges work
Challenges invite viewers to take a small action and create their own version — this drives user-generated content, increases reach, and creates community momentum.
Step-by-step challenge template (15–60 seconds)
- Hook (0–3s): Name the challenge and its benefit. Example: “7-day micro-teach challenge — teach for 60 seconds daily.”
- Rules (3–15s): Explain the exact task and how to participate. Keep rules minimal.
- Example (15–35s): Show your own execution or a before/after.
- CTA (35–60s): Tell viewers how to join (hashtag, tag, or duet) and what they’ll gain (feedback, feature, prize).
Script example
- Hook: “Join the 5-day student-engagement challenge.”
- Rules: “Post one 30-second micro-lesson, tag me, use #Engage5.”
- Example: Show a quick clip of your own micro-lesson then CTA.
Production tips
- Make a short demo reel that is easy to replicate.
- Create a simple graphic with challenge rules; pin it early in the video.
- Offer an incentive: feature selected submissions, provide a small prize, or free consultation (e.g., first 5 winners get a 20-minute audit).
Editing notes
- Use punchy transitions and consistent branding so users can mimic your style.
- Keep the call to action visually prominent and repeated in captions.
Localization
- When running a global challenge, allow submissions in multiple languages and encourage translated captions. Consider staggered start times for different regions.
KPIs
- Hashtag usage and UGC volume.
- New followers and mentions.
- Engagement rate (likes + comments + shares).
3) Storytelling — humanize your expertise
Why storytelling works
Stories connect emotionally. For course creators, storytelling builds trust, explains transformation, and illustrates how your teaching solves real problems.
Step-by-step storytelling template (20–60 seconds)
- Hook (0–3s): Set the situation (a problem or striking fact).
- Context (3–15s): Briefly describe the challenge — who, what, where.
- Turning point (15–35s): Show an insight, moment of change, or solution you taught.
- Outcome + CTA (35–60s): State the result and invite a step (join, download, DM).
Script example
- Hook: “Three years ago I almost quit teaching online.”
- Context: “My completion rates were 12% and I couldn’t scale.”
- Turning point: “I changed my structure to 10-minute daily lessons and added accountability calls.”
- Outcome + CTA: “Now completion sits at 68%. If you want my lesson plan, DM me.”
Production tips
- Use a conversational tone and natural facial expressions.
- Add B-roll or screenshots showing evidence (charts, testimonials, course pages).
- Use subtitles; stories are often consumed without sound.
Editing notes
- Keep the arc tight — trim details that don’t advance the story.
- Use ambient music lightly to enhance emotion; lower volume for speech clarity.
Localization
- Replace cultural references with universal metaphors or add a line that connects to local contexts. Show currency examples only if relevant (e.g., “I increased monthly revenue from $3,000 to €4,200”).
KPIs
- Comments (people often share personal stories in response).
- Shares (emotional stories get reshared).
- Profile visits and direct messages asking for help.
4) Behind-the-scenes (BTS) — authenticity and trust
Why BTS works
BTS content pulls back the curtain on your process. It makes creators relatable and shows competence through process rather than claim.
Step-by-step BTS template (15–60 seconds)
- Hook (0–3s): One-line teaser: “How I build a 60-minute lesson in 30 minutes.”
- Process snippets (3–40s): Rapid clips of planning, scripting, recording, and editing — caption each step.
- Proof or result (40–50s): Show the final product briefly or a learner reaction.
- CTA (50–60s): Invite viewers to sign up for a course module or download a planning template.
Script example
- Hook: “Here’s my 3-step course-creation sprint.”
- Process: “Step 1: Outline. Step 2: Record. Step 3: Rapid edit.”
- CTA: “Get the template in the link in my profile.”
Production tips
- Use time-lapse or hyper-lapse for long tasks to condense them.
- Show tools and workflows to demonstrate efficiency (camera, apps, desk setup).
- Keep it honest — small mistakes make you human and approachable.
Editing notes
- Use captions for tool names and quick tips.
- Speed up repetitive tasks and highlight the actionable moments.
Localization
- Show workspace variations from different countries to normalize diverse setups. For pricing or cost-of-setup examples, show multiple currencies (₹, £, $, €) to make the example globally useful.
KPIs
- Views and watch time (people watch to see the process).
- Comments asking for tools/workflow.
- Conversions from curious learners to low-cost entry offers.
Other high-performing micro-formats (brief)
- Testimonials / learner outcomes: 15–30s clips of alumni sharing specific results. Powerful for conversions.
- Case studies / before-after: Show a client problem and measurable result. Use clear metrics (e.g., revenue growth from $2k to $6k).
- Quick tips / hacks: 10–20s single-tip clips that are easily consumable and shareable.
- FAQ / myth-busting: Short responses to common objections — useful for funnel friction.
- Trend participation / sound-sync: Use a trending sound but adapt the message to your niche for discoverability.
Implementation checklist (quick)
- Choose the format that matches your objective: Tutorials = authority; Challenges = reach and UGC; Storytelling = trust; BTS = authenticity.
- Script using the templates above; keep hooks under 3 seconds.
- Film using your phone with clear audio; use captions and large on-screen text.
- Localize captions and examples for top markets; show multiple currency signs if you discuss pricing.
- Publish, monitor watch time and saves for tutorials, hashtag/UGC for challenges, comments/shares for storytelling, and tool questions for BTS.
Common pitfalls and final tips
- Trying to teach too much in one short video — focus on a single idea.
- Skipping subtitles — many viewers watch silently.
- Ignoring cultural meaning — test idioms and metaphors before scaling globally.
- Over-polishing at the cost of speed — iterate fast, measure, then optimize.
- Weak CTA — always have one clear action per video.
Keep this lesson pragmatic: each format is a repeatable template. Start with one format, post three different versions in one week, compare metrics, and refine. Short-form content scales when you combine consistent publishing, clear structure, and cultural sensitivity — your expertise will travel far when packaged into small, useful, and repeatable video moments.
We’re also giving these extra bonuses
Instagram Reels & Short-Form Video Marketing – Checklist
Instagram Reels & Short-Form Video Marketing – FAQs
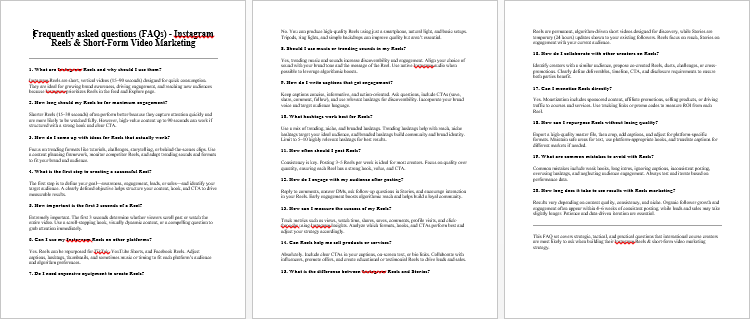
Instagram Reels & Short-Form Video Marketing – Salespage Content

Package Details:
Word Count: 33 783 Words
Number of Pages: 138
Instagram Reels & Short-Form Video Marketing – Bonus Content
Checklist
Word Count: 851 words
FAQs
Word Count: 677 words
Salespage Content
Word Count: 1002 words
Total Word Count: 36 313 Words
Your PLR License Terms
PERMISSIONS: What Can You Do With These Materials?
Sell the content basically as it is (with some minor tweaks to make it “yours”).
If you are going to claim copyright to anything created with this content, then you must substantially change at 75% of the content to distinguish yourself from other licensees.
Break up the content into small portions to sell as individual reports for $10-$20 each.
Bundle the content with other existing content to create larger products for $47-$97 each.
Setup your own membership site with the content and generate monthly residual payments!
Take the content and convert it into a multiple-week “eclass” that you charge $297-$497 to access!
Use the content to create a “physical” product that you sell for premium prices!
Convert it to audios, videos, membership site content and more.
Excerpt and / or edit portions of the content to give away for free as blog posts, reports, etc. to use as lead magnets, incentives and more!
Create your own original product from it, set it up at a site and “flip” the site for megabucks!
RESTRICTIONS: What Can’t You Do With These Materials?
To protect the value of these products, you may not pass on the rights to your customers. This means that your customers may not have PLR rights or reprint / resell rights passed on to them.
You may not pass on any kind of licensing (PLR, reprint / resell, etc.) to ANY offer created from ANY PORTION OF this content that would allow additional people to sell or give away any portion of the content contained in this package.
You may not offer 100% commission to affiliates selling your version / copy of this product. The maximum affiliate commission you may pay out for offers created that include parts of this content is 75%.
You are not permitted to give the complete materials away in their current state for free – they must be sold. They must be excerpted and / or edited to be given away, unless otherwise noted. Example: You ARE permitted to excerpt portions of content for blog posts, lead magnets, etc.
You may not add this content to any part of an existing customer order that would not require them to make an additional purchase. (IE You cannot add it to a package, membership site, etc. that customers have ALREADY paid for.)
Share Now!
Latest Products


Free Sales Funnel Builder

Related Products
Popular & Trending

Featured Products