
Eco-Friendly Home Upgrades PLR Course 20k Words
in Home Improvement PLR , Home Improvement PLR Ebooks , Home Painting PLR , Home Remodeling PLR , PLR Checklists , PLR eBooks , PLR eCourses , Premium PLR , Premium PLR eBooks , Premium PLR Reports , Premium White Label Brandable PLR Coaching Courses , Private Label Rights ProductsChoose Your Desired Option(s)
has been added to your cart!
have been added to your cart!
#ecofriendly #homeupgrades #plrcourse #sustainableliving #greenhome #digitalproducts #onlinebusiness #plrcontent #ecolifestyle
Transform Your Home, Save Money, and Help the Planet!
Are you ready to make your home more sustainable, energy-efficient, and environmentally friendly? Whether you’re a homeowner looking to reduce bills, a green enthusiast wanting to live eco-consciously, or an entrepreneur seeking a ready-to-use PLR product to sell, the Eco-Friendly Home Upgrades PLR Course is your complete solution.
This course provides practical, step-by-step guidance to upgrade your home, reduce waste, conserve energy, and make eco-friendly living easy. And because it’s PLR content, you can not only apply it for yourself but also rebrand, sell, or use it to build multiple income streams.
With 18,311 words of high-quality content, plus bonus checklists, FAQs, and a ready-made sales page, you’ll have everything you need to teach, sell, or implement eco-friendly home strategies immediately.
Presenting…
Eco-Friendly Home Upgrades PLR Course 20k Words
Why Eco-Friendly Home Upgrades Matter
Homes are a major source of energy consumption, water waste, and environmental impact. Small changes in your household can make a huge difference—for the planet and your wallet.
By implementing eco-friendly upgrades, you can:
- Reduce electricity bills and conserve energy
- Save water and lower utility costs
- Improve indoor air quality and reduce exposure to toxins
- Create a healthier environment for your family
- Reduce waste through sustainable habits
- Increase your property value with energy-efficient improvements
- Support global efforts to combat climate change
With this course, you don’t just learn theory—you get actionable steps to implement immediately, with modules focused on energy efficiency, water conservation, sustainable materials, renewable energy, and waste reduction.
Course Structure: Step-by-Step Eco-Friendly Home Upgrades
The course is broken into five detailed modules, each designed to address a critical aspect of sustainable living.
Module 1: Energy Efficiency – Reduce Your Power Usage & Bills
Your home may be consuming more energy than you realize. This module teaches you how to cut your electricity use, save money, and make your home more comfortable year-round.
Step 1: Understanding Your Home’s Energy Consumption
- Learn to conduct a simple energy audit to identify high-energy areas.
- Recognize appliances, systems, and habits that drive up your electricity bills.
Step 2: Switching to Energy-Efficient Lighting & Appliances
- Discover how LED lighting and Energy Star-rated appliances can reduce energy use.
- Tips for replacing old bulbs, fridges, washers, and other high-energy appliances.
Step 3: Improving Insulation & Sealing Air Leaks
- Techniques to retain heat in winter and keep your home cool in summer.
- Learn about sealing gaps, adding insulation, and upgrading windows.
Step 4: Using Smart Home Technology for Energy Savings
- Explore smart thermostats, motion sensors, and energy-monitoring devices.
- Learn how automation can reduce energy waste without changing your lifestyle.
Module 2: Water Conservation – Reduce Waste & Save Every Drop
Water is a precious resource, yet many households waste thousands of gallons each year. This module covers easy ways to conserve water at home.
Step 1: Fixing Leaks and Installing Water-Saving Fixtures
- Stop wasted water from leaking faucets, toilets, and pipes.
- Low-flow showers, toilets, and aerators reduce consumption without sacrificing comfort.
Step 2: Collecting and Reusing Rainwater
- Set up a rainwater harvesting system to water gardens and reduce tap water use.
- Learn the basics of storage, filtration, and safe usage.
Step 3: Switching to Water-Efficient Landscaping
- Implement drought-resistant plants, mulching, and efficient irrigation.
- Reduce water bills while creating a beautiful, sustainable yard.
Step 4: Reusing Greywater for Household Needs
- Safely repurpose water from sinks and showers for plants and outdoor cleaning.
- Practical solutions that lower household water consumption significantly.
Module 3: Sustainable Materials – Choosing Eco-Friendly Home Products
The materials in your home have a big impact on your health and the environment. Learn to choose sustainable, non-toxic options.
Step 1: Identifying Toxic & Unsustainable Materials
- Recognize harmful paints, flooring, furniture, and household products.
- Replace them with safer, environmentally-friendly alternatives.
Step 2: Choosing Sustainable Flooring, Paint, and Furniture
- Bamboo flooring, reclaimed wood, and low-VOC paints for a stylish, green home.
- Furniture choices that minimize environmental impact.
Step 3: Reducing Plastic Use in Your Home
- Swap single-use plastics for glass containers, cloth bags, and natural cleaning products.
- Reduce landfill contributions while creating a safer environment.
Step 4: DIY Projects Using Recycled & Upcycled Materials
- Fun, practical projects to repurpose old furniture, jars, and fabrics.
- Create eco-friendly decor, storage solutions, and functional household items.
Module 4: Renewable Energy – Power Your Home Sustainably
Take control of your energy needs with clean, renewable power.
Step 1: Understanding Solar Power Basics
- Learn how solar panels work, their benefits, and installation considerations.
- Understand potential ROI and long-term savings.
Step 2: Exploring Wind & Hydropower Options for Homes
- Small-scale turbines and micro-hydro systems as alternatives to solar energy.
Step 3: Using Battery Storage & Backup Power
- Store solar energy for night-time use or during outages.
- Maximize energy independence while lowering electricity costs.
Step 4: Switching to a Green Energy Provider
- Learn how to buy renewable energy from your utility company if installation isn’t feasible.
Module 5: Waste Reduction – Create a Zero-Waste Home
Reduce your environmental footprint with practical waste reduction strategies.
Step 1: Starting a Home Composting System
- Turn food scraps and yard waste into nutrient-rich compost.
- Reduce landfill waste and improve soil health.
Step 2: Cutting Down on Single-Use Items
- Replace disposable paper towels, plastics, and packaging with sustainable alternatives.
Step 3: Recycling Right – What Can & Can’t Be Recycled
- Avoid contamination and maximize recycling effectiveness.
Step 4: Shopping Sustainably – Buy Less, Buy Better
- Tips for ethical shopping, choosing second-hand, and reducing impulse purchases.
Bonus Materials Included
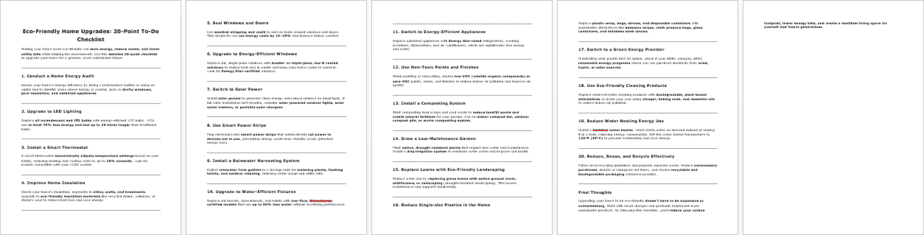
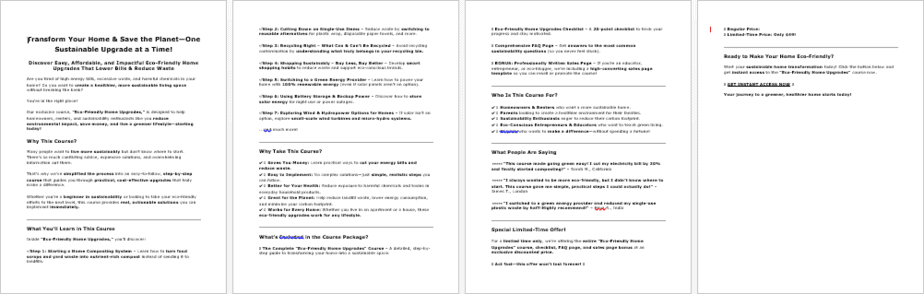
- Checklist: Eco-Friendly Home Upgrades Checklist (715 Words)
- FAQs: Eco-Friendly Home Upgrades FAQ Guide (934 Words)
- Sales Page: Ready-to-use Sales Page for the course (738 Words)
These resources make the course easy to implement, sell, or repurpose, saving you time and effort.
How You Can Use This PLR Course to Make Money
This PLR course isn’t just educational—it’s a complete business opportunity. You can:
- Sell the course as a digital download or eBook.
- Break it into smaller reports and sell each one for $10–$20.
- Bundle it with other eco-friendly or home improvement content ($47–$97).
- Offer it as a multi-week online class for $297–$497.
- Create a membership site and earn recurring revenue.
- Convert it into audio or video lessons.
- Use excerpts as lead magnets, blog posts, or freebies to build your email list.
- Customize it to create a unique product and flip the site for profit.
The possibilities are limitless, and the content is fully ready-to-use.
PLR License Terms
Permissions:
- Edit, brand, and sell the content.
- Break into reports, courses, or memberships.
- Convert to video, audio, or blog content.
- Use excerpts for lead magnets and incentives.
Restrictions:
- You may not pass on PLR or resell rights.
- Maximum affiliate commission allowed is 75%.
- You cannot give away the full content for free.
Why This Course Stands Out
- Comprehensive: Covers energy, water, materials, renewable energy, and waste.
- Actionable: Every module includes practical steps you can implement immediately.
- Ready-to-Use: Comes with checklist, FAQs, and sales page.
- Profitable: PLR license lets you monetize in multiple ways.
- Eco-Friendly Impact: Helps you and your customers save money, reduce waste, and live sustainably.
Final Thoughts & Next Steps
The Eco-Friendly Home Upgrades PLR Course is more than a guide—it’s a roadmap to a greener home, healthier lifestyle, and potential income.
By taking small, consistent steps, you can:
- Reduce utility bills and environmental impact
- Improve health and comfort at home
- Create a profitable product or service for your audience
Start today—upgrade your home, help the planet, and make money while sharing these valuable insights!
has been added to your cart!
have been added to your cart!
Here A Sample of Eco-Friendly Home Upgrades PLR Course
Transform Your Home, Save Money, and Help the Planet!
Welcome to this course on making your home more sustainable! Whether you’re just starting or looking to take your eco-friendly efforts to the next level, this course will guide you through practical upgrades to make your home energy-efficient, waste-free, and environmentally friendly.
Let’s dive in step by step!
Module 1: Energy Efficiency – Reduce Your Power Usage & Bills
Step 1: Understanding Your Home’s Energy Consumption
Before making any changes to improve your home’s energy efficiency, the first step is understanding where and how your home consumes energy. This step involves conducting a home energy audit, which will help you identify the biggest sources of energy consumption, pinpoint inefficiencies, and determine areas for improvement.
Why Is an Energy Audit Important?
- Saves Money: Identifying energy-wasting appliances and habits can reduce electricity bills.
- Reduces Environmental Impact: Lower energy consumption means fewer carbon emissions.
- Improves Home Comfort: A well-audited home ensures consistent temperatures and better air quality.
- Increases Property Value: Energy-efficient homes are more attractive to buyers.
Step-by-Step Guide to Conducting a Home Energy Audit
1. Check Your Energy Bills & Understand Usage Patterns
How to Read Your Energy Bill
Most utility companies provide detailed energy usage reports on monthly bills. Look for:
- Total energy consumption (kWh or MWh) – This indicates how much energy your home uses each month.
- Peak usage hours – Some utilities charge higher rates during specific hours (peak demand).
- Seasonal variations – Check how your energy use changes between summer and winter.
Compare Your Usage
- If your home’s energy use is significantly higher than similar-sized homes, it may indicate inefficiencies.
- Some utilities provide online tools to compare your energy usage with similar households.
2. Identify High-Energy Appliances & Devices
Certain appliances consume more energy than others. The most common energy-consuming household items include:
| Appliance | Average Energy Use per Month | Potential Efficiency Improvements |
| HVAC System (Heating & Cooling) | 45% of total energy use | Upgrade to a smart thermostat, improve insulation |
| Water Heater | 15% | Reduce water temperature, install an efficient heater |
| Refrigerator & Freezer | 8% | Check door seals, adjust temperature, defrost regularly |
| Washing Machine & Dryer | 6% | Use cold water, air-dry clothes, clean lint filter |
| Lighting | 5% | Switch to LED bulbs, use motion sensors |
| Electronics (TV, Computers, Gaming Consoles) | 5-10% | Unplug unused devices, use power strips |
How to Test Appliance Energy Use
- Use a Smart Energy Monitor – Devices like Kill A Watt™ or smart plugs track energy consumption per device.
- Check Appliance Labels – Look for Energy Star® or A+++ ratings to ensure efficiency.
- Turn Off & Compare – Turn off suspected energy-wasting devices and check your meter for changes.
3. Inspect Insulation & Air Leaks
One of the biggest sources of energy loss in homes is poor insulation and air leaks. Heat can escape through:
- Windows and doors – Check for gaps and seal them with weather stripping.
- Attic and walls – If your home feels drafty, you may need additional insulation.
- Vents and ducts – Ensure air ducts are properly sealed to avoid leaks.
DIY Methods to Detect Air Leaks
- Candle or Incense Test: Hold a candle or incense near doors, windows, and outlets. If the flame or smoke flickers, there’s a leak.
- Thermal Camera or Infrared Thermometer: These tools detect temperature differences to locate energy loss points.
- Paper Test: Close a door or window on a piece of paper. If you can pull it out easily, the seal is weak.
4. Evaluate Lighting & Smart Energy Usage
Lighting is a simple but important area to audit. Consider:
- Replacing old incandescent bulbs with LED or CFL bulbs – They use up to 80% less energy and last longer.
- Installing motion sensors and dimmers – Automatically turn lights off when rooms are unoccupied.
- Maximizing natural light – Open curtains during the day and use reflective surfaces to enhance brightness.
Next Steps After Your Home Energy Audit
Once you’ve identified areas where energy is being wasted, you can create an Energy Efficiency Plan:
- Prioritize the Biggest Issues – Start with upgrades that will have the highest impact, such as fixing insulation or replacing old appliances.
- Set Energy Reduction Goals – Aim for a percentage reduction in energy use over the next 3–6 months.
- Track Your Progress – Use your energy bills, smart meters, or tracking apps to measure improvements.
- Implement Sustainable Habits – Encourage family members to turn off lights, unplug devices, and use energy wisely.
By understanding your home’s energy consumption, you can make informed decisions to reduce waste, lower costs, and live in a more eco-friendly home. In the next module, we’ll explore how to switch to energy-efficient lighting and appliances to cut down on power usage.
Step 2: Switching to Energy-Efficient Lighting & Appliances
Lighting and household appliances are two of the biggest contributors to home energy consumption. Fortunately, switching to energy-efficient lighting and appliances can significantly reduce your electricity bill while also benefiting the environment. In this step, we will explore how to transition from outdated, high-energy-consuming items to modern, eco-friendly alternatives.
Why Should You Upgrade to Energy-Efficient Lighting and Appliances?
Lower Electricity Bills – Energy-efficient devices use less power, saving you money in the long run.
Environmental Benefits – Reducing energy consumption decreases carbon emissions, helping to combat climate change.
Longer Lifespan – LED bulbs and Energy Star-rated appliances last longer than traditional options, reducing waste.
Improved Performance – Modern appliances and LED lights often perform better and offer more convenience features.
Step-by-Step Guide to Upgrading Lighting and Appliances
1. Transitioning to LED Lighting
Lighting accounts for about 5-10% of a household’s total electricity usage. By switching to LED bulbs, you can cut this usage by up to 80% compared to traditional incandescent bulbs.
Why Choose LED Bulbs?
- Uses Less Energy – LED bulbs consume 75-90% less electricity than incandescent bulbs.
- Longer Lifespan – LEDs last 25,000–50,000 hours, while incandescent bulbs last only 1,000 hours.
- Cooler Operation – LEDs produce less heat, reducing the risk of overheating and fire hazards.
How to Select the Right LED Bulbs
When choosing LED bulbs, consider the following:
| Factor | Description |
| Wattage | Choose lower wattage LEDs that replace higher wattage incandescent bulbs. Example: A 10W LED is equivalent to a 60W incandescent bulb. |
| Color Temperature | Warm White (2700K-3000K) for cozy spaces, Cool White (3500K-5000K) for kitchens/offices, and Daylight (5000K-6500K) for task lighting. |
| Dimmable Option | If you use dimmer switches, ensure the LED bulb is dimmable to avoid flickering. |
| Energy Star Certification | Look for Energy Star-rated LEDs for the best efficiency and quality. |
Installation Tips for LED Lighting
- Replace bulbs in high-use areas first, such as living rooms, kitchens, and bathrooms.
- Consider smart LED bulbs that can be controlled via smartphone apps or voice assistants.
- Install motion sensors and timers to automatically turn off lights when not in use.
2. Choosing Energy-Efficient Appliances
Appliances account for about 30% of household electricity consumption. Older models are significantly less efficient than modern, Energy Star-certified versions.
What is Energy Star?
Energy Star is an international certification that indicates an appliance meets strict energy efficiency guidelines set by governments and energy agencies. Look for the Energy Star logo when purchasing new appliances.
Energy Usage Comparison – Old vs. New Appliances
| Appliance | Old Model (Annual Energy Use in kWh) | Energy-Efficient Model (Annual Energy Use in kWh) | Savings |
| Refrigerator (300L) | 800-1000 kWh | 350-450 kWh | 50% less energy |
| Washing Machine | 500-700 kWh | 150-250 kWh | 60% less energy |
| Dishwasher | 700-800 kWh | 250-300 kWh | 60% less energy |
| Air Conditioner | 1500-2000 kWh | 700-900 kWh | 50% less energy |
| Water Heater | 4000-5000 kWh | 1500-2500 kWh | 50% less energy |
Key Features to Look for in Energy-Efficient Appliances
- Refrigerators – Opt for inverter technology for stable temperature control and lower power consumption.
- Washing Machines – Choose front-load models, which use 40% less water and energy than top-load models.
- Dishwashers – Look for models with eco-wash cycles that adjust water and energy usage based on load size.
- Air Conditioners – Select models with variable-speed compressors to avoid unnecessary power spikes.
- Water Heaters – Tankless water heaters use energy only when needed, reducing standby energy loss.
3. Reducing Standby Power Consumption
Even when turned off, appliances still consume electricity if they remain plugged in. This is called phantom energy drain or vampire power.
How to Reduce Standby Power Usage:
✔ Unplug Devices – Disconnect chargers, TVs, and kitchen appliances when not in use.
✔ Use Smart Power Strips – These automatically cut off power to unused devices.
✔ Enable Power-Saving Mode – Most modern TVs, computers, and gaming consoles have an eco-mode that reduces standby power.
Estimated Energy Waste from Standby Power
| Device | Annual Standby Power Use | Cost Per Year (Approx.) |
| TV | 50-100 kWh | $10-$20 |
| Laptop | 20-50 kWh | $5-$10 |
| Gaming Console | 40-60 kWh | $8-$12 |
| Microwave | 25-40 kWh | $5-$8 |
| Phone Charger | 5-10 kWh | $1-$2 |
By addressing standby power, a household can save up to 10% on its electricity bill with minimal effort.
4. Implementing Smart Home Technology
Smart home devices can automate energy savings and enhance convenience.
Top Smart Home Technologies for Energy Efficiency
- Smart Thermostats – Adjust heating and cooling based on your schedule. Example: Nest, Ecobee.
- Smart Lighting – Control LED lights remotely or set them to turn off automatically.
- Smart Plugs & Switches – Cut power to unused devices and prevent standby energy drain.
- Solar-Powered Outdoor Lighting – Use solar lights to illuminate gardens, pathways, and driveways.
How to Set Up Smart Home Automation for Energy Savings
- Set timers for lights and appliances to turn off during sleeping hours.
- Use a smart thermostat to adjust temperatures when you’re away.
- Program smart plugs to cut power to unused devices at night.
Next Steps After Upgrading Lighting & Appliances
Once you have switched to LED bulbs and energy-efficient appliances, here’s how to maximize your savings:
- Track Your Energy Savings – Compare your electricity bills before and after making changes.
- Replace Appliances Gradually – If replacing all appliances at once is not feasible, start with the most energy-consuming ones.
- Encourage Household Participation – Teach family members about smart energy habits.
- Consider Renewable Energy – If possible, explore solar panels or wind energy solutions for additional savings.
By making these simple yet impactful changes, you can enjoy a more energy-efficient home, lower utility bills, and a reduced environmental footprint.
Step 3: Improving Insulation & Sealing Air Leaks
A well-insulated home with properly sealed air leaks can significantly reduce energy waste, lower heating and cooling costs, and create a more comfortable living environment year-round. In this step, we will explore how to identify air leaks, seal gaps, add insulation, and upgrade windows to maximize energy efficiency.
Why Is Insulation & Air Sealing Important?
Lower Energy Costs – Proper insulation can reduce heating and cooling expenses by up to 30%.
Improved Comfort – A well-sealed home prevents cold drafts in winter and excessive heat in summer.
Reduced Environmental Impact – Using less energy for heating and cooling lowers carbon emissions.
Better Indoor Air Quality – Sealing air leaks prevents dust, pollutants, and allergens from entering your home.
Increased Property Value – Homes with energy-efficient insulation and windows attract buyers and have higher resale value.
Step-by-Step Guide to Improving Insulation & Sealing Air Leaks
1. Identifying Air Leaks in Your Home
Before sealing gaps and adding insulation, it is essential to locate where air is escaping or entering your home.
Common Areas Where Air Leaks Occur
- Windows & Doors – Small gaps around frames allow air to seep in or out.
- Attic & Roof – Poorly insulated attics allow heat to escape in winter and trap hot air in summer.
- Walls & Electrical Outlets – Tiny cracks and gaps behind outlets leak air into walls.
- Basement & Crawl Spaces – Uninsulated floors and foundation walls cause heat loss.
- Fireplaces & Chimneys – A damper left open allows warm air to escape.
How to Test for Air Leaks
- The Hand Test – On a windy day, move your hand along door and window edges. If you feel a draft, there’s an air leak.
- Candle or Incense Test – Light a candle or incense stick near a suspected leak area. If the smoke moves erratically, air is escaping.
- Paper Test for Doors – Close a door with a sheet of paper halfway in. If you can pull it out easily, the seal is weak.
- Infrared Thermometer Test – Use an infrared thermometer to detect temperature differences in walls, floors, and ceilings.
- Blower Door Test (Professional Option) – A technician depressurizes your home to measure air leakage with a special fan.
2. Sealing Air Leaks to Prevent Energy Loss
Once air leaks are identified, sealing them is a simple and effective way to improve energy efficiency.
How to Seal Common Air Leaks
| Leak Location | Sealing Solution | Materials Needed |
| Doors & Windows | Apply weatherstripping and caulk around frames. | Foam tape, silicone caulk, door sweeps |
| Attic & Roof | Seal gaps around attic doors, vents, and chimneys. | Spray foam, insulation batts, caulk |
| Walls & Outlets | Install insulated outlet covers to prevent airflow. | Foam gaskets, outlet sealers |
| Basements & Crawl Spaces | Use rigid foam insulation and seal foundation cracks. | Cement sealant, rigid foam boards |
| Fireplaces & Chimneys | Close damper when not in use, install a chimney balloon. | Chimney draft stopper, heat-resistant foam |
Pro Tips for Effective Sealing
✔ Use silicone-based caulk for exterior areas (weather-resistant).
✔ Apply expandable spray foam for larger gaps in attics and basements.
✔ Replace worn-out door sweeps to block drafts at the bottom of doors.
✔ Install window film to reduce cold drafts in winter.
3. Adding or Upgrading Home Insulation
Insulation acts as a barrier against heat transfer, keeping warm air inside in winter and outside in summer.
Best Insulation Materials & Their Uses
| Insulation Type | Best For | Benefits |
| Fiberglass Batts | Walls, attics, basements | Affordable, easy to install, good heat resistance |
| Spray Foam | Small cracks, gaps, attics | Expands to fill spaces, excellent air sealing |
| Rigid Foam Boards | Basements, crawl spaces, roofs | High thermal resistance, moisture-resistant |
| Blown-In Cellulose | Attic floors, walls | Fire-resistant, eco-friendly (made from recycled paper) |
| Reflective Insulation | Attics, roofs | Reflects heat, effective in hot climates |
How to Add Insulation in Key Areas
- Attic – Lay fiberglass batts or blown-in cellulose to prevent rising heat loss.
- Walls – If walls are uninsulated, consider injecting spray foam or adding rigid foam panels inside.
- Basement & Crawl Space – Install foam board insulation on walls and floors to prevent cold air from seeping in.
- Windows – Use thermal curtains or window insulation kits for added protection.
Tip: Check the insulation R-value (thermal resistance). The higher the R-value, the better the insulation quality.
4. Upgrading to Energy-Efficient Windows & Doors
Older, single-pane windows are one of the biggest sources of energy loss. Upgrading to double-glazed or energy-efficient windows can cut energy waste by up to 25%.
Choosing the Best Energy-Efficient Windows
| Feature | Benefit |
| Double or Triple Glazing | Provides extra insulation by trapping air between glass layers |
| Low-E Coating | Reflects heat while allowing natural light in |
| Argon/Krypton Gas Filling | Improves insulation between glass panes |
| Vinyl or Fiberglass Frames | Better insulation than aluminum |
| Tilt-and-Turn Design | Provides airtight sealing |
Alternative Window Solutions for Budget-Friendly Upgrades
- Apply removable storm windows to improve insulation.
- Use thermal-backed curtains to reduce heat loss.
- Install weatherstripping on window sashes to block air leaks.
Tip: If replacing windows is too costly, consider secondary glazing—installing an extra glass panel over existing windows.
Next Steps After Improving Insulation & Sealing Air Leaks
Once your home is well-insulated and airtight, follow these maintenance tips to ensure long-term efficiency:
✔ Inspect insulation annually – Look for moisture damage or gaps in insulation.
✔ Reapply caulking and weatherstripping if cracks reappear.
✔ Keep windows & doors closed when heating or cooling your home.
✔ Monitor your energy bills – You should see a reduction in heating and cooling costs!
By following these insulation and air-sealing strategies, you can create a cozy, energy-efficient home while lowering utility bills and reducing environmental impact.
Step 4: Using Smart Home Technology for Energy Savings
In this step, we will explore how smart home technology can help you automate energy savings, reduce waste, and make your home more efficient and eco-friendly. By integrating devices like smart thermostats, motion-sensor lighting, energy-monitoring systems, and smart power strips, you can take full control of your home’s energy consumption while enjoying convenience and cost savings.
Why Use Smart Home Technology for Energy Efficiency?
Lower Energy Costs – Automating your home’s energy use can reduce electricity bills by up to 20-30%.
Convenience & Automation – Smart devices allow you to control energy use remotely and adjust settings based on real-time needs.
Reduced Carbon Footprint – Optimized energy use helps decrease overall environmental impact.
Improved Home Comfort – Automated climate control and lighting enhance indoor comfort levels while reducing waste.
Long-Term Savings – Though initial investments in smart technology may seem high, the energy savings quickly offset costs over time.
Step-by-Step Guide to Smart Home Energy Upgrades
1. Installing a Smart Thermostat for Automated Temperature Control
A smart thermostat is one of the most effective ways to reduce heating and cooling costs. It learns your schedule, adapts to your lifestyle, and adjusts temperatures automatically to maximize efficiency.
Key Benefits of Smart Thermostats
✔ Automated Temperature Adjustments – The device lowers heating/cooling when you’re away and optimizes it when you’re home.
✔ Remote Control – Adjust the temperature from anywhere using your smartphone app.
✔ Energy Usage Reports – Many models provide detailed energy tracking, helping you identify savings opportunities.
✔ Integration with Smart Home Systems – Works with voice assistants like Amazon Alexa, Google Assistant, and Apple HomeKit.
How to Set Up a Smart Thermostat
- Choose the Right Smart Thermostat – Look for models that are Energy Star-certified for maximum efficiency.
- Turn Off Power to Your HVAC System – Always switch off power before installation to ensure safety.
- Remove the Old Thermostat – Carefully disconnect and label the wires to avoid confusion during installation.
- Connect the New Thermostat – Follow the manufacturer’s instructions to connect wiring and mount the device.
- Configure the Settings – Set up your preferred temperature schedules using the app.
- Monitor & Optimize Usage – Use real-time data to fine-tune temperature settings for greater energy savings.
Tip: Set your thermostat to lower temperatures (18-20°C / 64-68°F) in winter and higher temperatures (24-26°C / 75-78°F) in summer when you are away to save energy.
2. Upgrading to Motion-Sensor & Smart Lighting
Traditional lighting wastes energy when left on unnecessarily. Upgrading to motion-sensor lights and smart LED bulbs ensures that lights turn off automatically when not needed, reducing electricity waste.
Best Smart Lighting Solutions
| Technology | How It Works | Energy-Saving Benefit |
| Motion-Sensor Lights | Turns on when movement is detected, off when no activity is detected. | Eliminates unnecessary lighting in empty rooms. |
| Smart LED Bulbs | Can be dimmed or scheduled via an app. | Uses up to 80% less energy than traditional bulbs. |
| Daylight Sensors | Adjusts brightness based on natural light levels. | Prevents overuse of artificial lighting. |
| Voice-Controlled Lights | Works with smart assistants to turn lights on/off via voice commands. | Reduces the need for manual switches. |
How to Set Up Smart Lighting
- Replace Traditional Bulbs with Smart LED Bulbs – Choose Wi-Fi-enabled or Bluetooth-connected bulbs that can be controlled remotely.
- Install Motion-Sensor Switches – Place them in hallways, bathrooms, garages, and outdoor areas to reduce energy waste.
- Use Smart Plugs or Smart Light Switches – Convert regular lamps into smart lights by using smart plugs that control power usage.
- Program Lighting Schedules – Set up timers in your smart home app to turn lights off automatically at bedtime.
Tip: Use warm white LED lights (2700K-3000K) for cozy spaces and cool white LEDs (4000K-5000K) for work areas to optimize lighting comfort.
3. Monitoring Energy Usage with Smart Meters & Home Energy Monitors
One of the most effective ways to cut energy waste is to track where energy is being used in real time. Smart home energy monitors help you identify energy-hungry appliances and detect areas where savings can be made.
Benefits of Smart Energy Monitoring
✔ Real-Time Energy Tracking – See how much electricity each device consumes.
✔ Set Energy Consumption Alerts – Get notifications when energy use is too high.
✔ Monitor Individual Appliances – Identify which appliances are using phantom power when plugged in but not in use.
✔ Optimize Usage Patterns – Adjust your habits based on data-driven insights.
How to Set Up a Smart Home Energy Monitor
- Choose the Right Smart Energy Monitor – Some models attach to your electrical panel, while others work with individual appliances.
- Install the Device Near the Main Circuit Breaker – Follow the manufacturer’s guidelines to connect it to your home’s electrical system.
- Connect the Device to a Mobile App – Use the Wi-Fi or Bluetooth setup process to start receiving energy usage data.
- Analyze Usage & Take Action – Identify high-energy-consuming devices and unplug or replace them with energy-efficient models.
Tip: Some smart meters allow utility company integration, letting you compare your usage with similar homes and get personalized energy-saving recommendations.
4. Reducing Phantom Energy Waste with Smart Power Strips
Many household devices continue to draw power even when turned off—this is known as phantom load or standby power. Devices like televisions, gaming consoles, and coffee makers use electricity 24/7 unless completely unplugged.
A smart power strip eliminates this waste by automatically cutting power to devices that are not in use.
How to Use Smart Power Strips Effectively
| Type of Smart Power Strip | How It Works | Best For |
| Timer-Based | Shuts off power at pre-set times. | Office equipment, TVs, routers. |
| Motion-Sensor | Detects activity and turns on/off power accordingly. | Gaming consoles, entertainment centers. |
| Master-Controlled | Powers off all connected devices when the main device is turned off. | Computer setups, home theaters. |
| Remote-Controlled | Can be switched off using a smartphone app. | Hard-to-reach power outlets. |
How to Set Up & Use Smart Power Strips
- Plug in Multiple Devices – Connect devices that don’t need to stay on 24/7.
- Use the App to Set Schedules – Program devices to turn off automatically at night.
- Monitor Energy Consumption – Some smart strips provide real-time energy tracking to identify unnecessary energy use.
- Enjoy Instant Energy Savings – Prevent phantom energy loss without the hassle of unplugging devices manually.
Tip: Unplug chargers when not in use—phone and laptop chargers still draw energy when left plugged in.
Next Steps After Implementing Smart Home Technology
Once you’ve integrated smart home devices for energy efficiency, follow these best practices:
✔ Regularly update your smart device settings to maximize savings.
✔ Analyze energy reports monthly and adjust schedules accordingly.
✔ Keep firmware updated on smart devices to improve functionality and security.
✔ Continue upgrading appliances with energy-efficient models over time.
By using smart home technology, you can reduce energy waste, cut costs, and live more sustainably—all while enjoying the convenience of automation!
We’re also giving these extra bonuses
Eco-Friendly Home Upgrades – Checklist
Eco-Friendly Home Upgrades – FAQs

Eco-Friendly Home Upgrades – Salespage Content
Package Details:
Word Count: 18 311 Words
Number of Pages: 99
Eco-Friendly Home Upgrades – Bonus Content
Checklist
Word Count: 715 words
FAQs
Word Count: 934 words
Salespage Content
Word Count: 738 words
Total Word Count: 20 698 Words
Your PLR License Terms
PERMISSIONS: What Can You Do With These Materials?
Sell the content basically as it is (with some minor tweaks to make it “yours”).
If you are going to claim copyright to anything created with this content, then you must substantially change at 75% of the content to distinguish yourself from other licensees.
Break up the content into small portions to sell as individual reports for $10-$20 each.
Bundle the content with other existing content to create larger products for $47-$97 each.
Setup your own membership site with the content and generate monthly residual payments!
Take the content and convert it into a multiple-week “eclass” that you charge $297-$497 to access!
Use the content to create a “physical” product that you sell for premium prices!
Convert it to audios, videos, membership site content and more.
Excerpt and / or edit portions of the content to give away for free as blog posts, reports, etc. to use as lead magnets, incentives and more!
Create your own original product from it, set it up at a site and “flip” the site for megabucks!
RESTRICTIONS: What Can’t You Do With These Materials?
To protect the value of these products, you may not pass on the rights to your customers. This means that your customers may not have PLR rights or reprint / resell rights passed on to them.
You may not pass on any kind of licensing (PLR, reprint / resell, etc.) to ANY offer created from ANY PORTION OF this content that would allow additional people to sell or give away any portion of the content contained in this package.
You may not offer 100% commission to affiliates selling your version / copy of this product. The maximum affiliate commission you may pay out for offers created that include parts of this content is 75%.
You are not permitted to give the complete materials away in their current state for free – they must be sold. They must be excerpted and / or edited to be given away, unless otherwise noted. Example: You ARE permitted to excerpt portions of content for blog posts, lead magnets, etc.
You may not add this content to any part of an existing customer order that would not require them to make an additional purchase. (IE You cannot add it to a package, membership site, etc. that customers have ALREADY paid for.)
Share Now!
Latest Products


Free Sales Funnel Builder

Related Products
Popular & Trending


Featured Products