
Selling Your House PLR Course 29k Words
in PLR Checklists , PLR eBooks , PLR eCourses , PLR List Building Reports , Premium PLR , Premium PLR eBooks , Premium PLR Packages , Premium White Label Brandable PLR Coaching Courses , Private Label Rights Products , Real Estate , Real Estate PLR , Real Estate PLR eBooksChoose Your Desired Option(s)
has been added to your cart!
have been added to your cart!
#realestate #realestatemarketing #sellyourhouse #contentmarketing plrcourse #plrcontent #realestatetips
Selling Your House PLR Course – Step-by-Step Training for a Successful Sale
Sell Your Home Faster, Smarter, and for the Best Price
Selling your house can feel overwhelming. From prepping your home to pricing, marketing, negotiating offers, and closing the deal, there are countless decisions to make. The Selling Your House PLR Course is designed to take the stress out of selling by providing a step-by-step, easy-to-follow roadmap that guides homeowners and real estate enthusiasts through the entire process.
Whether you are a homeowner looking to sell your property quickly and profitably, a real estate agent wanting a ready-made client resource, or a digital entrepreneur seeking a PLR product to sell or bundle, this course provides everything you need.
With over 27,000 words of actionable content, checklists, FAQs, and sales copy, you’ll have a fully-developed course that’s ready to be edited, branded, and monetized.
Presenting…
Selling Your House PLR Course 29k Words
Why This Course Matters
Selling a home is more than just putting a “For Sale” sign in the yard. Many homeowners struggle with:
- Knowing where to start when preparing their home for sale
- Determining a realistic asking price
- Marketing effectively to attract serious buyers
- Negotiating offers without leaving money on the table
- Understanding the closing process and legal obligations
The Selling Your House PLR Course addresses each of these challenges with clear instructions, practical tips, and expert guidance, ensuring sellers feel confident and prepared.
Who This Course Is For
This PLR course is ideal for:
- Homeowners preparing to sell their property
- Real estate professionals who want a resource for clients or lead magnets
- Personal finance or real estate bloggers seeking ready-to-use digital products
- Coaches and consultants offering home-selling guidance
- Entrepreneurs looking for PLR content to sell, bundle, or repurpose
With full PLR rights, you can resell, bundle, or rebrand the course in multiple formats.
What You’ll Learn
The course is organized into five comprehensive modules, each containing four actionable steps. Here’s what’s included:
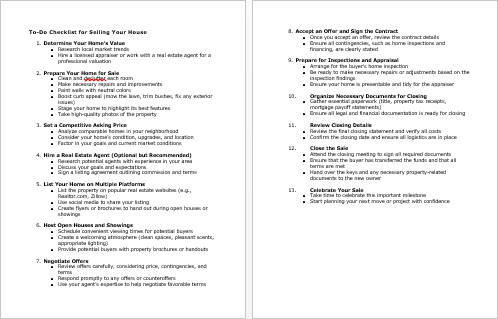
Module 1: Preparing Your Home for Sale
Goal: Make your home irresistible to buyers by maximizing appeal and minimizing issues.
Step 1: Evaluate Your Home’s Condition
- Walk through your property with a fresh perspective.
- Identify cleaning, repair, or improvement areas.
- Tip: Invite a friend or professional to spot details you may miss.
Step 2: Declutter and Depersonalize
- Remove personal items, family photos, and excess furniture.
- Tip: Treat your home as a blank canvas for potential buyers.
Step 3: Complete Necessary Repairs
- Fix small issues such as leaky faucets, squeaky doors, or chipped paint.
- Tip: Use a checklist and tackle one task at a time to avoid overwhelm.
Step 4: Boost Curb Appeal
- Improve your home’s exterior with fresh paint, landscaping, and outdoor decor.
- Tip: First impressions matter—your front yard is the first thing buyers notice.
Module Benefits:
Sellers learn to make a strong first impression, increase perceived value, and attract more buyers.
Module 2: Setting the Right Price
Goal: Price your home competitively to attract buyers while maximizing profit.
Step 1: Research the Market
- Analyze comparable homes in your neighborhood.
- Tip: Use online platforms and consult local agents for accurate data.
Step 2: Get a Professional Appraisal
- Hire a licensed appraiser to determine fair market value.
- Tip: Avoid overpricing or underpricing by relying on professional insights.
Step 3: Understand Your Costs
- Factor in closing costs, agent fees, and potential repairs.
- Tip: Knowing your expenses allows confident pricing.
Step 4: Set an Attractive Asking Price
- Align your price with market trends while leaving room for negotiation.
- Tip: A competitive price sparks interest and accelerates offers.
Module Benefits:
Sellers learn to set realistic and strategic prices, reducing time on the market and maximizing returns.
Module 3: Marketing Your Home
Goal: Promote your property effectively to reach the right buyers.
Step 1: Take Stunning Photos
- Use professional photography or high-quality cameras.
- Tip: Bright, natural lighting enhances room appeal.
Step 2: Write a Compelling Listing
- Highlight key features using descriptive, benefit-oriented language.
- Tip: Include details like proximity to schools, parks, and shopping.
Step 3: List Your Home Online
- Post listings on popular real estate websites and social media.
- Tip: Use keywords like “move-in ready” or “recently renovated” to attract clicks.
Step 4: Host Open Houses and Showings
- Schedule viewings at convenient times and maintain a clean, welcoming environment.
- Tip: Provide brochures or property details for potential buyers to take home.
Module Benefits:
Sellers learn to maximize visibility, attract serious buyers, and generate competitive offers.
Module 4: Negotiating Offers
Goal: Navigate offers strategically to secure the best deal.
Step 1: Review Offers Carefully
- Look beyond the price—consider contingencies, financing, and closing timelines.
- Tip: Your agent can help evaluate each offer comprehensively.
Step 2: Counter Offer Strategically
- Respond to initial offers in a way that balances your priorities with the buyer’s needs.
- Tip: Stay flexible but maintain essential deal points.
Step 3: Stay Calm During Negotiations
- Keep emotions in check to make informed decisions.
- Tip: Avoid rushing; thoughtful responses lead to better outcomes.
Step 4: Finalize the Agreement
- Sign the purchase agreement and prepare for closing.
- Tip: Consult legal professionals to ensure all documents are accurate.
Module Benefits:
Sellers gain confidence in negotiating, ensuring fair and profitable deals.
Module 5: Closing the Sale
Goal: Complete the sale efficiently and confidently.
Step 1: Complete the Home Inspection
- Be ready to address buyer concerns or minor repairs.
- Tip: Keep repair receipts to demonstrate care and transparency.
Step 2: Prepare for the Appraisal
- Ensure cleanliness and highlight upgrades for maximum appraisal value.
Step 3: Organize Documents for Closing
- Gather title, purchase agreement, tax receipts, and permits.
- Tip: Use a checklist for stress-free organization.
Step 4: Celebrate Your Sale!
- Sign documents, hand over keys, and reflect on your accomplishment.
- Tip: Celebrate the milestone—it’s a major life achievement!
Module Benefits:
Sellers gain peace of mind during closing and leave with a sense of accomplishment.
Bonus Materials
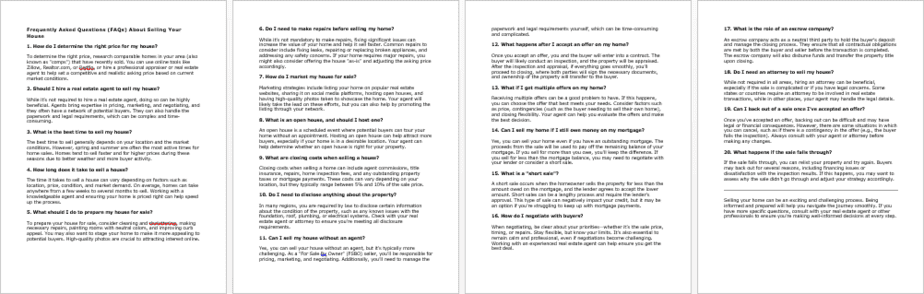
- Selling Your House Checklist (440 words) – Step-by-step reference for each module
- FAQs (1,290 words) – Answers to common selling questions, objections, and scenarios
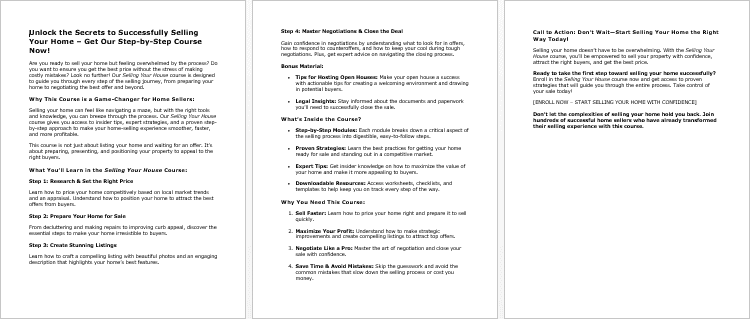
- Salespage Copy (621 words) – Ready-to-use marketing copy for your PLR product
How to Use and Profit from This PLR Course
- Sell as a Complete Digital Course to homeowners or real estate clients.
- Break into Mini-Reports ($10–$20) targeting staging, pricing, marketing, or closing tips.
- Bundle with Other Real Estate PLR Products ($47–$97) for premium offers.
- Launch a Membership Site with ongoing tips, templates, and guides.
- Convert to Audio, Video, Workbooks, or eBooks for multi-platform monetization.
- Use Excerpts as Lead Magnets to grow an email list and generate affiliate income.
- Create Original Products or coaching programs using the content as a foundation.
Licensing Terms
Permissions:
- Sell, edit, and repurpose content
- Claim copyright if 75% of content is changed
- Use for coaching, e-courses, digital products, or membership sites
Restrictions:
- Cannot transfer PLR rights
- Max affiliate commission: 75%
- Cannot give full content away for free
- Cannot bundle without additional purchase
Why This PLR Course is a Must-Have
- Over 27,000 words of comprehensive, step-by-step guidance
- Covers preparing your home, pricing, marketing, negotiating, and closing
- Includes checklists, FAQs, and ready-to-use sales copy
- Fully editable and ready to sell, brand, or bundle
- Ideal for coaches, agents, bloggers, or entrepreneurs in the real estate niche
- Helps users sell their property faster, smarter, and more profitably
Take Action Today
Start using this Selling Your House PLR Course to:
- Empower clients or your audience with actionable guidance
- Build a profitable PLR product in the booming real estate niche
- Generate income through sales, bundles, or membership programs
Your next step is to download, brand, and start selling! This comprehensive PLR course makes it simple, efficient, and profitable.
has been added to your cart!
have been added to your cart!
Here A Sample of Selling Your House PLR Course
Module 1: Preparing Your Home for Sale
Step 1: Evaluate Your Home’s Condition
Selling your home begins with understanding its current state. This step is about assessing your property as objectively as possible, identifying areas that need attention, and setting the foundation for a successful sale. Follow these detailed, step-by-step instructions to evaluate your home effectively:
1. Approach with Fresh Eyes
To evaluate your home thoroughly, imagine yourself as a potential buyer visiting for the first time.
- Begin Outside: Start with the exterior, as it’s the first impression buyers will have. Stand at the curb and assess your home’s curb appeal. Does the lawn look tidy? Are the driveway and pathways clean? Are the walls and roof in good condition?
- Move Inside: Enter the house and observe it room by room. Pay attention to how each space feels—bright, clean, and welcoming—or dark, cluttered, and dated.
Pro Tip: It’s easy to overlook flaws in a home you’ve lived in for years. Pretend you’re a guest seeing it for the first time.
2. Create a Room-by-Room Checklist
Documenting your findings ensures you won’t miss any details. Use a notebook, spreadsheet, or home evaluation app.
- For Each Room, Check the Following:
- Walls and Ceilings: Look for cracks, peeling paint, or water stains.
- Floors: Check for scratches, stains, or damaged tiles.
- Lighting: Ensure all fixtures work and provide adequate illumination.
- Windows and Doors: Test that they open, close, and lock properly. Look for broken seals or drafts.
- Storage Spaces: Evaluate closets, cupboards, and attic areas for organization and cleanliness.
- Walls and Ceilings: Look for cracks, peeling paint, or water stains.
Pro Tip: Break larger areas like kitchens and living rooms into sub-sections (e.g., cabinets, appliances, countertops) to keep track of specific issues.
3. Focus on Cleanliness and Maintenance
A clean and well-maintained home is more appealing to buyers.
- Key Areas to Inspect for Cleaning Needs:
- Kitchen and Bathrooms: Ensure surfaces are spotless, grout is clean, and there are no lingering odors.
- Windows and Mirrors: Clean all glass to remove smudges and improve brightness.
- Hidden Areas: Don’t forget basements, garages, and under-sink cabinets. These often-overlooked spots matter to buyers.
- Kitchen and Bathrooms: Ensure surfaces are spotless, grout is clean, and there are no lingering odors.
- Check Maintenance Tasks: Replace burnt-out light bulbs, tighten loose screws, and clean HVAC vents.
Pro Tip: A deep clean is often necessary at this stage. Consider hiring professional cleaners for an intensive top-to-bottom job.
4. Identify Repairs and Improvements
Some issues might require fixing, while others may benefit from upgrades.
- Minor Repairs:
- Fix dripping faucets, squeaky hinges, and cracks in walls.
- Patch holes or dents in drywall.
- Major Concerns:
- If you notice larger problems, such as a leaky roof or outdated electrical wiring, consider consulting professionals.
- If you notice larger problems, such as a leaky roof or outdated electrical wiring, consider consulting professionals.
- Improvements:
- These are optional but can boost your home’s value. For example, repainting walls with neutral colors or upgrading outdated light fixtures can make a significant difference.
Pro Tip: Prioritize repairs that affect functionality and safety over purely aesthetic upgrades.
5. Invite a Friend for a Second Opinion
It’s challenging to spot every issue yourself, especially when you’re emotionally attached to your home. A friend, neighbor, or trusted colleague can provide a fresh perspective.
- Choose Someone Honest and Observant: Look for someone who isn’t afraid to give constructive feedback.
- Have Them Walk Through: Guide them through your home and encourage them to point out anything that feels outdated, broken, or unappealing.
- Take Notes: Write down their observations and compare them with your own checklist to ensure no detail is missed.
Pro Tip: If a friend isn’t available, hiring a professional home stager or inspector at this stage can provide valuable insights.
Final Thoughts
Evaluating your home’s condition is a critical first step in the selling process. By carefully examining each area, addressing maintenance issues, and improving its presentation, you’ll create a solid foundation for a successful sale. Taking the time to do this right ensures that your home makes a great first impression and meets buyers’ expectations, ultimately helping you achieve your selling goals.
Step 2: Declutter and Depersonalize
Decluttering and depersonalizing your home is one of the most impactful steps you can take to make it appealing to buyers. This process involves removing distractions and creating a neutral, clean space that allows buyers to envision themselves living in the home. Follow these detailed, step-by-step instructions to tackle this important task:
1. Begin with Decluttering
Start by removing unnecessary items to make your home appear more spacious and organized.
- Step 1: Evaluate Each Room:
- Walk through each room with a critical eye and identify items that don’t serve a purpose in showcasing the space.
- Focus on visible surfaces such as countertops, shelves, and tables. Clear away knick-knacks, excess décor, and cluttered stacks of papers or magazines.
- Step 2: Sort into Categories:
- Use the Three-Box Method:
- Keep Box: Items you’ll use daily or plan to take to your next home.
- Donate/Sell Box: Items in good condition but no longer needed.
- Trash Box: Broken or unusable items to be discarded.
- Keep Box: Items you’ll use daily or plan to take to your next home.
- Use the Three-Box Method:
- Step 3: Start Small:
- Begin with a single drawer, shelf, or small room to avoid feeling overwhelmed.
- Progress gradually to larger areas like the kitchen, living room, and garage.
Pro Tip: Clutter-free spaces not only look larger but also allow buyers to focus on the home’s features rather than its contents.
2. Depersonalize the Space
Depersonalization is about removing items that reflect your personal style and life, allowing potential buyers to visualize the home as their own.
- Step 1: Remove Personal Photos and Keepsakes:
- Take down family photos, framed certificates, and personalized wall art.
- Pack away unique or sentimental items like trophies, collections, or children’s artwork.
- Step 2: Neutralize Décor:
- Replace bold or highly personalized décor with neutral items, such as simple vases, mirrors, or candles.
- Avoid themed or niche items that might not resonate with all buyers.
- Step 3: Store Valuable Items:
- Safeguard valuable or irreplaceable possessions by packing them away securely.
Pro Tip: Think of this process as creating a blank canvas. The less personalized the space, the easier it is for buyers to imagine their own lives unfolding there.
3. Simplify Furniture Arrangements
Too much furniture can make a space feel cramped, while poorly arranged furniture can disrupt the flow of a room.
- Step 1: Assess Furniture Functionality:
- Keep only essential pieces that showcase the purpose of each room. For example, a bed and nightstands in the bedroom, or a sofa and coffee table in the living room.
- Keep only essential pieces that showcase the purpose of each room. For example, a bed and nightstands in the bedroom, or a sofa and coffee table in the living room.
- Step 2: Create Open Pathways:
- Rearrange furniture to allow for easy movement and highlight the room’s layout. Remove extra chairs, oversized pieces, or items that block windows or doors.
- Rearrange furniture to allow for easy movement and highlight the room’s layout. Remove extra chairs, oversized pieces, or items that block windows or doors.
- Step 3: Use a Minimalist Approach:
- Limit decorative furniture items like ottomans, side tables, or bookcases unless they enhance the space’s functionality or aesthetic appeal.
Pro Tip: Less furniture creates a sense of spaciousness, which is especially important in smaller homes or apartments.
4. Organize Storage Spaces
Buyers are likely to open closets, cabinets, and drawers during showings. Well-organized storage spaces make a great impression.
- Step 1: Declutter Closets and Cabinets:
- Donate or discard clothes, shoes, and accessories you no longer wear.
- Pare down kitchen items to essentials, removing duplicates and rarely used gadgets.
- Step 2: Group Similar Items Together:
- Use clear bins or labeled baskets to neatly organize items like linens, cleaning supplies, and toiletries.
- Use clear bins or labeled baskets to neatly organize items like linens, cleaning supplies, and toiletries.
- Step 3: Maximize Space:
- Use shelf dividers, hanging organizers, or drawer inserts to make storage areas look larger and more functional.
Pro Tip: Organized storage signals to buyers that your home is well-maintained and offers ample space for their needs.
5. Clean and Finalize the Space
Once you’ve decluttered and depersonalized, give your home a thorough cleaning and finalize the presentation.
- Step 1: Deep Clean All Surfaces:
- Dust furniture, clean windows, and wipe down walls.
- Pay attention to details like light fixtures, baseboards, and switch plates.
- Step 2: Remove Odors:
- Eliminate lingering smells from pets, cooking, or dampness. Use air purifiers, mild fragrances, or fresh flowers for a pleasant atmosphere.
- Eliminate lingering smells from pets, cooking, or dampness. Use air purifiers, mild fragrances, or fresh flowers for a pleasant atmosphere.
- Step 3: Stage Neutral Touches:
- Add finishing touches like neutral-colored throw pillows, fresh towels, or a bowl of fruit on the kitchen counter to make the space inviting.
Pro Tip: A clean, decluttered home not only photographs well but also sets the stage for a positive buyer experience.
Final Thoughts
Decluttering and depersonalizing is about making your home appeal to the widest possible audience. By removing distractions and showcasing your home’s potential, you’re helping buyers envision their own story in the space. Think of it as setting the stage for their next chapter—clean, open, and full of possibilities.
Step 3: Complete Necessary Repairs
Completing necessary repairs before listing your home is crucial for making a positive impression on buyers. Small issues can distract potential buyers and create the perception that the home hasn’t been well-maintained. Fixing these problems enhances your home’s appeal, boosts buyer confidence, and could even increase your asking price. Follow these step-by-step instructions to address repairs effectively and systematically.
1. Assess and Prioritize Repairs
Start by identifying all the areas of your home that require attention.
- Step 1: Conduct a Walkthrough:
- Use the checklist you created in Step 1 to identify and confirm repair needs. Walk through your home room by room, paying close attention to small but noticeable issues.
- Focus on high-impact areas such as the kitchen, bathrooms, and living spaces.
- Step 2: Categorize Repairs:
- Divide repairs into two categories:
- Essential Repairs: Necessary fixes like leaky faucets, broken tiles, or peeling paint that buyers will immediately notice.
- Cosmetic Improvements: Optional upgrades like replacing outdated fixtures or improving landscaping.
- Essential Repairs: Necessary fixes like leaky faucets, broken tiles, or peeling paint that buyers will immediately notice.
- Divide repairs into two categories:
- Step 3: Prioritize by Impact:
- Address safety or functionality issues first, such as loose handrails, faulty electrical outlets, or doors that don’t close properly.
Pro Tip: Small, inexpensive repairs often provide the highest return on investment. Buyers appreciate a home that feels well-maintained and move-in ready.
2. Create a Detailed Repair Checklist
Organizing your tasks ensures you tackle each repair efficiently.
- Step 1: List Repairs by Room:
- Write down all the fixes needed in each area of the home, starting with high-traffic spaces.
- Example for the kitchen: Fix leaky faucet, replace broken cabinet handles, re-grout tiles.
- Example for the bathroom: Replace cracked tiles, repair loose towel bars, clean and recaulk bathtub edges.
- Write down all the fixes needed in each area of the home, starting with high-traffic spaces.
- Step 2: Estimate Time and Cost:
- For each repair, note whether it’s a quick fix or requires professional help. Include a rough estimate of costs to prioritize within your budget.
- For each repair, note whether it’s a quick fix or requires professional help. Include a rough estimate of costs to prioritize within your budget.
- Step 3: Set a Timeline:
- Assign deadlines to each task based on urgency. Tackle simple repairs first to build momentum.
Pro Tip: Breaking the process into manageable steps helps avoid feeling overwhelmed and ensures steady progress.
3. Tackle DIY Repairs
Many minor repairs can be handled on your own with basic tools and minimal effort.
- Step 1: Fix Leaky Faucets and Pipes:
- Tighten fittings or replace washers to stop drips. Ensure all plumbing connections are secure and free of leaks.
- Tighten fittings or replace washers to stop drips. Ensure all plumbing connections are secure and free of leaks.
- Step 2: Silence Squeaky Doors and Windows:
- Apply a lubricant like WD-40 to hinges and sliding tracks. Tighten loose screws to ensure smooth operation.
- Apply a lubricant like WD-40 to hinges and sliding tracks. Tighten loose screws to ensure smooth operation.
- Step 3: Patch and Paint Walls:
- Fill nail holes, repair cracks, and touch up with neutral paint. Focus on high-visibility areas like hallways and living spaces.
- Fill nail holes, repair cracks, and touch up with neutral paint. Focus on high-visibility areas like hallways and living spaces.
- Step 4: Replace Small Fixtures:
- Swap out old light switch plates, cabinet knobs, or broken doorknobs for affordable upgrades that enhance your home’s look.
Pro Tip: If you’re unsure about tackling a specific repair, consult online tutorials or seek advice from local hardware stores.
4. Know When to Call Professionals
Certain repairs may require expertise to ensure safety and quality.
- Step 1: Evaluate Complex Repairs:
- Examples include electrical work, roof repairs, or fixing structural issues. These are best left to licensed professionals.
- Examples include electrical work, roof repairs, or fixing structural issues. These are best left to licensed professionals.
- Step 2: Get Multiple Quotes:
- For significant repairs, obtain estimates from at least three contractors to compare costs and timelines. Ensure they are licensed and insured.
- For significant repairs, obtain estimates from at least three contractors to compare costs and timelines. Ensure they are licensed and insured.
- Step 3: Schedule Repairs Strategically:
- Coordinate repair schedules to minimize disruptions. Focus on completing essential fixes before showings or photography sessions.
Pro Tip: Investing in professional repairs for major issues can save time, avoid liability, and add value to your home.
5. Inspect Your Work and Finalize Repairs
Once the repairs are complete, review everything to ensure no details have been missed.
- Step 1: Conduct a Second Walkthrough:
- Revisit all areas of your home with your checklist to confirm that each repair has been addressed.
- Revisit all areas of your home with your checklist to confirm that each repair has been addressed.
- Step 2: Test Functionality:
- Check that doors open and close smoothly, faucets no longer leak, and all lights and outlets function properly.
- Check that doors open and close smoothly, faucets no longer leak, and all lights and outlets function properly.
- Step 3: Seek a Fresh Perspective:
- Invite a friend, family member, or home stager to inspect the repairs. They might notice details you’ve overlooked.
Pro Tip: Consider hiring a professional home inspector to verify the quality of repairs, especially for older homes or properties with extensive updates.
Final Thoughts
Completing necessary repairs may seem tedious, but it’s an essential step in preparing your home for sale. Buyers want a home they can move into without immediate concerns, and addressing repairs upfront demonstrates that your property is well-cared for. Take it one task at a time, and remember that even small fixes can make a significant difference in the overall impression of your home.
Step 4: Boost Curb Appeal
The exterior of your home is the first thing buyers see, and it sets the tone for the rest of their experience. A well-maintained, visually appealing exterior can create an emotional connection and leave a lasting impression, increasing the chances of a successful sale. Enhancing your home’s curb appeal doesn’t have to be expensive; with some strategic upgrades, you can significantly improve your property’s visual impact. Follow these detailed, step-by-step instructions to ensure your home’s exterior makes a memorable first impression.
1. Start with a Clean Slate
A clean, tidy exterior immediately conveys that your home is well-cared for.
- Step 1: Clear Away Clutter:
- Remove any items that don’t belong in the yard, such as toys, tools, or seasonal decorations. Keep pathways and porches clear.
- Dispose of debris like fallen branches, leaves, or trash.
- Step 2: Wash Exterior Surfaces:
- Pressure wash siding, driveways, and walkways to remove dirt and grime. Pay extra attention to areas with visible stains or mildew.
- Clean windows inside and out for a sparkling finish.
- Step 3: Inspect and Clean the Roof and Gutters:
- Clear gutters of leaves and debris to ensure proper drainage. A clean, well-maintained roof can reassure buyers of your home’s condition.
Pro Tip: Renting a pressure washer or hiring a professional cleaning service can save time and deliver noticeable results.
2. Focus on Landscaping
Well-manicured landscaping enhances the overall aesthetic and signals attention to detail.
- Step 1: Mow and Edge the Lawn:
- Keep the grass trimmed and neat. Use an edger to define borders along sidewalks, driveways, and garden beds.
- Keep the grass trimmed and neat. Use an edger to define borders along sidewalks, driveways, and garden beds.
- Step 2: Add Fresh Mulch:
- Spread a fresh layer of mulch in flower beds and around trees to create a polished, uniform look. Mulch also helps retain moisture and suppress weeds.
- Spread a fresh layer of mulch in flower beds and around trees to create a polished, uniform look. Mulch also helps retain moisture and suppress weeds.
- Step 3: Plant Seasonal Flowers or Shrubs:
- Add pops of color with seasonal flowers in garden beds or potted plants near the entrance. Choose low-maintenance options that complement your home’s exterior.
- Add pops of color with seasonal flowers in garden beds or potted plants near the entrance. Choose low-maintenance options that complement your home’s exterior.
- Step 4: Trim and Prune:
- Shape hedges, bushes, and trees to give them a tidy appearance. Remove any dead branches or overgrown foliage.
Pro Tip: Choose native plants and flowers to ensure they thrive in your region’s climate and require minimal upkeep.
3. Refresh Key Elements
Small updates to your home’s exterior can have a big impact.
- Step 1: Paint the Front Door:
- A fresh coat of paint in a bold yet tasteful color can make your home stand out. Popular choices include navy blue, classic red, or neutral black.
- A fresh coat of paint in a bold yet tasteful color can make your home stand out. Popular choices include navy blue, classic red, or neutral black.
- Step 2: Update House Numbers and Hardware:
- Replace worn or outdated house numbers, door handles, and mailbox for a modern, cohesive look. Choose finishes that match your home’s style.
- Replace worn or outdated house numbers, door handles, and mailbox for a modern, cohesive look. Choose finishes that match your home’s style.
- Step 3: Add Outdoor Lighting:
- Install or update lighting fixtures near the front door, garage, or pathways. Solar-powered lights are an eco-friendly option for highlighting walkways and landscaping.
- Install or update lighting fixtures near the front door, garage, or pathways. Solar-powered lights are an eco-friendly option for highlighting walkways and landscaping.
- Step 4: Repair Fences and Gates:
- Fix sagging gates, repaint fences, and ensure all latches work properly. A sturdy, attractive fence adds charm and privacy.
Pro Tip: Neutral or classic design choices appeal to the widest range of buyers, so avoid overly bold or trendy updates.
4. Create a Welcoming Entrance
A warm, inviting entrance helps buyers envision themselves living in the home.
- Step 1: Add a Welcome Mat:
- Place a clean, stylish welcome mat at the front door. It’s an affordable way to set a positive tone.
- Place a clean, stylish welcome mat at the front door. It’s an affordable way to set a positive tone.
- Step 2: Decorate Thoughtfully:
- Arrange potted plants, a small bench, or a decorative wreath near the entrance. Keep decorations simple and tasteful.
- Arrange potted plants, a small bench, or a decorative wreath near the entrance. Keep decorations simple and tasteful.
- Step 3: Ensure Pathways Are Safe and Inviting:
- Repair cracks in walkways or steps. Ensure paths are well-lit and free of hazards to create a safe, welcoming environment.
- Repair cracks in walkways or steps. Ensure paths are well-lit and free of hazards to create a safe, welcoming environment.
- Step 4: Check for Final Touches:
- Polish door hardware, clean any glass on doors, and ensure the doorbell works. Attention to these small details enhances the overall impression.
Pro Tip: Stand at the curb and assess your home from a buyer’s perspective. Ask yourself, “Does this look like a home I’d want to walk into?”
5. Maintain Curb Appeal During Showings
Curb appeal isn’t a one-time effort. Keep the exterior looking its best throughout the selling process.
- Step 1: Water Plants Regularly:
- Keep flowers and shrubs hydrated to ensure they remain vibrant. Use an irrigation system for convenience.
- Keep flowers and shrubs hydrated to ensure they remain vibrant. Use an irrigation system for convenience.
- Step 2: Sweep and Tidy Daily:
- Regularly sweep walkways and porches to remove dirt and debris. Straighten outdoor furniture or décor as needed.
- Regularly sweep walkways and porches to remove dirt and debris. Straighten outdoor furniture or décor as needed.
- Step 3: Monitor Seasonal Changes:
- Adjust decorations or landscaping to match the season. For example, clear snow in winter or rake leaves in autumn.
Pro Tip: Schedule weekly maintenance or hire a landscaping service if you’re busy or living elsewhere during the selling process.
Final Thoughts
Boosting curb appeal is one of the most cost-effective ways to attract buyers and make your home stand out. By investing time and effort into landscaping, cleaning, and small updates, you create a strong first impression that sets the stage for a successful sale. Buyers often decide within moments whether they’re interested in a property—ensure your home makes a lasting impact.
We’re also giving these extra bonuses
Selling Your House – Checklist
Selling Your House – FAQs
Selling Your House – Salespage Content
Package Details:
Word Count: 27 321 Words
Number of Pages: 96
Selling Your House – Bonus Content
Checklist
Word Count: 440 words
FAQs
Word Count: 1290 words
Salespage Content
Word Count: 621 words
Total Word Count: 29 672 Words
Your PLR License Terms
PERMISSIONS: What Can You Do With These Materials?
Sell the content basically as it is (with some minor tweaks to make it “yours”).
If you are going to claim copyright to anything created with this content, then you must substantially change at 75% of the content to distinguish yourself from other licensees.
Break up the content into small portions to sell as individual reports for $10-$20 each.
Bundle the content with other existing content to create larger products for $47-$97 each.
Setup your own membership site with the content and generate monthly residual payments!
Take the content and convert it into a multiple-week “eclass” that you charge $297-$497 to access!
Use the content to create a “physical” product that you sell for premium prices!
Convert it to audios, videos, membership site content and more.
Excerpt and / or edit portions of the content to give away for free as blog posts, reports, etc. to use as lead magnets, incentives and more!
Create your own original product from it, set it up at a site and “flip” the site for megabucks!
RESTRICTIONS: What Can’t You Do With These Materials?
To protect the value of these products, you may not pass on the rights to your customers. This means that your customers may not have PLR rights or reprint / resell rights passed on to them.
You may not pass on any kind of licensing (PLR, reprint / resell, etc.) to ANY offer created from ANY PORTION OF this content that would allow additional people to sell or give away any portion of the content contained in this package.
You may not offer 100% commission to affiliates selling your version / copy of this product. The maximum affiliate commission you may pay out for offers created that include parts of this content is 75%.
You are not permitted to give the complete materials away in their current state for free – they must be sold. They must be excerpted and / or edited to be given away, unless otherwise noted. Example: You ARE permitted to excerpt portions of content for blog posts, lead magnets, etc.
You may not add this content to any part of an existing customer order that would not require them to make an additional purchase. (IE You cannot add it to a package, membership site, etc. that customers have ALREADY paid for.)
Share Now!
Latest Products


Free Sales Funnel Builder

Related Products
Popular & Trending


Featured Products