Journaling for Mental Clarity PLR Course 30k Words
in Journaling PLR , PLR eCourses , PLR List Building Reports , Premium PLR , Premium PLR Reports , Premium White Label Brandable PLR Coaching Courses , Private Label Rights Products , Self Discipline PLR , Self Esteem PLR , Self Help PLR , Self Improvement PLRChoose Your Desired Option(s)
has been added to your cart!
have been added to your cart!
#journaling #mentalclarity #plrcourse #mindsetgrowth #selfreflection #wellnessmarketing #plrcontent #personaldevelopment #healthymind
Journaling for Mental Clarity PLR Course – 30,000 Words
Unlock Your Mind, Reduce Stress, and Live with Focus Through Journaling
Do you feel overwhelmed, distracted, or emotionally drained by the demands of modern life?
The Journaling for Mental Clarity PLR Course is a complete step-by-step system that helps learners:
- Reduce mental clutter and stress
- Release emotions safely
- Gain focus and clarity for daily decisions
- Build a lasting journaling habit for self-care and personal growth
With 30,000 words of expertly crafted content, this PLR course is perfect for career coaches, wellness bloggers, educators, and PLR resellers looking to deliver high-value, ready-to-use content in the self-development and wellness niche.
Whether your audience is new to journaling or wants to take their practice to the next level, this course provides practical strategies and exercises that produce real results.
Introducing the…
Journaling for Mental Clarity
Why Journaling is a Game-Changer
Journaling is more than just writing—it’s a powerful mental tool. Research shows that daily journaling:
- Reduces stress and anxiety by giving your thoughts a safe outlet
- Improves emotional regulation and clarity
- Supports goal-setting and intention-driven action
- Enhances self-reflection and decision-making
With this course, learners get guided instruction, practical exercises, and actionable prompts that make journaling approachable, enjoyable, and life-changing.
What’s Inside the Course
The course is divided into five modules, each with four lessons, designed to build skills step by step. Each lesson is beginner-friendly, actionable, and focused on delivering mental clarity, emotional release, and personal growth.
Module 1: Getting Started with Journaling
Goal: Introduce learners to the fundamentals of journaling and build a gentle, lasting habit.
- Lesson 1: Why Journaling Works for Your Mind
Understand how journaling clears mental clutter, reduces stress, and gives your thoughts a safe place to land. - Lesson 2: Picking Your Perfect Journal
Explore options—digital apps, simple notebooks, or guided journals—to find a format that inspires daily writing. - Lesson 3: Creating Your Journaling Space
Learn how to set up a cozy, distraction-free environment where journaling feels natural and inviting. - Lesson 4: Building a Gentle Habit
Start with short, easy prompts to ease into a regular journaling rhythm without pressure or overwhelm.
Module 2: Journaling for Self-Reflection
Goal: Teach learners how to use journaling to gain insights, identify patterns, and understand themselves better.
- Lesson 1: Asking Yourself the Right Questions
Simple self-reflection prompts encourage clarity about emotions, choices, and priorities. - Lesson 2: Spotting Thought Patterns
Identify recurring beliefs, worries, or habits that may be clouding your mind. - Lesson 3: Writing with Honesty (Without Judgment)
Practice writing freely without worrying about “right or wrong,” fostering authenticity. - Lesson 4: Turning Reflections into Insights
Learn to spot “aha!” moments that guide your decisions and daily actions.
Module 3: Emotional Release Through Writing
Goal: Use journaling as a safe space to release negative emotions and cultivate positivity.
- Lesson 1: Journaling Out Stress and Anxiety
Techniques for putting heavy feelings on paper to lighten your mind and body. - Lesson 2: Releasing Anger and Frustration Safely
Expressive writing exercises allow for emotional processing without harm or regret. - Lesson 3: Gratitude as a Reset Button
Shift focus from stress to appreciation using gratitude journaling practices. - Lesson 4: Using Journaling for Emotional Balance
Combine venting and gratitude to feel grounded, calm, and more in control.
Module 4: Journaling for Clarity and Focus
Goal: Help learners use journaling as a tool for decision-making, goal-setting, and mental clarity.
- Lesson 1: Clearing Mental Clutter
Practice “brain dump” journaling to release overwhelming thoughts and regain focus. - Lesson 2: Setting Intentions and Priorities
Write daily or weekly intentions to stay on track and aligned with goals. - Lesson 3: Journaling for Decision-Making
Learn structured methods, like pros-and-cons lists, to make confident choices. - Lesson 4: Visualizing Goals Through Writing
Use your journal to map out and visualize your ideal future, creating clarity and motivation.
Module 5: Making Journaling a Lifelong Companion
Goal: Turn journaling into a sustainable, enjoyable daily practice for ongoing mental clarity and self-care.
- Lesson 1: Creating Your Own Rituals
Add personal touches—tea, music, candles—that make journaling feel special and inviting. - Lesson 2: Overcoming Writer’s Block
Use prompts and simple strategies to keep the words flowing, even on difficult days. - Lesson 3: Tracking Your Growth Over Time
Review old entries to see your progress, insights, and personal evolution. - Lesson 4: Journaling as a Daily Self-Care Practice
Make journaling a consistent, nourishing habit that supports mental clarity and emotional well-being.
Bonus Materials
The course comes with high-value extras to make it easy to implement and resell:
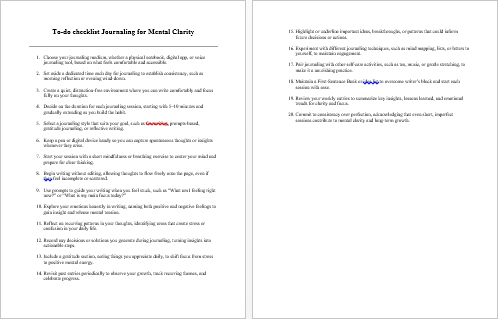
- Checklist – 387 Words: A concise, step-by-step guide to ensure journaling habits are established and maintained.
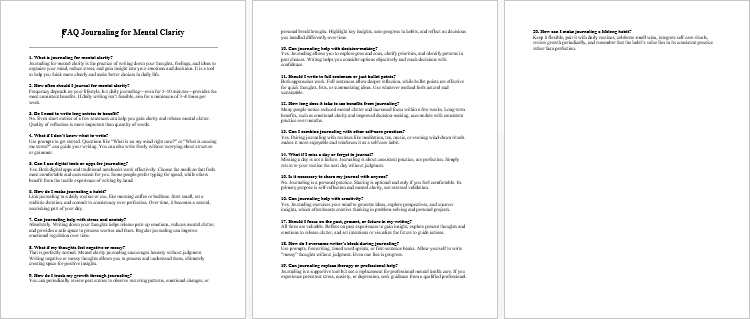
- FAQs – 781 Words: Answers to common questions about journaling, techniques, and best practices.
- Salespage – 832 Words: Ready-to-use sales copy to promote the course immediately on your website.
Who Can Benefit from This PLR Course
This PLR course is ideal for:
- Coaches and Therapists: Provide clients with a structured journaling program for mental wellness.
- Bloggers and Influencers: Offer a high-value guide as a lead magnet or paid product.
- Educators and Online Course Creators: Turn lessons into workshops, e-courses, or membership content.
- PLR Resellers: Sell a ready-made, in-demand product in the self-help and wellness niche.
- Individuals: Build a self-care toolkit to help themselves or others develop daily journaling habits.
This course can be rebranded, bundled, or split into smaller guides for multiple revenue streams.
How to Use and Profit from This Course
- Sell the Full Course: Offer as a digital product for $197–$497.
- Break Into Mini-Reports: Sell individual modules or lessons for $10–$20 each.
- Create Bundles: Combine with other self-development PLR products for $47–$97.
- Launch a Multi-Week E-Class: Use the modules as a structured program for $297–$497.
- Membership Site Content: Provide recurring value and generate monthly revenue.
- Create Physical Products: Convert lessons into guided journals, workbooks, or planners.
- Lead Generation: Excerpts can be used for blogs, social media, or email campaigns.
- Flip a Website: Build a journaling or self-care site using this course and sell it as a complete package.
Licensing Terms
Permissions – What You Can Do:
- Sell the course as-is or with minor edits.
- Claim copyright if 75%+ of the content is rewritten.
- Break the content into smaller guides or membership site content.
- Bundle with other PLR products or digital courses.
- Use excerpts for marketing, blogs, or lead magnets.
Restrictions – What You Cannot Do:
- Pass PLR or resale rights to your customers.
- Offer 100% affiliate commissions (maximum 75%).
- Give away the complete materials for free.
- Include content in existing orders without requiring an additional purchase.
Why Buy This PLR Course from Buy Quality PLR?
- Professionally written 30,000-word course ready for immediate use
- Structured modules and lessons for step-by-step learning
- Evergreen self-development and wellness niche
- Includes checklist, FAQs, and sales page copy
- Save time and effort creating content from scratch
- Monetize immediately in multiple formats
Bottom Line
The Journaling for Mental Clarity PLR Course is a turnkey solution for anyone in wellness, personal development, or self-care. You can:
- Teach clients, students, or audiences how to reduce stress, gain clarity, and stay focused
- Launch a digital product in a high-demand niche
- Create recurring revenue via membership sites, e-classes, or bundles
- Profit from ready-to-use, professional content without spending months creating it
Help your audience transform their minds, improve emotional balance, and live with clarity—all while generating a profitable digital product for yourself.
has been added to your cart!
have been added to your cart!
Here A Sample of the Journaling for Mental Clarity PLR Course
Module 1: Getting Started with Journaling
Lesson 1: Why Journaling Works for Your Mind
(Instructor-facing, step-by-step session plan for international course creators)
Opening note (tone & purpose):
This lesson gives learners a clear, evidence-informed explanation of why journaling helps mental clarity, and it guides them through short, embodied practice so they personally experience the effect. Keep your language simple and culturally neutral, invite curiosity, and hold space for different comfort levels with emotional sharing.
Learning outcomes (what learners will be able to do by the end of this lesson)
✓ Explain three core ways journaling supports mental clarity (externalization, metacognition, emotion regulation).
✓ Practice a short journaling technique that reduces mental clutter.
✓ Reflect on one personal insight from writing and describe how journaling could fit into their routine.
Session length (recommended)
60–75 minutes total. This gives time for explanation, a hands-on exercise, and guided reflection. You can shorten to 40 minutes by focusing only on the short writing exercise and a brief debrief.
Materials & setup
• A notebook or loose paper and a pen for each participant (or a clear digital document if online).
• Timer (phone or online).
• A whiteboard / flipchart or slide with prompts and key concepts.
• Quiet room or breakout rooms for small-group or solo work.
• Optional: printed list of prompts translated to participants’ languages.
Instructor preparation (before the session)
- Prepare 4–6 simple prompts (see sample list below) and translate them if you serve multilingual groups.
- Create a one-page handout summarizing the three key mechanisms of journaling.
- Prepare trigger-safety language: plan how you’ll support a participant who becomes upset while writing (see Emotional Safety below).
- Choose two brief examples or metaphors you will use to explain abstract ideas (e.g., “brain dump” as emptying a backpack).
Step-by-step instructor script & flow
0–8 minutes — Warm welcome and hook
Say (friendly, conversational):
“Welcome — today we’ll explore why journaling can actually change how you think. Many people come to journaling hoping for immediate calm; what we’ll do now is both explain and experience a short practice so you can see the mechanism at work.”
Quick icebreaker (optional, culturally sensitive): ask one sentence answers: “What word describes how you feel about writing?” Keep answers voluntary.
8–20 minutes — Teach the three core mechanisms (short, memorable)
Introduce each mechanism with a one-sentence definition, one practical example, and one instructor cue.
- Externalization — putting thoughts outside your head
• Definition: Writing transfers messy internal noise into written words.
• Example: “A to-do list or a worry on paper is easier to inspect and less likely to swirl.”
• Instructor cue: “Imagine your mind as a crowded table — journaling clears space on that table.” - Metacognition — noticing your own thinking
• Definition: Writing helps you step back and see thoughts as objects you can study.
• Example: “When you write ‘I am anxious about X’, you can then ask: is that fear or something I can solve?”
• Instructor cue: “Use the question: ‘What am I thinking about right now?’ and write the answer.” - Emotion regulation & cognitive processing
• Definition: Writing about feelings helps process them and reduces intensity.
• Example: “Expressive writing about a frustration often reduces its emotional charge.”
• Instructor cue: “Note the feeling, name it in one line, then write one small action you could take.”
After each mechanism, pause briefly and invite a single clarifying question. Keep answers concise.
20–25 minutes — Short demonstration (live)
Model the practice. Tell the group you’ll do a 3-minute “brain dump” out loud but not read aloud; show you will write quickly, imperfectly. Say: “I’m writing: ‘Too many projects, email backlog, tired, want clarity on priorities’.” Keep it short — learners value authenticity.
25–40 minutes — Guided practice: 5–10 minute brain dump (step-by-step)
Explain the exercise clearly:
- “Set your timer for 5 minutes.”
- “Write continuously – don’t edit. If you run out of words, write ‘I don’t know what to write’ until something comes.”
- “Focus on what’s occupying your mind right now — tasks, worries, decisions, feelings.”
- “Do not worry about grammar, spelling or style.”
- “If you prefer, do this in your own language.”
Start the timer and keep quiet while participants write. Walk the room gently (or stay silent online). If someone asks about privacy, remind them it’s personal unless they choose to share.
If you have more time, extend to 8–10 minutes or add a second round with a prompt: “Now write one sentence that summarizes the single clearest next action.”
40–55 minutes — Reflection and guided debrief
Invite reflection with structured prompts (allow silent journaling first, then share in pairs or small groups):
Reflection prompts for learners (you may display these):
• What did you notice when you started writing?
• Was anything surprising that became clearer on paper?
• Did your intensity of worry or mental clutter change after writing?
• What is one small action that feels possible now?
Facilitation options:
• For large groups: use breakout rooms of 3 people for 6 minutes each (3–4 minutes sharing).
• For sensitive contexts: opt for silent reflection with a written short-answer submission to the facilitator.
• Keep sharing optional; never pressure.
55–60 minutes — Summary & takeaways
Recap the three mechanisms in one sentence each. Reinforce that journaling is a tool, not therapy, and that small regular practice yields benefits. Offer a short practice suggestion for after the session: “Try a daily 5-minute brain dump for 7 days.”
Sample prompts you can use during or after the lesson
• “What is taking up most of my mental space today?”
• “What am I feeling right now? Describe it in one line.”
• “What is one small step I can take in the next 24 hours?”
• “If I could tell my future self one thing, what would it be?”
• “List three things you are grateful for today.”
Emotional safety & cultural sensitivity (important)
• Begin with a trigger warning: “Writing may bring up strong feelings for some people.”
• Provide exit options: allow participants to stop, step out, or shift to neutral prompts.
• Avoid forcing personal sharing — in many cultures, self-disclosure is sensitive. Offer anonymous sharing methods (paper drop box, private chat).
• If someone is visibly distressed, follow your local protocol: offer calm support, provide a short grounding prompt (“Name five things you can see right now”), and refer them to professional support if needed.
Troubleshooting common issues
• Blank page paralysis: Say “Start with ‘I don’t know what to write’ — write that phrase and keep going.”
• Over-editing: Encourage speed writing and a rule: no editing during the timed write.
• Reluctance to write: Offer alternative formats — draw a mind map or dictate voice notes into a private file.
• Language barriers: Allow writing in any language; provide translated prompts.
Assessment & instructor reflection (how to know it worked)
Short, low-burden checks:
• Ask learners to write one-line answers on a post-it or chat: “One insight I gained” and “One action I’ll try.”
• Collect anonymous feedback: Did the exercise reduce mental clutter? (Yes / No / Unsure) and one sentence why.
• Instructor reflection: After the session, note what worked (timing, prompts) and what to adjust for the next cohort.
Facilitator tips for international classrooms
• Use plain English and short sentences; supply translated prompts when possible.
• Be mindful of time zones and prayer or break times when running live synchronous sessions.
• Consider literacy differences — provide an audio prompt option for participants who prefer speaking to writing.
• Keep metaphors culturally neutral (avoid idioms that may not translate).
Final instructor note (brief)
This lesson’s power comes from pairing a simple explanation with a short, repeatable experience. Your role is to make the process feel safe, simple, and non-judgmental. Encourage learners to experiment — even five minutes of daily writing often gives the clarity they’re seeking.
Lesson 2 — Picking Your Perfect Journal
(Instructor-facing, step-by-step session plan for international course creators)
Opening note (tone & purpose):
This lesson helps learners make an intentional choice about how they will keep their journaling practice. The point is not to sell one “right” system but to teach people how to match a journaling format to their lifestyle, personality, and accessibility needs. Use plain language, model curiosity, and give space for low-tech and high-tech preferences equally.
Learning outcomes (by the end of this lesson learners will be able to):
✓ Describe at least three journaling formats (analog, digital, guided) and the strengths of each.
✓ Use a quick decision checklist to evaluate journal options against their needs.
✓ Try three formats in short practice rounds and reflect which one feels most sustainable.
Session length (recommended)
90 minutes. This includes explanation, three short practice rotations (5–7 minutes each), and a structured reflection. If you must shorten, aim for 60 minutes and compress practice to 3 minutes per format.
Materials & setup
• A selection of physical journals: plain/blank notebook, lined notebook, dotted/grid notebook, a spiral/planner, and one guided journal sample. Consider sizes A5 and A6 (pocket).
• A device (tablet/phone/laptop) with a simple note app pre-opened (no need to teach an app). Use a voice-to-text option if available.
• Pens of different weights (0.5 mm, 0.7 mm), and one marker. Optional: highlighter.
• A printed decision checklist for learners (or digital copy).
• Timer.
• Space for small group sharing.
• Accessibility supports: headphones, screen-reader-friendly device, extra-large print handouts.
Instructor preparation (before the session)
- Gather or photograph 4–5 different physical journal types so learners can see and hold them.
- Prepare a neutral digital note template (title, tags, quick prompt) to demo digital journaling.
- Print the decision checklist and a 1–5 rating sheet (Ease, Speed, Privacy, Joy, Likelihood of Habit). Use the same scale across formats.
- Prepare brief safety language about privacy (how to keep notes secure).
- Translate key prompts if you work with multilingual groups.
Step-by-step instructor script & flow
0–8 minutes — Welcome & set the intention
Say (warm, conversational):
“Today is about practical choices. A journal is a tool — like a pair of shoes. The best pair fits your feet. By the end, you’ll have tried options and a simple way to pick what will actually get used.”
Quick ask: “How many of you have tried journaling before?” (raise hands or chat) — note diversity and set non-judgmental tone.
8–20 minutes — Explain the three broad formats (keep it simple)
Introduce each with a one-line definition, pros, cons, and ideal user profile.
- Analog — a simple notebook
• Definition: Paper, pen, free-form.
• Pros: tactile, private, no battery, encourages slow reflection.
• Cons: harder to search, vulnerable to loss.
• Good for: people who enjoy handwriting, tangible ritual, or low-tech life.
Instructor cue: “Tell learners to notice how their pen feels when they write.” - Guided journals (structured physical books)
• Definition: Pre-printed prompts and sections (daily prompts, mood trackers).
• Pros: great for beginners, reduces decision fatigue, keeps you on track.
• Cons: costs money, prompts may feel limiting over time.
• Good for: learners who need prompts or want a clear format for a few months.
Instructor cue: “Emphasize that guided doesn’t mean rigid — people can add pages.” - Digital journals / note apps
• Definition: Typed notes, voice memos, searchable, sync across devices.
• Pros: searchable, easy to backup, includes multimedia (photos, audio).
• Cons: distractions (notifications), privacy considerations, screen fatigue.
• Good for: people who prefer typing, travel often, or want multimedia records.
Instructor cue: “Ask learners to consider device access and privacy.”
Pause for a quick clarifying question. Keep answers concise.
20–30 minutes — Introduce the decision checklist (tool participants will use)
Give every learner the checklist and rating sheet. Explain the criteria and scoring:
Decision criteria (rate 1–5)
• Ease of use → How simple is it to start?
• Speed → How quickly can I capture a thought?
• Privacy → How secure does this feel?
• Joy → How pleasant is it to use?
• Likelihood of habit → Will I return to it tomorrow?
Scoring tip: Add the five scores to get a quick comparative number. Higher = better fit for right now.
30–60 minutes — Practice rotation: Try three formats (hands-on)
Explain the activity: learners will spend 7 minutes with each format. After each round, they rate the experience. Rotate in this order: analog notebook → guided prompt sample → digital note. If time is short, do 5 minutes each.
Round A — Analog (7 minutes)
- Hand out a plain notebook and a pen (or ask learners to use their own).
- Prompt: “Do a 3-minute brain-dump about your current day; then write one sentence summarising a small next step.”
- Encourage speed writing, no editing.
- After time, learners rate the five criteria on the sheet.
Round B — Guided journal (7 minutes)
- Give each learner a sample guided page (a printed prompt if you don’t have books).
- Prompt sample: “Today I feel… / One thing I’m proud of… / One thing I want to let go of…”
- Encourage honest, brief responses.
- After time, rate the five criteria.
Round C — Digital quick note (7 minutes)
- Ask learners to open a note app or voice memo. Offer to show the template.
- Prompt: “Type or record a 2-minute reflection: What is taking up mental space and one tiny action?”
- Demonstrate quick tagging or saving in three steps (title, tag, save).
- After time, rate the five criteria.
60–75 minutes — Structured reflection & group sharing
Bring everyone back together. Ask small groups (3–4 people) to share one insight: which format scored highest and why? If learners prefer privacy, invite written reflections sent to the facilitator.
Reflection prompts you can display:
• Which format felt the most natural? Why?
• Did any format surprise you?
• What felt like a barrier to regular use?
• What small habit tweak might make the lower-scoring formats easier?
Encourage learners to be specific: “I liked digital because I can type fast on my commute” instead of generalities.
75–85 minutes — Decision-making exercise: create your ‘starter plan’
Ask each learner to write a short plan (3 lines):
- Chosen format (Analog / Guided / Digital / Hybrid).
- When I will journal (time of day or trigger).
- One small rule to keep it simple (e.g., 5 minutes daily, or always write one sentence before bed).
Collect a few volunteer examples and read aloud (with permission) to normalize varied choices.
85–90 minutes — Wrap-up and quick handout recap
Summarize key takeaways: no single right journal, smallness wins over perfection, and the format should remove friction. Give learners the checklist to take home.
Sample decision checklist (one-line version you can print)
✓ Ease of use: 1–5
✓ Speed for capturing thoughts: 1–5
✓ Privacy/security: 1–5
✓ Pleasure to use: 1–5
✓ Likelihood I’ll use it daily: 1–5
Add totals and a short note: “If your average is ≥4, try it for 7 days.”
Troubleshooting common barriers & facilitator tips
• Fear of ‘messing up’ a blank notebook: offer scrap paper first or encourage “first page ritual” (date it, write one sentence).
• Worry about privacy for physical journals: suggest using a lockbox, a code for sensitive entries, or a digital encrypted app.
• Digital overwhelm: recommend a minimal workflow: open app → create one-line note → tag → close. Teach ‘do not disturb’ or airplane mode while journaling.
• Cost concerns: show low-cost options (loose sheets, photocopied guided prompts) and free digital note apps without naming brands.
• Left-handed writers: provide left-handed friendly notebooks (spiral on the right) or suggest using a clipboard.
Accessibility & cultural considerations (important for international classrooms)
• Language: allow journaling in any first language. Provide prompts translated where possible.
• Right-to-left scripts: ensure guided journals or printed prompts respect RTL layouts.
• Literacy differences: invite voice notes, drawings, or bullet lists as valid journaling forms.
• Visual impairment: recommend audio prompting and screen-reader compatible apps.
• Religious or cultural norms: avoid prompts that force personal disclosure; offer neutral prompts focused on action or gratitude.
Assessment & follow-up (how to know learners are set)
• Quick post-class microtask: ask learners to test their chosen format for 7 days and record a one-line progress note each day.
• Optional reflection form: “After 7 days, my chosen format felt: Better / Same / Worse. One change I’ll make is…”
• Instructor reflection: note which formats were most popular and why; use this to adjust material options for future cohorts.
Facilitator scripts (short lines to use during the lesson)
• “There’s no best journal — only the one you will actually use.”
• “Think about friction: what makes it harder to begin? Choose the format that removes that friction.”
• “Small rituals are powerful: same place, same pen or a 2-minute timer.”
Final instructor note (brief)
This lesson is practical and experiential. Your role is to reduce decision fatigue and normalize experimentation. Encourage learners to give their chosen format a fair trial (7–14 days) and to treat the choice as reversible — switching formats is part of the learning. A sustainable journaling practice begins with a small, comfortable first step.
Lesson 3 — Creating Your Journaling Space
(Instructor-facing, step-by-step session plan for international course creators)
Opening note (tone & purpose)
This lesson helps learners design a journaling space that feels inviting, private, and easy to return to. The emphasis is practical: small, repeatable changes that reduce friction and increase the chance a person will actually journal. Encourage experimentation — the “perfect” space is the one that gets used. Use plain language and culturally neutral examples.
Learning outcomes (by the end of this lesson learners will be able to):
✓ Describe the essential elements of a functional journaling space.
✓ Set up a simple, low-cost journaling spot at home or on the go.
✓ Create a short pre-writing ritual to anchor the practice.
✓ Troubleshoot common barriers (noise, lack of privacy, small space).
Session length (recommended)
60–90 minutes. This allows time for teaching, a hands-on micro-setup activity, and a short journaling practice using the new space.
Materials & setup for the class
• Several sample set-ups to show: a desk corner, a cozy armchair, a kitchen island corner, a travel kit (small notebook + pen + pouch).
• A pen and paper for each learner, plus a digital note template for those who prefer typing.
• A simple “space audit” checklist handout.
• Timer.
• Optional: small objects to demonstrate ritual (e.g., mug, candle, timer, small plant).
• Quiet room or breakout rooms for small-group activity.
Instructor preparation (before the session)
- Prepare 3–4 visuals or short descriptions of journaling spaces (include shared-home and travel-friendly options).
- Print the space audit checklist and a one-page ergonomics tip-sheet.
- Draft three short pre-writing rituals to model (30–90 seconds each).
- Prepare accessibility alternatives (voice notes, large-print paper, seated/standing options).
- Prepare safety language about sensitive writing content and privacy.
Step-by-step instructor script & flow
0–6 minutes — Welcome & set the intention
Say (warm, direct):
“Today we create a place for your thoughts to land. A journaling space doesn’t need to be perfect — it needs to be available and comfortable enough that you’ll return to it. We’ll build one that fits your life, even if you live in a small or shared space.”
6–18 minutes — Teach the four essential elements (simple, memorable)
Introduce each element with a one-line definition and a quick practical tip.
- Accessibility — make it easy to start
• Definition: Your journal and pen are within reach when you want to write.
• Tip: Keep your journal by your bed or on a regular shelf; use a small pouch for travel. - Privacy — reduce worry about being read
• Definition: A sense that your words are for you.
• Tip: Use a drawer, an envelope, a password-protected file, or a coded system for sensitive notes. - Comfort & ergonomics — protect your body
• Definition: Your seat and surface support comfortable writing.
• Tip: If you sit, feet flat and forearms supported; raise or lower surfaces with books if needed. - Cue & ritual — create a trigger that starts the habit
• Definition: A short, repeatable action that signals “journal time.”
• Tip: Make a 30-second ritual: make tea, light a neutral-smelling candle, or set a timer.
Pause to invite one clarifying question. Keep responses concise.
18–28 minutes — Show examples (remotely or in-person)
Walk learners through 3 quick examples:
• Small-space corner: A chair, a narrow shelf for notebook, a portable lamp.
• Shared-home drawer: Journal stored in a labeled box or envelope; write at a common table during off-hours.
• Travel kit: Small pocket notebook, ballpoint pen, and a zipper pouch that lives in a bag.
Demonstrate a 30-second ritual and show how it feels.
28–46 minutes — Space audit activity & micro-setup (hands-on)
Explain the activity: learners will do a 10-minute “space audit” and a 7-minute micro-setup. Provide the checklist and set a timer.
Space audit checklist (quick prompts):
• Where are you most likely to have 5–15 minutes uninterrupted?
• What surface will you use for writing? (lap, table, lap desk)
• Where can you keep your journal so it is accessible?
• How will you protect privacy? (drawer, password, code)
• What small ritual will you use? (breath, cup, chime)
Micro-setup instructions (7 minutes):
- Choose one spot you can use tomorrow.
- Place your journal and a pen there.
- Add one simple comfort item (a mug, a cushion, or a folded blanket).
- Create a short ritual and practice it once.
- Rate the spot on three quick measures: ease (1–5), privacy (1–5), comfort (1–5).
Facilitation note: circulate (in-person) or visit breakout rooms (online) to support choices. Offer alternatives if someone lacks space — a travel pouch is a perfectly valid “space.”
46–58 minutes — Short journaling practice in the new space (5–8 minutes)
Invite everyone to sit in their newly set-up spot and do a brief practice:
Prompt: “Write for 5 minutes about what you notice about this spot — what feels right, what might get in the way, and one small change that would help.”
Set the timer and stay silent while participants write. After writing, ask them to rate again and note one tiny adjustment they’ll make.
58–72 minutes — Group reflection & troubleshooting
Gather reflections in pairs or small groups. Provide guided questions:
• What made a spot feel usable right away?
• What was the biggest barrier?
• What low-cost tweak could remove that barrier?
Share solutions that worked: movable lap desk, noise-cancelling headphones, scheduling a five-minute slot after breakfast, keeping a dedicated pen in a pouch.
Detailed guidance: lighting, sound, scent, and ergonomics
Lighting
• Natural light is best for mood but not always available — a warm desk lamp works well.
• Avoid harsh overhead fluorescents when possible; if unavoidable, use a soft table lamp or plug-in dimmer.
• For late-night journaling, choose a lamp with low blue light or put your device in night mode.
Sound & privacy
• Use short, predictable sound cues: a 2-minute chime to start and a chime to end.
• If noise is a problem, suggest low-cost earplugs or simple headphones with calming instrumental playlists (no lyrics if participants need to think).
• For shared homes, negotiate “quiet windows” — 10–15 minutes when housemates agree to minimize interruptions.
Scent & sensory comfort
• Scents can help anchor a ritual, but be mindful of allergies and cultural practices. Offer unscented options.
• Textural comfort matters: a soft cushion or a smooth writing surface improves the physical experience.
Ergonomics (quick checklist)
• Seat height: feet flat, knees at roughly 90 degrees.
• Surface: wrist and forearm supported.
• Paper angle: slight tilt toward you for comfortable handwriting.
• Screen use: position eyes about an arm’s length from the device if typing.
Privacy & digital security (practical steps)
• For physical journals: consider a small lockbox or a simple code system (e.g., initials + date) instead of full text.
• For digital notes: enable device passcode, use apps that support offline mode or local encryption, and turn off automatic cloud sync if privacy is a concern.
• Remind participants that journals are personal and that sharing should always be a choice.
Solutions for common constraints (step-by-step)
No dedicated room / small living space
- Identify a consistent trigger (first cup of tea, after brushing teeth).
- Create a portable kit: small notebook, pen, pouch.
- Use a routine: write standing at a counter, or sit on a balcony for 5 minutes.
Shared housing with limited privacy
- Select times when housemates are out or asleep.
- Keep journal in a secure place and use short, private entries.
- Agree a visible signal with housemates (e.g., closed door or placed object).
Travel / commuting
- Choose a small, tactile notebook that fits in a bag.
- Use voice notes if you cannot write.
- Use a two-line daily check-in: two sentences in transit; longer reflection at destination.
Physical limitations (mobility or hand pain)
- Use a clipboard or lap desk to change angles.
- Try voice-to-text apps or short bullet-list entries.
- Split journaling into micro-sessions (two 2–3 minute writes).
Accessibility & cultural considerations (important for international classrooms)
• Language: permit journaling in any language and offer translated prompts when possible.
• Visual impairment: provide large-print paper or screen-reader friendly templates.
• Religious and cultural norms: avoid prescriptive rituals; offer neutral options (breathing, stretching, a cup of tea).
• Gender and privacy norms: recognize that privacy needs vary by culture; provide alternatives for those who cannot write in visible spaces.
Assessment & instructor reflection (how to know it worked)
• Quick learner check: ask participants to write a one-line commitment: “My journaling spot is ______. I will use it at ______.”
• Collect short feedback: one thing that made the spot better and one remaining barrier.
• Instructor reflection: note common barriers and refine sample setups for future cohorts.
Facilitator tips (short scripts and nudges)
• “If it feels silly, try it anyway — small rituals create momentum.”
• “Choose convenience over perfection. A worn notebook that gets used is better than an expensive one never opened.”
• “If privacy is limited, write short bullet points and expand later in private.”
Final instructor note (brief)
The goal of this lesson is to remove friction and create a gentle invitation to write. Emphasize experimentation and reversibility: people can change their spot, swap formats, or shorten their ritual. Help learners leave with a concrete, testable setup they can use tomorrow.
We’re also giving these extra bonuses
Journaling for Mental Clarity PLR Course – Checklist
Journaling for Mental Clarity PLR Course – FAQs
Journaling for Mental Clarity PLR Course – Salespage Content
Package Details:
Word Count: 30 543 Words
Number of Pages: 127
Journaling for Mental Clarity – Bonus Content
Checklist
Word Count: 387 words
FAQs
Word Count: 781 words
Salespage Content
Word Count: 832 words
Total Word Count: 32 543 Words
Your PLR License Terms
PERMISSIONS: What Can You Do With These Materials?
Sell the content basically as it is (with some minor tweaks to make it “yours”).
If you are going to claim copyright to anything created with this content, then you must substantially change at 75% of the content to distinguish yourself from other licensees.
Break up the content into small portions to sell as individual reports for $10-$20 each.
Bundle the content with other existing content to create larger products for $47-$97 each.
Setup your own membership site with the content and generate monthly residual payments!
Take the content and convert it into a multiple-week “eclass” that you charge $297-$497 to access!
Use the content to create a “physical” product that you sell for premium prices!
Convert it to audios, videos, membership site content and more.
Excerpt and / or edit portions of the content to give away for free as blog posts, reports, etc. to use as lead magnets, incentives and more!
Create your own original product from it, set it up at a site and “flip” the site for megabucks!
RESTRICTIONS: What Can’t You Do With These Materials?
To protect the value of these products, you may not pass on the rights to your customers. This means that your customers may not have PLR rights or reprint / resell rights passed on to them.
You may not pass on any kind of licensing (PLR, reprint / resell, etc.) to ANY offer created from ANY PORTION OF this content that would allow additional people to sell or give away any portion of the content contained in this package.
You may not offer 100% commission to affiliates selling your version / copy of this product. The maximum affiliate commission you may pay out for offers created that include parts of this content is 75%.
You are not permitted to give the complete materials away in their current state for free – they must be sold. They must be excerpted and / or edited to be given away, unless otherwise noted. Example: You ARE permitted to excerpt portions of content for blog posts, lead magnets, etc.
You may not add this content to any part of an existing customer order that would not require them to make an additional purchase. (IE You cannot add it to a package, membership site, etc. that customers have ALREADY paid for.)
Share Now!
Latest Products


Free Sales Funnel Builder

Related Products
Popular & Trending

Featured Products