Home Cleaning PLR Course 29k words
in Home Cleaning PLR , Home Improvement PLR , Home Improvement PLR Ebooks , PLR Checklists , PLR eBooks , PLR eCourses , PLR List Building Reports , Premium PLR , Premium PLR eBooks , Premium PLR Packages , Premium White Label Brandable PLR Coaching Courses , Private Label Rights ProductsChoose Your Desired Option(s)
has been added to your cart!
have been added to your cart!
#homecleaning #plrcourse #cleanhometips #housekeeping #homeorganization #cleaninghacks #plrcontent #homecare #diycleaning #cleanliving
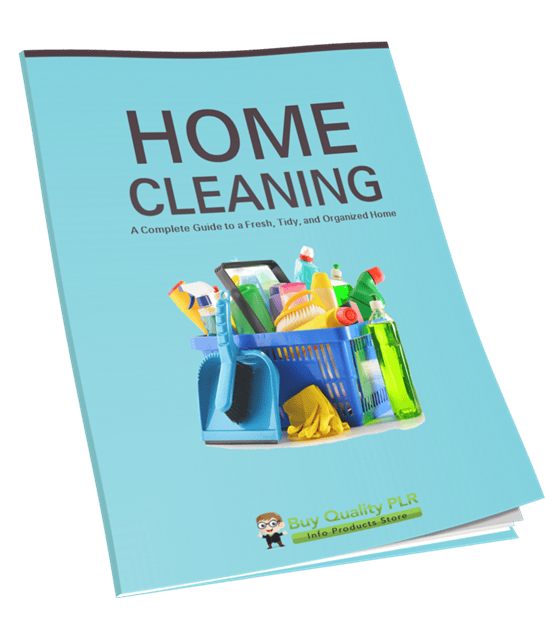
Home Cleaning PLR Course – A Complete Guide to a Fresh, Tidy, and Organized Home
Are you ready to provide your audience with the ultimate solution for maintaining a sparkling clean home? The Home Cleaning PLR Course is a comprehensive, ready-to-use digital product that teaches people how to clean, organize, and maintain their homes with ease. Perfect for entrepreneurs, coaches, and digital marketers, this PLR course is packed with actionable strategies, tips, and techniques that your audience will love.
With full Private Label Rights (PLR), you can rebrand, resell, and monetize this course in multiple ways—without spending months creating content from scratch. Whether you’re building a membership site, creating a multi-week e-class, or offering a premium downloadable guide, this course gives you the flexibility to earn in the way that suits your business best.
Presenting…
Home Cleaning PLR Course 29k words
🌟 Why the Home Cleaning Niche Is Hot Right Now
A clean and organized home isn’t just about appearances—it’s about creating a space that promotes productivity, calmness, and wellbeing. Busy professionals, stay-at-home parents, and anyone juggling multiple responsibilities want practical solutions that make cleaning easier and more efficient.
The home cleaning niche is evergreen, meaning there will always be a demand for content that helps people maintain a tidy, healthy home. By offering a comprehensive course in this niche, you provide real value while tapping into a highly profitable market.
🏡 What’s Inside the Home Cleaning PLR Course
This course is structured into five detailed modules, giving your audience a step-by-step roadmap to a cleaner, more organized home. Each module is designed for maximum impact and usability.
Module 1: Understanding the Basics of Home Cleaning
Starting off with the fundamentals, this module ensures your audience is fully prepared:
- Know Your Cleaning Supplies: Learn which essential tools and products are must-haves, from microfiber cloths and sponges to brooms, mops, and vacuums.
- Organize Your Cleaning Area: Tips on creating a central cleaning supply station so everything is within easy reach.
- Set a Routine: How to build a daily or weekly cleaning schedule that fits any lifestyle.
- Safety First: Keep families safe by handling cleaning products responsibly, using gloves, ventilating rooms, and keeping pets and children away from chemicals.
Module 2: Room-by-Room Cleaning Strategy
A systematic approach makes cleaning manageable and efficient:
- Living Room: Dust, vacuum, wipe surfaces, and clean hidden areas like under the couch and shelves.
- Kitchen: Clean countertops, sinks, stovetops, refrigerators, and microwaves—plus daily habits to maintain a spotless kitchen.
- Bedrooms: Make beds, tidy nightstands, dust furniture, vacuum floors, and organize closets for a restful space.
- Bathroom: Scrub toilets, sinks, and mirrors, replace towels, mop floors, and ensure a hygienic, fresh bathroom environment.
Module 3: Deep Cleaning Techniques
Go beyond daily cleaning with specialized strategies:
- Windows: Clean inside and out using streak-free solutions or simple water and vinegar mixtures, including window tracks.
- High-Touch Surfaces: Disinfect doorknobs, light switches, and remote controls to reduce germs.
- Floors: Vacuum carpets, mop hard floors, and select the right cleaning solutions for each surface.
- Upholstery and Fabrics: Remove dust and allergens from furniture, curtains, and other fabrics.
Module 4: Organizing Your Space Efficiently
A clean home is more than just surface cleaning—it’s about smart organization:
- Declutter Your Space: Remove items you no longer need to simplify cleaning and improve functionality.
- Create Storage Solutions: Use bins, baskets, shelves, and labels to keep everything organized.
- Organize Your Kitchen: Rearrange pantry items, use drawer organizers, and discard expired products.
- Maximize Closet Space: Utilize space-saving hangers, bins, and seasonal storage for a streamlined wardrobe.
Module 5: Maintaining a Clean Home
The key to long-term cleanliness is consistency:
- Make Cleaning a Habit: Incorporate daily tasks to prevent mess from piling up.
- Regularly Maintain Appliances: Keep refrigerators, microwaves, ovens, and HVAC systems clean.
- Clean as You Go: Reduce buildup by tidying during cooking or daily activities.
- Involve the Family: Assign small tasks to household members to make cleaning efficient and fun.
📚 Bonus Materials Included
To make this course even more valuable, your purchase also includes:
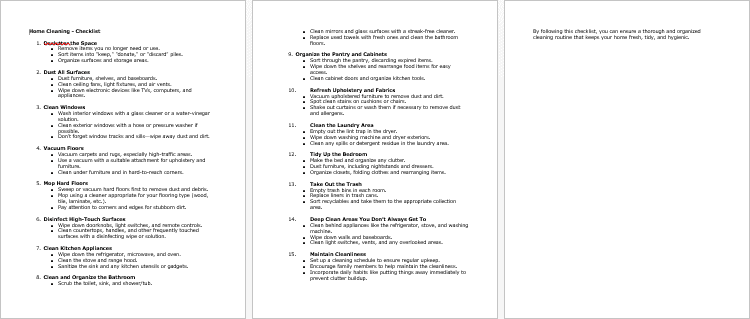
- Home Cleaning Checklist (514 Words): A simple, actionable checklist for daily and weekly cleaning.
- Home Cleaning FAQs (1,165 Words): Covers common questions and concerns, helping your audience get the most out of the course.
- Home Cleaning Pre-Written Sales Page (762 Words): Ready-to-use sales content to promote your product and boost conversions.
💡 How You Can Use and Profit From This Course
The Home Cleaning PLR Course gives you countless ways to monetize your purchase:
- Sell as-is: Rebrand and sell directly as a digital course, guide, or report.
- Break Into Small Reports: Offer individual modules or sections for $10–$20 each.
- Bundle With Other Content: Create premium packages for $47–$97.
- Membership Site: Offer exclusive access to members for monthly recurring revenue.
- Multi-Week E-Class: Convert it into an interactive course priced $297–$497.
- Physical Products: Turn it into printed guides, journals, or planners for higher perceived value.
- Multimedia Content: Convert it into audio or video lessons.
- Lead Magnets: Use excerpts to drive email subscriptions or blog traffic.
- Site Flip: Build a niche cleaning site and sell it for profit.
📜 License Terms
Permissions:
- Sell and rebrand content as your own.
- Create smaller reports or bundles.
- Convert into audio, video, or membership content.
- Excerpt or edit for lead magnets or blog posts.
Restrictions:
- Cannot pass PLR rights to customers.
- Maximum affiliate commission is 75%.
- Cannot give the complete materials away for free.
- Cannot add content to existing customer orders without an additional purchase.
🔥 Why This Course Is a Must-Have
- High Demand: Home cleaning is a topic everyone can relate to.
- Comprehensive: Covers cleaning, deep cleaning, organization, and maintenance.
- Ready-to-Sell: Includes pre-written sales page, checklist, and FAQs.
- Flexible: Perfect for digital, physical, or multimedia products.
- Profitable: Multiple ways to monetize for both passive and premium income streams.
Take Action Today
Stop spending months creating your own content from scratch. The Home Cleaning PLR Course is fully structured, professionally written, and ready to sell or repurpose. Whether you want to create a downloadable guide, a membership site, or a multi-week online course, this PLR package provides everything you need to deliver value and start profiting immediately.
Give your audience the tools, techniques, and confidence to maintain a sparkling clean, organized home—and position yourself as a trusted authority in the home and lifestyle niche.
Start today and turn this high-demand course into a profitable business opportunity!
has been added to your cart!
have been added to your cart!
Here A Sample of Home Cleaning PLR Course
Welcome to the “Home Cleaning” course! In this course, we’ll guide you step-by-step to make home cleaning an easy and enjoyable process. By the end of this course, you’ll have all the tools, tricks, and techniques to maintain a sparkling clean home in no time!
Module 1: Understanding the Basics of Home Cleaning
Step 1: Know Your Cleaning Supplies
Before diving into the world of home cleaning, it’s crucial to have the right cleaning supplies at your disposal. This ensures you’re not only efficient in your work but also effective in achieving a sparkling, tidy home. In this step, we’ll walk you through the essential cleaning tools, what they are used for, and some additional tips to ensure your cleaning routine is top-notch. Let’s begin!
1.1 Microfiber Cloths
Microfiber cloths are a must-have in your cleaning toolkit. Unlike regular cotton cloths, microfiber is designed to trap dirt, dust, and bacteria effectively, making it highly efficient for cleaning various surfaces. These cloths can be used for dusting, wiping down countertops, and cleaning glass, mirrors, and stainless steel. They also come in different colors, which can help with color-coding tasks (e.g., using different colors for different areas of the house to prevent cross-contamination).
Tip: Make sure to wash microfiber cloths separately to maintain their effectiveness. Avoid using fabric softeners, as they can reduce the cloth’s ability to trap dust and dirt.
1.2 Brooms
A broom is essential for sweeping hard floors, particularly in rooms where dust and dirt tend to accumulate. Look for brooms with soft bristles for hardwood or tile floors and stiffer bristles for outdoor use, such as in the garage or porch. The type of broom you choose will depend on the flooring you have in your home and the areas you’re cleaning.
Tip: If you have dust allergies or need to remove pet hair, opt for a broom with rubber bristles, which are highly effective at attracting and gathering dust and hair.
1.3 Mops
Mops are indispensable when it comes to cleaning larger floor areas, particularly in kitchens, bathrooms, and hallways. You can choose from various types of mops, such as traditional string mops, sponge mops, and microfiber mops. Microfiber mops, in particular, are known for their ability to clean without the need for harsh chemicals, making them ideal for those seeking eco-friendly options.
When selecting a mop, ensure the head is easily washable and replaceable. Also, consider a mop with an adjustable handle for easier maneuvering, especially in tight spaces.
Tip: For effective floor cleaning, always ensure that the mop head is damp, not soaking wet, to avoid streaks on your floor.
1.4 Sponges
Sponges are versatile cleaning tools that come in handy in many situations. They’re great for scrubbing dishes, cleaning countertops, or tackling tough stains on kitchen surfaces. You’ll find sponges in a variety of types, such as abrasive sponges for heavy-duty cleaning, soft sponges for delicate surfaces, and microfiber sponges for general cleaning.
When selecting a sponge, make sure to choose the right type for the surface you’re cleaning. Harsh abrasive sponges may scratch delicate surfaces like glass or porcelain, while softer sponges are better for these surfaces.
Tip: Always allow your sponges to dry out between uses to prevent bacteria growth. Regularly disinfecting your sponges with a vinegar-water solution can also help extend their lifespan.
1.5 Vacuum Cleaner
A vacuum cleaner is a fundamental tool for any home cleaning routine. Whether you have carpeted floors, hardwood, or tile, a vacuum is essential for picking up dirt, dust, pet hair, and allergens. Modern vacuum cleaners come with a variety of features, such as adjustable suction power, HEPA filters, and different attachments for cleaning upholstery, crevices, and even curtains.
When choosing a vacuum cleaner, consider the type of flooring in your home. For carpeted homes, opt for a vacuum with strong suction and a rotating brush head to get deep into fibers. For homes with mostly hard floors, consider a vacuum with a hard floor setting to avoid scattering debris.
Tip: Empty the vacuum cleaner bag or bin regularly to maintain optimal suction power. Additionally, regularly clean or replace the vacuum filter to ensure your vacuum performs at its best.
1.6 Cleaning Products (Store-Bought or Natural)
Cleaning products play an essential role in the effectiveness of your cleaning routine. You can opt for either store-bought cleaning products or make your own natural alternatives. The choice depends on personal preference, cleaning needs, and the level of environmental consciousness you wish to incorporate into your cleaning routine.
Store-Bought Products:
These typically include all-purpose cleaners, disinfectants, floor cleaners, and glass cleaners. Choose products that are suitable for the surfaces you plan to clean. For instance, use glass cleaner for mirrors and windows, and an all-purpose cleaner for countertops and tables. Always check the labels to ensure you’re using the right product for your needs.
Natural Cleaning Products:
If you prefer a more eco-friendly cleaning routine, natural products like vinegar, baking soda, and essential oils can serve as powerful alternatives to chemical cleaners. Vinegar is excellent for cleaning glass, countertops, and removing odors, while baking soda can be used for scrubbing surfaces and deodorizing carpets. Essential oils not only add a pleasant fragrance but also have antibacterial properties, making them a great addition to your natural cleaning supplies.
Tip: Be cautious when mixing cleaning products. Never mix bleach with ammonia or vinegar, as this can produce harmful fumes. Always read product labels for safety instructions.
1.7 Additional Tools to Consider
Beyond the basics, there are several other tools that may help you with more specialized cleaning tasks:
- Dusters: Choose between extendable dusters for high places (e.g., ceiling fans, light fixtures) or handheld dusters for regular dusting of furniture and shelves.
- Scrub Brushes: For tough grime in areas like grout lines, around taps, or stovetops, a stiff-bristled scrub brush can make the job easier.
- Rubber Gloves: Protect your hands while cleaning, especially when using harsh chemicals or working with water. Opt for durable rubber gloves that provide a good grip.
- Squeegees: A squeegee is invaluable for cleaning windows and shower doors, leaving them streak-free and gleaming.
- Air Fresheners: Keep your home smelling fresh with a variety of air fresheners, from spray mists to essential oil diffusers. Ensure they are safe and compatible with your home’s air quality.
Conclusion
Knowing what cleaning supplies to use and how to use them properly is essential for achieving a thorough and efficient cleaning process. Whether you choose to use store-bought products or natural alternatives, make sure your cleaning tools are appropriate for the task at hand. Keep your supplies organized and always ready for use. With these essential tools in your cleaning arsenal, you’ll be well on your way to a cleaner, fresher home, no matter where in the world you are cleaning.
Step 2: Organize Your Cleaning Area
Having an organized cleaning area is just as crucial as having the right tools for the job. When your cleaning supplies are stored systematically, you save time and effort during each cleaning session. It also prevents frustration when you can’t find what you need and ensures that everything stays in good condition for future use. In this step, we will guide you through how to efficiently set up and maintain a designated cleaning supply station.
2.1 Why Organize Your Cleaning Area?
Before we get into the specifics of organizing, let’s take a moment to understand why it matters. An organized cleaning area:
- Saves time: When everything is in its place, you won’t waste time searching for cleaning products or tools. This allows you to spend more time actually cleaning and less time gathering supplies.
- Improves efficiency: Having cleaning tools readily available means you can move quickly from task to task, avoiding unnecessary interruptions.
- Prevents damage: Storing cleaning products in an orderly way ensures they don’t spill, dry out, or become damaged by improper storage. Proper storage can also extend the lifespan of your cleaning tools.
- Reduces clutter: An organized space keeps your home tidy and minimizes visual clutter, which is important for maintaining an overall clean and pleasant environment.
Now that we understand the importance of organization, let’s dive into how you can set up your cleaning area.
2.2 Choose the Right Location for Your Cleaning Station
The first step in organizing your cleaning supplies is to choose an appropriate location for your cleaning station. Ideally, this should be a central and easily accessible space that allows you to quickly grab what you need, without the need to trek around the house.
Here are some options to consider:
- A Dedicated Cabinet or Cupboard: If you have a spare cabinet or cupboard in your home, this is an excellent place to store your cleaning supplies. It keeps everything out of sight, and you can arrange products on shelves, in baskets, or using organizers for easy access.
- Under-Sink Storage: Many kitchens and bathrooms have under-sink cabinets, which can be utilized to store cleaning supplies. This area is perfect for household cleaning products and smaller tools, but make sure it’s organized enough to avoid clutter.
- A Cleaning Caddy: If you prefer to keep your supplies portable, a cleaning caddy can be a great solution. This is especially useful if you need to move from room to room or if you prefer to keep cleaning supplies out of sight in a cupboard but need quick access.
- A Dedicated Closet: If you have more space available, such as a broom closet or a dedicated storage room, this can be the ideal place to store all your cleaning products, tools, and extra supplies. Make sure it’s ventilated and dry to prevent any products from becoming ineffective.
Tip: When selecting your storage area, make sure it’s easily accessible to everyone in your household who might need to use the cleaning supplies. Accessibility is key to ensuring a smooth and hassle-free cleaning experience.
2.3 Group Similar Items Together
Once you’ve selected your storage location, the next step is to group your cleaning supplies by category. This will make it easier for you to find the right product when needed, and will ensure you’re not constantly shuffling through bottles or tools.
Here are some common categories to consider:
- General Cleaning Products: Store all-purpose cleaners, surface cleaners, and disinfectants in one area. These are your go-to products for daily or weekly cleaning tasks and should be easily accessible.
- Specialty Cleaners: For products that are designed for specific tasks, such as glass cleaners, stainless steel cleaners, or bathroom-specific products, designate a separate section in your cleaning station. Label these so you can easily identify which product to use for each job.
- Floor Care: If you use different products for different flooring types (e.g., wood, tile, carpet), group them together. This might include floor cleaners, mops, broom attachments, and specialized tools for floor care.
- Sponges and Scrubbers: Keep all your sponges, scrub brushes, microfiber cloths, and cleaning pads in one area. You can use a small bin or drawer organizer to keep them separate and avoid cross-contamination (for example, using a dish sponge for the floor).
- Tools and Accessories: Store your cleaning tools such as brooms, mops, dustpans, vacuums, and microfiber cloths in a section dedicated to these items. It’s essential to keep your tools organized to maintain their longevity and efficiency.
Tip: Label each section or storage container with clear tags. This reduces the time spent searching for products and ensures everyone in the household can easily locate what they need.
2.4 Maximize Space with Organizers and Storage Solutions
To maximize the space in your cleaning station, consider using various storage solutions and organizers. By organizing your supplies in an efficient manner, you’ll be able to store more items while keeping everything accessible.
Here are some storage solutions to consider:
- Shelves and Racks: Install shelves or racks inside your cupboard or storage area to keep products organized and off the floor. Adjustable shelves are a great way to create more space for taller items like bottles or spray cans.
- Baskets and Bins: Use baskets or bins to store items like cleaning cloths, sponges, and gloves. Label the bins for easy identification. This also helps keep smaller items organized and prevents them from rolling around or getting lost.
- Over-the-Door Hooks or Racks: For larger cleaning tools, such as brooms and mops, consider installing over-the-door hooks or racks. This allows you to hang your tools out of the way, preventing them from taking up valuable shelf space.
- Clear Containers: For smaller items like gloves, brushes, or extra sponges, use clear containers or ziplock bags so you can easily see what’s inside without opening each one. This is particularly helpful if you have multiple similar products.
- Drawer Organizers: If you’re storing your supplies in a drawer or caddy, use dividers or small trays to separate items like cleaning brushes, wipes, and spray bottles. This helps prevent items from getting tangled or jumbled.
Tip: When organizing, ensure that heavier items are stored lower down for safety and convenience. Lighter items should be stored on higher shelves or areas where you can easily reach them.
2.5 Regularly Maintain and Clean Your Cleaning Station
Just like the rest of your home, your cleaning station needs attention from time to time. Regularly cleaning and maintaining your cleaning area will keep it organized and ensure that your tools and products are in top condition.
Here’s how you can maintain your cleaning station:
- Reorganize Periodically: Every few months, take a moment to reassess the organization of your cleaning supplies. Remove empty or expired products, and make sure everything is in its proper place.
- Keep it Clean: Wipe down shelves, containers, and the floor of your cleaning area regularly. Dust and dirt can build up, especially if cleaning supplies are being used frequently, so ensure that your cleaning station remains hygienic.
- Check for Expired Products: Just like any other product in your home, cleaning supplies can expire or lose effectiveness over time. Periodically check the expiration dates on your cleaning products, especially if they are store-bought, and replace them as needed.
Tip: Make it a habit to clean your cleaning station whenever you clean the rest of your home. This will help you stay on top of it and prevent clutter from accumulating.
Conclusion
By designating a specific cleaning station and organizing your supplies, you’re creating a more efficient and productive environment for your cleaning routine. You’ll find that maintaining an organized cleaning area reduces stress, saves time, and ensures your cleaning tasks are completed effectively. Whether you’re in a small apartment or a large home, these organizing strategies can be scaled to fit any space, helping you keep your cleaning supplies in perfect order.
Step 3: Set a Routine
Setting a cleaning routine is one of the most effective ways to maintain a consistently clean and fresh home. A cleaning routine doesn’t mean you need to spend hours every day cleaning; rather, it’s about being consistent and breaking down tasks into manageable chunks. This step will guide you through creating a sustainable and practical cleaning schedule that fits your lifestyle.
3.1 Why a Cleaning Routine is Essential
A regular cleaning routine brings structure to your home maintenance tasks, ensuring that things don’t pile up over time. Without a routine, it’s easy to feel overwhelmed by the sheer volume of cleaning needed, which can cause procrastination. A cleaning routine helps prevent this by:
- Maintaining cleanliness: Regular cleaning stops dirt and grime from building up. This means you won’t have to spend hours deep cleaning in the future.
- Reducing stress: Knowing that there’s a plan in place to keep things tidy helps you stay on top of your cleaning and reduces feelings of being overwhelmed.
- Creating a healthy environment: Consistent cleaning ensures that dust, allergens, and germs are minimized, making your home a healthier place to live.
With that said, let’s dive into how you can design and implement your own routine.
3.2 Determine Your Cleaning Frequency
The first step in setting your routine is deciding how often to clean. This depends on factors like the size of your home, the number of people living in it, your lifestyle, and personal preferences. Not every task needs to be done daily, but some cleaning duties should be completed more often than others.
Here are some common frequency categories for different types of cleaning tasks:
- Daily Tasks: These are small, quick tasks that prevent clutter from accumulating and keep your home in a presentable state. Daily tasks often take just 10 to 15 minutes and include:
- Wiping down kitchen counters
- Making the bed
- Doing the dishes
- Sweeping high-traffic areas
- Tidying up living areas
- Spot-cleaning spills or messes as they happen
- Weekly Tasks: These tasks require a bit more effort and time but don’t need to be done every day. Weekly tasks might include:
- Vacuuming carpets and rugs
- Mopping floors
- Dusting surfaces and furniture
- Cleaning mirrors and windows
- Changing bed linens
- Cleaning bathroom surfaces (toilets, sinks, and showers)
- Monthly Tasks: These tasks don’t need to be done as frequently but are still necessary for maintaining cleanliness. Examples include:
- Deep cleaning kitchen appliances (like the oven or fridge)
- Washing windows and window sills
- Cleaning baseboards and vents
- Decluttering storage spaces
- Washing throw blankets and pillows
- Seasonal or Biannual Tasks: These are deep cleaning tasks that require more time and effort but are necessary to maintain a fresh and healthy home. These might include:
- Carpet deep cleaning
- Cleaning out the garage or basement
- Organizing closets and drawers
- Washing exterior windows or power washing the house
Tip: Use a calendar or cleaning planner to schedule these tasks. This way, you won’t forget about the bigger cleaning jobs, and you’ll stay on top of your daily and weekly routines.
3.3 Break Down Tasks Into Manageable Chunks
One of the main reasons people shy away from cleaning is that they perceive it as a daunting, time-consuming task. To avoid this, break down your cleaning tasks into smaller, manageable steps. This will make it feel much more achievable and less overwhelming.
Here’s how to break down your tasks:
- Create Checklists: Write out specific cleaning tasks for each room or area of your home. For example, instead of writing “clean the kitchen,” list tasks like “wipe countertops,” “clean stovetop,” “mop the floor,” and “empty the trash.” This will allow you to focus on one task at a time without feeling like you have to clean the entire kitchen in one go.
- Use Timers: Set a timer for 10-15 minutes for each task. You’d be surprised how much you can get done in a short period of time. It helps you focus on the job at hand and prevents distractions. You can even challenge yourself to clean as much as possible within that time frame.
- Tackle One Room at a Time: Instead of thinking about cleaning the entire house, focus on one room or area at a time. This approach allows you to complete each area thoroughly and gives you a sense of accomplishment when you finish.
3.4 Build Flexibility Into Your Routine
Life can be unpredictable, so it’s important to build some flexibility into your cleaning routine. Sometimes tasks won’t be completed exactly as planned, and that’s okay. The goal is to make cleaning a part of your daily life, not a source of stress.
Here are some ways to add flexibility:
- Prioritize Tasks: If something unexpected comes up and you don’t have time to clean everything, prioritize your tasks. If you can’t vacuum every room, focus on high-traffic areas like the living room or kitchen. If you skip dusting this week, don’t worry—it can be done next week.
- Use “Catch-Up” Days: If you miss a day of cleaning or you fall behind, designate a “catch-up day” to tackle tasks that were skipped. You don’t need to do it all in one day—spread tasks across a few days if necessary.
- Ask for Help: If you live with others, don’t hesitate to delegate tasks. A cleaning routine doesn’t have to be a solo effort. If you have kids, assign them age-appropriate chores, like wiping down surfaces, folding laundry, or putting away toys. If you live with a partner or roommate, split the responsibilities.
Tip: Use a flexible checklist or calendar, which allows you to shift tasks based on your changing schedule.
3.5 Stick to the Routine
The key to success with your cleaning routine is consistency. Consistency doesn’t mean perfection—it means following through with your cleaning habits day after day, week after week. Over time, it will become second nature, and you’ll be able to maintain a clean and organized home with minimal effort.
Here are some tips for staying consistent with your routine:
- Start Small: If you’re not used to cleaning regularly, begin with a few small tasks and gradually increase your cleaning frequency. This way, you can build momentum without overwhelming yourself.
- Set Reminders: Use alarms, phone notifications, or calendar alerts to remind yourself when it’s time to clean. This can help you stay on track, especially if you have a busy schedule.
- Reward Yourself: Celebrate your accomplishments. After you complete your cleaning tasks for the day or week, take a moment to enjoy your hard work. You could reward yourself with a nice meal, a cup of tea, or some relaxation time.
- Track Progress: Keep a cleaning journal or checklist where you can track what you’ve done. This will help you stay motivated, and it’s a great way to look back at how much you’ve accomplished over time.
Tip: If you find yourself struggling to stay consistent, enlist the help of a cleaning buddy. Having someone to clean with can make the process more enjoyable and help keep you accountable.
Conclusion
By setting a cleaning routine, you’ll find that maintaining a clean home becomes a natural and manageable part of your life. The key to success is consistency—breaking down tasks into smaller steps, prioritizing, and staying flexible while keeping your goals in sight. With a little practice, your cleaning routine will become effortless, and you’ll enjoy the rewards of a fresh, tidy home.
Step 4: Safety First
Ensuring your safety while cleaning should be your top priority. Cleaning can involve the use of various products and tools, some of which may be harmful if not handled correctly. By incorporating safety measures into your routine, you can protect yourself, your family, and your home from potential hazards. This step provides detailed guidance on how to maintain a safe environment while cleaning.
4.1 Understand the Importance of Safety in Cleaning
Cleaning supplies, whether store-bought or homemade, can contain chemicals that are harmful if used improperly. Even seemingly harmless tools like vacuums or brooms can cause accidents if not handled with care. By staying informed about safety measures, you ensure that your home remains clean, without putting anyone at risk.
Here are some reasons why safety is crucial in cleaning:
- Chemical Hazards: Many commercial cleaning products contain chemicals that can cause burns, skin irritation, respiratory issues, or eye damage if not used properly.
- Physical Safety: Cleaning often involves bending, lifting, or reaching, which can lead to physical strain or injury if not done carefully.
- Preventing Accidents: Misuse of cleaning equipment, such as vacuums or mops, can result in falls, electric shocks, or other accidents.
- Environmental Safety: Some cleaning products can have harmful effects on the environment if not disposed of correctly.
By following these safety guidelines, you protect yourself, your family, and the environment.
4.2 Read and Follow Product Labels
One of the most essential steps in cleaning safely is reading and understanding the labels on cleaning products. The product label contains valuable information that helps you use the product safely and effectively.
Here’s how to interpret and follow the product labels:
- Ingredients: Cleaning products often list their active ingredients. Some ingredients, like ammonia or bleach, can be hazardous. Be sure to know what chemicals you are using and their potential dangers. If you’re sensitive to specific chemicals or have allergies, choose products that are free from harsh ingredients.
- Safety Warnings: Always look for any safety warnings or precautions on the label. This might include:
- Wear protective gear such as gloves or goggles.
- Avoid inhaling fumes or ensure proper ventilation.
- Keep out of reach of children and pets.
- Do not mix with other chemicals (e.g., mixing bleach with ammonia can create toxic gases).
- Instructions for Use: Follow the instructions on the label carefully. If the product is meant to be diluted, don’t skip this step. Using it in a more concentrated form can cause damage to surfaces or increase the risk of injury.
- Storage Recommendations: Pay attention to storage instructions. Many cleaning products should be stored in a cool, dry place, away from children, pets, or heat sources. Some might need to be kept upright to avoid spills.
- Expiration Dates: Some cleaning products lose their effectiveness over time. If the product has an expiration date, use it before it expires to ensure it works as intended.
Tip: If you ever lose the product label, you can usually find it online by searching for the product’s name and “safety data sheet.”
4.3 Wear Appropriate Protective Gear
Protective gear is crucial for ensuring your safety when cleaning. Whether you’re handling chemical products, working in tight spaces, or cleaning areas that require bending or reaching, the right gear will minimize risk and help you clean more efficiently.
Here are the most common protective gear items to wear while cleaning:
- Gloves: Cleaning gloves help protect your skin from harsh chemicals and irritants, and they prevent your hands from drying out. Rubber or latex gloves are commonly used for cleaning. Choose a durable pair that fits well to ensure comfort and protection.
- Tip: If you have sensitive skin or allergies to latex, opt for vinyl or nitrile gloves.
- Goggles: If you’re using cleaning products that can splash or produce fumes, wearing goggles will protect your eyes. This is particularly important when working with chemicals like bleach or ammonia.
- Tip: Look for goggles that offer a tight fit to ensure no fumes or liquids can reach your eyes.
- Tip: Look for goggles that offer a tight fit to ensure no fumes or liquids can reach your eyes.
- Masks: Certain cleaning tasks, like scrubbing or dusting, can stir up dust and debris. Inhaling these particles can irritate your respiratory system. A simple dust mask or, in more severe cases, a respirator can offer protection. Masks are especially important when using aerosol cleaners or cleaning products with strong fumes.
- Tip: Consider wearing a N95 respirator if you’re cleaning mold, heavy dust, or using strong chemicals.
- Tip: Consider wearing a N95 respirator if you’re cleaning mold, heavy dust, or using strong chemicals.
- Non-slip Footwear: When mopping or cleaning wet areas, wear non-slip shoes to prevent slips and falls. This is essential in maintaining physical safety while cleaning.
- Tip: Opt for shoes that have good grip, are comfortable for long periods, and are waterproof if you’re cleaning areas like bathrooms or kitchens.
4.4 Proper Ventilation
Good ventilation is key when using cleaning products, particularly those containing chemicals. Poor ventilation can lead to an accumulation of fumes, which may cause headaches, dizziness, or nausea, and in some cases, long-term health effects. Ensuring that the area is well-ventilated will help prevent these issues.
Here’s how to improve ventilation during cleaning:
- Open Windows and Doors: Whenever possible, open windows and doors to allow fresh air to circulate. This helps to disperse any fumes from cleaning products.
- Use Exhaust Fans: Many kitchens and bathrooms have exhaust fans designed to ventilate air. Turn these on when cleaning to improve airflow and reduce the concentration of cleaning fumes.
- Turn on Air Purifiers: If you have an air purifier with a HEPA filter, turn it on while cleaning. This can help remove dust and airborne particles, making the air safer to breathe.
- Take Breaks: If you’re cleaning in a confined space with poor ventilation (like a bathroom or basement), take regular breaks to step outside or into a well-ventilated room to breathe fresh air.
4.5 Keep Children and Pets Safe
Children and pets are naturally curious, and they may be attracted to cleaning products or tools, which could pose risks. It’s essential to keep these vulnerable family members away from cleaning supplies and areas where chemicals are used.
Here’s how to ensure your family stays safe:
- Store Cleaning Products Safely: Always store cleaning chemicals in a secure cabinet or locked cupboard, out of reach of children and pets. Consider using childproof locks on cabinets containing cleaning products.
- Use Non-Toxic Products: If possible, opt for natural or non-toxic cleaning products, especially if you have young children or pets in the house. These products are less likely to cause harm if accidentally ingested or touched.
- Keep Cleaning Areas Off-Limits: If you’re cleaning a room with harsh chemicals, make sure to close the door to keep children and pets out. You can also use baby gates to block access to specific areas, like bathrooms or kitchens.
- Clean Up Spills Immediately: If you spill a cleaning product, especially one that is toxic, clean it up immediately. Children and pets may unknowingly come into contact with it, so it’s important to prevent exposure.
4.6 Recognize Emergency Procedures
Accidents can still happen, even with the best precautions. It’s important to be prepared for potential cleaning emergencies, whether it’s a chemical spill, a fall, or an accidental inhalation of fumes.
Here’s how to handle cleaning-related emergencies:
- In Case of Chemical Exposure: If you or someone else is exposed to a harmful cleaning product, immediately follow the emergency instructions on the product label. If necessary, call poison control or emergency services.
- For skin exposure: Rinse the area with plenty of water.
- For eye exposure: Flush the eyes with water for at least 15 minutes.
- For ingestion: Do not induce vomiting unless directed by a medical professional.
- In Case of a Fall or Injury: If you slip or fall while cleaning, check for injuries and seek medical help if needed. Make sure your cleaning area is free of obstacles to reduce the risk of falls in the future.
- First Aid Kit: Always keep a first aid kit on hand in case of minor injuries like cuts, scrapes, or burns. Ensure the kit includes bandages, antiseptic wipes, burn cream, and gauze.
Conclusion
By following safety guidelines and using protective measures, you ensure that your cleaning tasks are both effective and risk-free. Always read labels, wear appropriate gear, ensure proper ventilation, and keep cleaning products away from children and pets. When safety becomes a priority, cleaning can become a stress-free and secure task for everyone involved.
We’re also giving these extra bonuses
Home Cleaning – Checklist
Home Cleaning – FAQs
Home Cleaning – Salespage Content
Package Details:
Word Count: 27 575 Words
Number of Pages: 96
Home Cleaning – Bonus Content
Checklist
Word Count: 514 words
FAQs
Word Count: 1165 words
Salespage Content
Word Count: 762 words
Total Word Count: 30 016 Words
Your PLR License Terms
PERMISSIONS: What Can You Do With These Materials?
Sell the content basically as it is (with some minor tweaks to make it “yours”).
If you are going to claim copyright to anything created with this content, then you must substantially change at 75% of the content to distinguish yourself from other licensees.
Break up the content into small portions to sell as individual reports for $10-$20 each.
Bundle the content with other existing content to create larger products for $47-$97 each.
Setup your own membership site with the content and generate monthly residual payments!
Take the content and convert it into a multiple-week “eclass” that you charge $297-$497 to access!
Use the content to create a “physical” product that you sell for premium prices!
Convert it to audios, videos, membership site content and more.
Excerpt and / or edit portions of the content to give away for free as blog posts, reports, etc. to use as lead magnets, incentives and more!
Create your own original product from it, set it up at a site and “flip” the site for megabucks!
RESTRICTIONS: What Can’t You Do With These Materials?
To protect the value of these products, you may not pass on the rights to your customers. This means that your customers may not have PLR rights or reprint / resell rights passed on to them.
You may not pass on any kind of licensing (PLR, reprint / resell, etc.) to ANY offer created from ANY PORTION OF this content that would allow additional people to sell or give away any portion of the content contained in this package.
You may not offer 100% commission to affiliates selling your version / copy of this product. The maximum affiliate commission you may pay out for offers created that include parts of this content is 75%.
You are not permitted to give the complete materials away in their current state for free – they must be sold. They must be excerpted and / or edited to be given away, unless otherwise noted. Example: You ARE permitted to excerpt portions of content for blog posts, lead magnets, etc.
You may not add this content to any part of an existing customer order that would not require them to make an additional purchase. (IE You cannot add it to a package, membership site, etc. that customers have ALREADY paid for.)
Share Now!
Latest Products
Free Sales Funnel Builder

Related Products
Popular & Trending

Featured Products