Facebook Ads Secrets PLR Course 22k Words
in Facebook PLR , Facebook PLR Ebooks , Internet Marketing PLR , Internet Marketing PLR eBooks , PLR eBooks , PLR eCourses , PLR List Building Reports , Premium PLR , Premium PLR eBooks , Premium PLR Reports , Premium White Label Brandable PLR Coaching Courses , Private Label Rights ProductsChoose Your Desired Option(s)
has been added to your cart!
have been added to your cart!
#facebookads #plrcourse #digitalmarketing #adstrategies #socialmediamarketing #onlinebusiness #marketingsecrets #businessgrowth #advertisingtips #plrcontent
Facebook Ads Secrets PLR Course: Unlock the Power of Facebook Ads for Business Growth
Welcome to the Facebook Ads Secrets PLR Course! This comprehensive course is designed to teach you how to harness the full power of Facebook Ads to boost your business. Whether you’re a beginner or looking to take your current Facebook advertising to the next level, this course offers practical, step-by-step guidance to help you achieve measurable results.
Presenting…
Facebook Ads Secrets PLR Course 22k Words
Course Overview
Facebook Ads can be an incredibly powerful tool for businesses looking to increase brand awareness, drive traffic, and generate sales. However, navigating the platform and making the most out of your ad spend can be tricky without the right knowledge.
The Facebook Ads Secrets PLR Course offers a clear, easy-to-follow roadmap that covers everything from setting up your first ad campaign to advanced optimization techniques. By the end of this course, you’ll have all the knowledge and strategies needed to craft effective Facebook Ads that produce real business results.
Course Modules:
Module 1: Getting Started with Facebook Ads
Before diving into the world of Facebook Ads, it’s crucial to get comfortable with the platform and its tools. This module will guide you through the basic setup and help you prepare to launch your first campaign.
- Step 1: Setting Up Your Facebook Business Manager
Learn how to create your Facebook Business Manager account and link it to your Facebook page. This will be your hub for all ad campaigns. - Step 2: Navigating Facebook Ads Manager
Familiarize yourself with the Ads Manager interface, where you’ll create, manage, and analyze your ad campaigns. - Step 3: Define Your Business Objective
Understand the different Facebook campaign objectives (Awareness, Traffic, Engagement, Conversion) and select the right one for your goals. - Step 4: Setting Up Your Payment Method
Get your billing details set up correctly so your ads run smoothly without interruptions.
Module 2: Audience Targeting and Research
The success of your Facebook Ads depends largely on how well you target the right audience. In this module, we’ll teach you how to define and research your ideal audience to ensure your ads are seen by the right people.
- Step 1: Define Your Target Audience
Learn how to use demographics, interests, and behaviors to target your ideal customer. - Step 2: Create Custom Audiences
Discover how to create custom audiences using data from your website, email lists, or Facebook page engagement. - Step 3: Use Lookalike Audiences for Broader Reach
Learn how to use Lookalike Audiences to find new people who share characteristics with your best customers. - Step 4: Monitor Audience Insights
Understand how to use Facebook’s Audience Insights tool to refine your audience targeting and optimize for better results.
Module 3: Crafting Compelling Ads
An effective ad needs to grab attention and deliver your message clearly. In this module, we’ll walk you through the process of creating high-converting ads that capture your audience’s attention.
- Step 1: Choosing the Right Ad Format
Explore various ad formats such as image, video, carousel, and slideshow, and learn how to pick the best one for your campaign. - Step 2: Writing Killer Ad Copy
Master the art of writing persuasive and engaging ad copy that speaks to your audience’s pain points and desires. - Step 3: Selecting High-Quality Visuals
Understand how to choose or create visually appealing images or videos that align with your ad’s message and stand out in the crowded feed. - Step 4: Adding a Strong Call to Action (CTA)
Learn how to craft a CTA that compels your audience to take immediate action, whether it’s “Shop Now,” “Sign Up,” or “Learn More.”
Module 4: Budgeting and Ad Bidding Strategies
Understanding how to set your budget and bid for your Facebook Ads is essential to ensure you’re spending effectively without overextending your resources.
- Step 1: Setting Your Ad Budget
Learn how to choose between daily or lifetime budgets and how to allocate your budget for maximum impact. - Step 2: Choosing the Right Bidding Strategy
Understand the different bidding options (CPC, CPM, CPA) and how to select the best one for your campaign objectives. - Step 3: Monitoring Your Ad Spend
Track your ad spend to ensure you stay within your budget and get the best return on investment. - Step 4: Scaling Your Ads
Once your ads are performing well, learn how to scale them effectively to reach a larger audience while maintaining good performance.
Module 5: Analyzing and Optimizing Your Facebook Ads
A successful Facebook Ads strategy doesn’t stop after the launch. To ensure continued growth and success, you need to constantly analyze and optimize your campaigns.
- Step 1: Understanding Key Metrics
Learn the most important metrics to track, such as CTR, conversions, reach, and engagement, and how to measure your ad’s success. - Step 2: A/B Testing for Better Results
Understand how to run A/B tests to experiment with different ad variations and find the best-performing elements (headlines, images, CTAs). - Step 3: Refining Your Audience Targeting
Based on the data you collect, tweak your audience targeting to focus on high-converting segments for even better results. - Step 4: Continuously Optimizing Your Ads
Keep refining your ads over time, testing new strategies, and staying ahead of your competition to maintain effectiveness.
Conclusion: Mastering Facebook Ads for Business Growth
Congratulations! By completing this course, you now have the tools, strategies, and know-how to create successful Facebook Ads that drive business growth. Whether you’re just getting started or looking to optimize your existing campaigns, you’ll be well-equipped to make the most out of Facebook’s powerful advertising platform.
Bonus Materials Included:
To make sure you get the most out of your learning experience, we’ve included the following bonus materials:
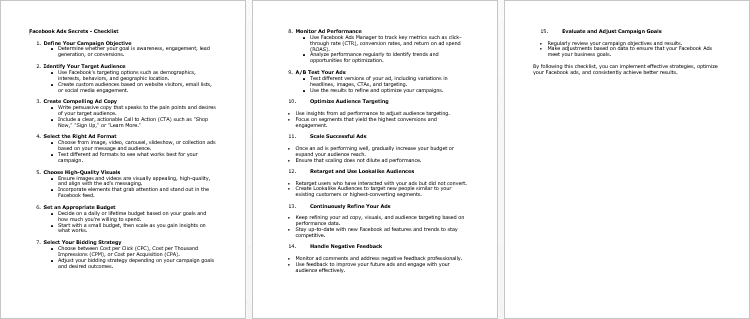
- Facebook Ads Secrets Checklist – 485 words
- Facebook Ads Secrets FAQs – 1,151 words
- Facebook Ads Secrets Salespage – 876 words
These additional resources will help you implement the course teachings more effectively and provide you with ready-made content for your marketing efforts.
How You Can Use and Profit from This Course
The Facebook Ads Secrets PLR Course comes with full Private Label Rights (PLR), meaning you can edit, rebrand, and resell this content as your own. Here are some ways to profit from this course:
- Resell the Course: Sell it as-is or with minor adjustments. Package it as a guide or course for individuals looking to master Facebook Ads.
- Create a Membership Site: Offer ongoing access to Facebook Ads strategies, updates, and additional resources as part of a subscription-based membership site.
- Bundle with Other Digital Products: Combine this course with other digital marketing content to create larger, more valuable offers.
- Offer It as a Lead Magnet: Use parts of this course as blog posts or downloadable PDFs to build your email list.
- Create Interactive Content: Turn the course into video tutorials or live webinars to offer a more engaging learning experience.
- Print It as a Physical Product: Convert the content into a workbook or printed guide and sell it as a physical product.
License Terms:
What You Can Do:
- Sell the content as-is with minor edits.
- Break the content into smaller sections and sell individual reports.
- Bundle the course with other products for larger offers.
- Set up a membership site or offer the course as a paid subscription.
- Create a multi-week “eclass” or training program.
- Convert the course into physical products such as books or guides.
- Create audio or video versions of the course for added value.
- Use parts of the course for lead magnets or email marketing.
What You Can’t Do:
- Pass the PLR rights to your customers.
- Offer 100% affiliate commissions.
- Give away the entire course for free without modifications.
- Add the course to a product bundle that customers have already purchased.
Start Unlocking the Power of Facebook Ads Today
With the Facebook Ads Secrets PLR Course, you have everything you need to succeed with Facebook Ads. Start creating high-converting campaigns, reach your target audience, and grow your business like never before. Don’t miss out—get started today and unlock the full potential of Facebook advertising!
has been added to your cart!
have been added to your cart!
Here A Sample of Facebook Ads Secrets PLR Course
Unlock the Power of Facebook Ads for Your Business Growth
Module 1: Getting Started with Facebook Ads
Before diving into the world of Facebook Ads, it’s crucial to understand the platform and its tools. This module will guide you through the basics and set you up for success!
Step 1: Setting Up Your Facebook Business Manager
Creating a Facebook Business Manager account is the first and most crucial step in running professional and scalable ad campaigns. This platform serves as the central hub where you manage your Facebook pages, ad accounts, and team members, ensuring streamlined advertising operations.
In this step-by-step guide, we will walk you through the process of setting up Facebook Business Manager and linking it to your Facebook Page. By the end of this lesson, you will have a fully functional Business Manager account, ready for your advertising activities.
Why You Need Facebook Business Manager
Before we dive into the setup process, let’s first understand why Business Manager is essential:
- Organized Account Management – Keep your business assets (pages, ad accounts, and pixels) separate from personal profiles.
- Secure Team Collaboration – Assign roles to team members without sharing login credentials.
- Multiple Ad Accounts Management – Ideal for managing different businesses or clients in one place.
- Advanced Audience Targeting – Connect your ad account with Custom Audiences and Pixels for precise targeting.
- Better Security and Control – Control who has access to different business assets.
If you plan to run Facebook ads at an advanced level, Business Manager is a must-have.
Step-by-Step Guide to Creating Your Facebook Business Manager Account
1. Go to Facebook Business Manager
To begin, navigate to the official Meta Business Manager website:
👉 https://business.facebook.com/
Click on the “Create Account” button at the top right corner of the screen.
2. Sign in With Your Facebook Account
You will be asked to log in using your personal Facebook credentials. If you do not have a Facebook account, you must create one before proceeding.
Important Note: Facebook requires every Business Manager account to be linked to a personal profile. However, your personal information remains private—only you can see it.
3. Enter Your Business Information
Once logged in, a setup form will appear. Fill in the following details:
- Business Name – Enter the official name of your business (this should match your brand or company name).
- Your Name – Facebook automatically fills this with your personal profile name.
- Business Email – Use an official email address (e.g., yourname@yourbusiness.com) instead of a personal one (e.g., yourname@gmail.com) for professional credibility.
After entering the details, click “Next.”
4. Add Your Business Details
On the next screen, you will need to provide more information about your business:
- Country – Select your business location from the drop-down menu.
- Street Address, City, State/Region, ZIP Code – Enter your company’s physical address.
- Business Phone Number – Provide a valid contact number.
- Website – Enter your business website URL (if applicable).
- Business Use Case – Choose whether you are using Business Manager for your own business or to provide services for clients.
Click “Submit” when done.
5. Confirm Your Business Email
After submitting your details, Facebook will send a confirmation email to the email address you provided.
- Open your email inbox and look for an email from Meta Business Manager.
- Click the confirmation link inside the email to verify your account.
Once confirmed, your Facebook Business Manager account is officially set up!
Linking Your Facebook Page to Business Manager
Now that your Business Manager account is created, the next step is to link your Facebook Page to it.
1. Navigate to Business Manager Settings
- Go to https://business.facebook.com/settings
- Click on “Business Settings” in the left-hand menu.
2. Add Your Facebook Page
- In the Business Settings menu, select Pages under the “Accounts” section.
- Click the blue “Add” button. You will see three options:
- Add a Page – If you already own the Facebook page, select this option.
- Request Access to a Page – If you manage a page for a client, request access instead.
- Create a New Page – If you don’t have a business page yet, create a new one.
- Add a Page – If you already own the Facebook page, select this option.
For this tutorial, click “Add a Page” and type your Page’s name in the search bar.
3. Confirm Page Ownership
- Once you select your Facebook Page, click “Add Page” to connect it to Business Manager.
- If you are the page admin, the page will be added instantly.
- If another person owns the page, they must approve your request before you can access it.
4. Assign Page Roles (Optional)
If you work with a team, you can assign specific roles to different team members:
- Admin – Full control over the page, ad account, and settings.
- Editor – Can edit and publish posts but cannot manage settings.
- Advertiser – Can create and manage ads but cannot publish posts.
- Analyst – Can only view insights and reports.
Click “Save” after assigning roles.
Final Check: Ensuring Everything is Set Up Correctly
To make sure your Facebook Business Manager and Facebook Page are correctly linked:
✅ Go to Business Settings → Pages → Check if your Page appears in the list.
✅ Ensure your email is verified (otherwise, you may face restrictions).
✅ If working with a team, double-check user roles to prevent unauthorized access.
Next Steps: Prepare for Facebook Advertising
Now that your Facebook Business Manager account is set up and linked to your page, you’re ready to move forward!
In the next step, we will explore Facebook Ads Manager, the platform where you will create, manage, and optimize your advertising campaigns.
📌 Key Takeaways from This Lesson:
- Facebook Business Manager helps organize and manage all your business assets.
- Always use a business email to set up your account for a professional approach.
- Connecting your Facebook Page allows you to run ads and promotions effectively.
- Assigning page roles is essential for secure and efficient team collaboration.
Now, let’s move on to the next step and start navigating Facebook Ads Manager!
Step 2: Navigating Facebook Ads Manager
Now that you have successfully set up Facebook Business Manager, it’s time to explore Facebook Ads Manager—the core platform where you will create, manage, and optimize your advertising campaigns.
Facebook Ads Manager may seem overwhelming at first, but once you understand its structure and features, you’ll be able to navigate it with confidence. In this lesson, we’ll walk you through the layout, key sections, and functions of Ads Manager so you can start running successful ad campaigns.
Why Facebook Ads Manager is Essential
Facebook Ads Manager is the command center for your advertising efforts on both Facebook and Instagram. Here’s why you need to master it:
✔ Create and Manage Ads – Design and run paid advertisements targeting specific audiences.
✔ Optimize Performance – Adjust your ads in real time to improve results.
✔ Monitor Key Metrics – Track impressions, clicks, conversions, and return on ad spend (ROAS).
✔ Split Test Strategies – Compare different ad creatives, audiences, and placements.
✔ Automate and Scale – Set rules to pause, adjust, or scale ads based on performance.
By understanding the Ads Manager interface, you’ll be able to effectively manage your campaigns without confusion.
Accessing Facebook Ads Manager
1. Log into Facebook Ads Manager
To access Ads Manager, go to:
👉 https://www.facebook.com/adsmanager
Alternatively, from Facebook Business Manager:
- Click on the menu (☰) in the top left corner.
- Select “Ads Manager” under the “Advertise” section.
Important Note: If this is your first time opening Ads Manager, Facebook may prompt you to set up a payment method before you can create ads.
Understanding the Facebook Ads Manager Dashboard
Once inside Ads Manager, you will see the main dashboard displaying key information about your ad account. Let’s break it down:
1. Overview Section
The top navigation bar contains:
- Account Name & ID – Your advertising account (found in the top left).
- Date Range Selector – Allows you to filter data by specific time periods.
- Search Bar – Use this to find specific campaigns, ad sets, or ads quickly.
- Notifications – Alerts for ad approvals, errors, or performance issues.
2. Campaign Structure: The Three Levels of Ads
Facebook Ads Manager is divided into three hierarchical levels:
A. Campaign Level
- The highest level where you define the objective of your ad (e.g., brand awareness, traffic, conversions).
- A campaign can contain multiple ad sets with different targeting options.
- You select budget types at this level (campaign budget optimization or ad set budget).
B. Ad Set Level
- This is where you define who sees your ads (audience targeting), where ads appear (placements), and when they run (scheduling).
- Each campaign can have multiple ad sets with different targeting strategies.
- You can set a daily or lifetime budget per ad set.
C. Ad Level
- The final level, where you create visuals, headlines, descriptions, and call-to-action (CTA) buttons.
- You can test multiple ad creatives within the same ad set.
- Choose between different formats like single image, carousel, video, or slideshow ads.
3. Columns and Data Metrics
The Ads Manager interface displays your campaign data in a structured table format. The key columns include:
✔ Delivery – Status of your campaign (Active, In Review, Paused, etc.).
✔ Results – Performance based on your campaign objective (e.g., clicks, conversions).
✔ Reach & Impressions – Number of people who saw your ads and how often.
✔ Cost Per Result – How much you are paying per action (e.g., per click, per purchase).
✔ Budget & Spend – How much you have allocated vs. how much has been spent.
To customize your view:
- Click “Columns” at the top right.
- Choose “Performance,” “Delivery,” “Engagement,” or
“Conversions” depending on your focus.
Exploring the Main Features of Facebook Ads Manager
1. Campaigns Tab
This section lists all your ad campaigns. You can:
- View, create, or edit campaigns.
- See the status, budget, and objective of each campaign.
- Duplicate or archive campaigns when needed.
👉 To create a new campaign: Click the green “+ Create” button.
2. Ad Sets Tab
- Displays the ad sets within each campaign.
- Allows you to edit targeting, budgets, placements, and schedules.
- You can create multiple ad sets to test different audiences.
3. Ads Tab
- This section contains all individual ads within your ad sets.
- You can edit ad creatives, copy, CTA buttons, and tracking settings.
- Enables A/B testing to compare different ad variations.
4. Account Overview
- Provides big-picture insights into overall account performance.
- Helps you analyze trends across multiple campaigns.
- Useful for making data-driven advertising decisions.
Bonus: Advanced Tools Inside Facebook Ads Manager
1. Audience Insights
- Located under the Business Tools (☰) menu.
- Allows you to analyze your target audience’s demographics, interests, and behaviors.
- Helps you refine your ad targeting strategy.
2. Facebook Pixel & Event Manager
- Found under Business Tools > Events Manager.
- Used to track website visitors and measure conversions from your ads.
- Essential for retargeting campaigns and optimizing for specific events (purchases, sign-ups, etc.).
3. Automated Rules
- Found in the Rules section under Ads Manager settings.
- Allows you to automate ad management by pausing underperforming ads or scaling successful ones.
Final Check: Ensuring You’re Comfortable with Ads Manager
Before moving on to the next step, make sure you can:
✅ Log in to Facebook Ads Manager and navigate the dashboard.
✅ Understand the campaign structure (Campaign > Ad Set > Ad).
✅ View and customize columns to track key metrics.
✅ Access Audience Insights to refine targeting.
✅ Locate Facebook Pixel and Event Manager for tracking.
Next Steps: Setting Up Your First Facebook Ad Campaign
Now that you’re familiar with Ads Manager, the next step is creating your first ad campaign. In the next lesson, we will guide you through selecting the right campaign objective, setting budgets, and choosing audiences for the best results.
📌 Key Takeaways from This Lesson:
- Ads Manager is where you create, manage, and analyze ad campaigns.
- Understanding the three ad levels (Campaign, Ad Set, Ad) is crucial.
- Use custom columns and reports to track ad performance effectively.
- Audience Insights and Pixel help with advanced targeting and optimization.
Let’s move on and start setting up your first Facebook ad campaign!
Step 3: Define Your Business Objective
Now that you’re familiar with Facebook Ads Manager, it’s time to define your business objective—the foundation of every successful ad campaign. Choosing the right campaign objective ensures that Facebook optimizes your ads for the best results.
This step is crucial because Facebook’s algorithm tailors your ad delivery based on the objective you set. If you choose the wrong objective, your campaign might not generate the desired results, leading to wasted ad spend.
In this lesson, we’ll break down the different campaign objectives, their purpose, and how to select the best one for your advertising goals.
Why Campaign Objectives Matter
Facebook categorizes objectives into three main marketing goals:
✔ Awareness – Increase visibility and brand recognition.
✔ Consideration – Encourage users to engage, visit your website, or take action.
✔ Conversion – Drive sales, sign-ups, or other business-related actions.
Your objective determines:
🔹 How Facebook delivers your ads (who sees them and how often).
🔹 What performance metrics Facebook prioritizes.
🔹 The type of audience targeting and ad placements available.
Understanding Facebook’s Campaign Objectives
When you create a new campaign in Facebook Ads Manager, you will be prompted to choose a campaign objective. Facebook provides several preset objectives to match different business needs.
Let’s break down each objective and when to use them.
1. Awareness Objectives (Top of Funnel)
Goal: Maximize reach and visibility to new audiences.
A. Brand Awareness
- Best for: Increasing brand recall and recognition.
- Facebook shows your ads to people who are most likely to remember your brand.
- Ideal for new businesses, product launches, or local stores.
- Suitable for long-term brand-building efforts rather than immediate sales.
🔹 Example: A fashion brand launching in a new market uses Brand Awareness ads to introduce itself to potential customers.
B. Reach
- Best for: Getting your ad in front of as many people as possible.
- Facebook prioritizes maximizing impressions rather than engagement or clicks.
- Great for local businesses, event promotions, or large-scale branding campaigns.
🔹 Example: A local restaurant running an ad to reach all potential customers within a 10 km radius.
2. Consideration Objectives (Middle of Funnel)
Goal: Get people interested in your business and drive engagement.
A. Traffic
- Best for: Driving users to your website, app, or landing page.
- Facebook optimizes ad delivery to people who are most likely to click the link.
- Great for blog posts, product pages, service pages, or lead magnets.
🔹 Example: A real estate agency using a Traffic campaign to drive visitors to a webpage listing available properties.
B. Engagement
- Best for: Increasing interactions (likes, shares, comments) on your posts or page.
- Facebook prioritizes users who are more likely to engage with your content.
- Ideal for brand storytelling, community building, and increasing credibility.
🔹 Example: A fitness coach running an Engagement ad to boost a motivational post and encourage followers to comment.
C. App Installs
- Best for: Promoting mobile apps and increasing downloads.
- Directs users to the Google Play Store or Apple App Store.
- Facebook optimizes ad delivery for people likely to install apps.
🔹 Example: A meditation app using App Install ads to increase downloads among users interested in mindfulness.
D. Video Views
- Best for: Promoting video content to increase brand awareness or storytelling.
- Facebook prioritizes users who watch videos for longer durations.
- Great for introducing new products or sharing customer testimonials.
🔹 Example: A skincare brand launching a new product runs Video View ads to showcase its benefits.
E. Lead Generation
- Best for: Collecting contact information directly within Facebook.
- Facebook provides a pre-filled form, making sign-ups quick and easy.
- Useful for newsletter sign-ups, event registrations, and service inquiries.
🔹 Example: A digital marketing agency offering a free consultation runs Lead Generation ads to collect emails from potential clients.
F. Messages
- Best for: Starting direct conversations with potential customers via Facebook Messenger, WhatsApp, or Instagram DM.
- Facebook prioritizes users who frequently use messaging apps.
- Great for customer support, answering inquiries, or offering personalized deals.
🔹 Example: A travel agency runs a Messages ad encouraging users to ask about vacation packages via WhatsApp.
3. Conversion Objectives (Bottom of Funnel)
Goal: Drive sales, sign-ups, and business-specific actions.
A. Conversions
- Best for: Encouraging purchases, sign-ups, or form submissions.
- Requires Facebook Pixel to track actions on your website.
- Works well for eCommerce, service bookings, and membership sign-ups.
🔹 Example: An online store running Conversion ads optimized for “Add to Cart” and “Checkout” events.
B. Catalog Sales
- Best for: Dynamic retargeting ads that showcase product listings.
- Requires a Facebook Product Catalog connected to your store.
- Automatically shows relevant products based on user activity.
🔹 Example: An electronics store showing different ads to users who browsed but didn’t buy.
C. Store Traffic
- Best for: Driving physical store visits.
- Optimized for users within a specific geographic location.
- Great for retail stores, restaurants, salons, and service providers.
🔹 Example: A coffee shop runs Store Traffic ads offering a discount to nearby customers.
How to Choose the Right Campaign Objective
To select the best objective, ask yourself:
✔ What is my main goal? (Branding, engagement, website visits, sales?)
✔ What action do I want users to take? (Click a link, watch a video, fill a form?)
✔ Do I need tracking and retargeting? (Do I have Facebook Pixel installed?)
✔ Am I focusing on new or returning customers?
General Guidelines
✅ If your business is new → Brand Awareness or Reach
✅ If you need traffic to your website → Traffic
✅ If you want more engagement → Engagement
✅ If you need to collect leads → Lead Generation
✅ If you sell products online → Conversions or Catalog Sales
✅ If you have a physical store → Store Traffic
Final Check: Are You Ready to Set Your Objective?
Before moving to the next step, ensure you can:
✅ Identify the three main campaign categories (Awareness, Consideration, Conversion).
✅ Understand the differences between each objective.
✅ Match the right objective to your business goal.
✅ Access and select objectives within Facebook Ads Manager.
Next Steps: Setting Up Your Target Audience
Now that you’ve defined your objective, it’s time to select the right audience for your ads. In the next lesson, we’ll cover audience targeting strategies, including custom audiences, lookalike audiences, and demographic filters.
📌 Key Takeaways from This Lesson:
- Facebook objectives are divided into Awareness, Consideration, and Conversion.
- Choosing the wrong objective can lead to poor ad performance.
- Align your objective with your business goal for better results.
- Certain objectives require Facebook Pixel or a product catalog.
Let’s move forward and start setting up your target audience!
Step 4: Setting Up Your Payment Method
Now that you’ve defined your campaign objective, it’s time to set up your payment method in Facebook Ads Manager. This step ensures that your ads run smoothly and that Facebook can charge you correctly for your advertising spend.
Without a valid payment method, your campaigns won’t go live, and any running ads could stop if there’s a payment issue. To avoid interruptions, you need to add and verify your billing details properly.
This guide will walk you through step-by-step instructions on how to set up and manage your payment method in Facebook Ads Manager.
Why Setting Up Payment Properly is Important
✔ Ensures uninterrupted ad delivery – If your payment fails, Facebook will pause your campaigns.
✔ Allows flexible budgeting and billing options – You can set spending limits and track transactions.
✔ Prevents billing issues and unexpected ad stops – Keeping your payment details updated avoids disruptions.
✔ Supports multiple payment options – Facebook accepts various international payment methods.
Step-by-Step Guide to Setting Up Your Payment Method
Step 1: Access the Facebook Payment Settings
1️⃣ Log into your Facebook Business Manager account.
2️⃣ Navigate to Facebook Ads Manager by visiting https://business.facebook.com/.
3️⃣ Click on the menu icon (☰) in the top-left corner and select Billing under the “Accounts” section.
4️⃣ On the Billing page, locate the Payment Settings tab.
5️⃣ Click on “Add Payment Method.”
This section allows you to manage your billing details, add or remove payment methods, and set up spending limits.
Step 2: Choose Your Preferred Payment Method
Facebook offers multiple international payment options depending on your country. The available methods may include:
✔ Credit or Debit Cards – Visa, Mastercard, American Express, Discover.
✔ PayPal – Secure and widely accepted in most regions.
✔ Bank Transfers (Manual Payment Methods) – Available in select countries.
✔ Facebook Ad Credits – Prepaid credits issued by Facebook or through promotions.
How to Select a Payment Method:
1️⃣ Choose your country and currency.
2️⃣ Select your preferred payment method from the available options.
3️⃣ If you’re using a credit or debit card, enter your card details, including:
- Cardholder Name
- Card Number
- Expiration Date
- CVV Code (the 3-digit security code on the back of your card)
4️⃣ If you’re using PayPal, log into your PayPal account and authorize the payment.
5️⃣ Click “Continue” to proceed.
Step 3: Verify Your Payment Method
Once you’ve entered your payment details, Facebook may require verification to ensure security and prevent fraud.
🔹 For credit/debit cards: Facebook may place a small test charge on your card (usually less than $1) to confirm its validity. This amount is automatically refunded.
🔹 For PayPal users: You may need to log in and confirm the connection.
🔹 For manual payments (bank transfer): Follow the instructions provided by Facebook for bank verification.
✔ Ensure that your card or PayPal account has sufficient funds to avoid payment failures.
Step 4: Set Your Billing Threshold and Payment Cycle
Facebook uses two main billing systems:
✔ Automatic Payments: Facebook charges you after you accumulate a certain amount of ad spend (billing threshold).
✔ Manual Payments: You preload funds into your account, and ads run until the balance is used up.
How to Set Your Billing Threshold:
1️⃣ In the Payment Settings, find the section labeled “Billing Threshold.”
2️⃣ Set a spending limit that determines when Facebook will charge you (e.g., every $50, $100, or custom amount).
3️⃣ If you prefer, you can set a spending limit on your account to control your budget.
📌 Important Notes:
- The billing threshold may vary based on your ad account history and country.
- If you exceed your billing threshold before the scheduled billing date, Facebook will charge you immediately.
- You can modify your billing threshold, but it may require account history and spending patterns.
Managing and Updating Payment Methods
How to Change or Remove a Payment Method
If you need to update your payment details, follow these steps:
1️⃣ Go to Billing in Facebook Ads Manager.
2️⃣ Click on “Payment Settings.”
3️⃣ Under “Payment Methods,” locate your current payment method.
4️⃣ Click “Edit” to update card details OR “Remove” to delete the method.
5️⃣ If removing a payment method, ensure you add a new one before proceeding to avoid campaign disruptions.
✔ Facebook requires at least one valid payment method at all times, so you cannot remove your primary payment method without adding another.
Troubleshooting Payment Issues
If you encounter payment errors, here’s what you can do:
🚨 Payment Declined:
- Ensure your card is not expired or blocked for international transactions.
- Try another payment method (PayPal, another credit card, or bank transfer).
🚨 Ads Stopped Running Due to Payment Failure:
- Go to Billing → Payment Settings and retry the payment.
- If the payment still fails, contact your bank or card provider.
🚨 Facebook Disabled My Ad Account Due to Unpaid Bills:
- Clear any outstanding balance immediately.
- Submit an appeal through Facebook Business Help Center if necessary.
Final Check: Are You Ready to Launch Your Ads?
Before moving to the next step, ensure that you have:
✅ Added a valid payment method (credit/debit card, PayPal, or bank transfer).
✅ Verified your payment details (if required by Facebook).
✅ Set your billing threshold (if using automatic payments).
✅ Tested and confirmed successful transactions to prevent ad interruptions.
Once your payment method is set up, you are now ready to move on to the next step: Creating Your First Facebook Ad!
Next Steps: Crafting a Winning Ad Campaign
With your payment system in place, it’s time to move forward with creating your first ad campaign. In the next lesson, we’ll cover:
✔ How to set up an ad campaign step-by-step.
✔ Choosing the right ad format and creative elements.
✔ Optimizing your ads for engagement and conversions.
📌 Key Takeaways from This Lesson:
- Facebook requires a valid payment method for running ads.
- You can pay using credit/debit cards, PayPal, bank transfers, or ad credits.
- Billing thresholds determine when Facebook charges you.
- Regularly update and monitor your payment settings to prevent disruptions.
Now, let’s move on to creating your first ad campaign and start running successful Facebook Ads!
We’re also giving these extra bonuses
Facebook Ads Secrets – Checklist
Facebook Ads Secrets – FAQs
Facebook Ads Secrets – Salespage Content
Package Details:
Word Count: 20 098 Words
Number of Pages: 105
Facebook Ads Secrets – Bonus Content
Checklist
Word Count: 485 words
FAQs
Word Count: 1151 words
Salespage Content
Word Count: 876 words
Total Word Count: 22 610 Words
Your PLR License Terms
PERMISSIONS: What Can You Do With These Materials?
Sell the content basically as it is (with some minor tweaks to make it “yours”).
If you are going to claim copyright to anything created with this content, then you must substantially change at 75% of the content to distinguish yourself from other licensees.
Break up the content into small portions to sell as individual reports for $10-$20 each.
Bundle the content with other existing content to create larger products for $47-$97 each.
Setup your own membership site with the content and generate monthly residual payments!
Take the content and convert it into a multiple-week “eclass” that you charge $297-$497 to access!
Use the content to create a “physical” product that you sell for premium prices!
Convert it to audios, videos, membership site content and more.
Excerpt and / or edit portions of the content to give away for free as blog posts, reports, etc. to use as lead magnets, incentives and more!
Create your own original product from it, set it up at a site and “flip” the site for megabucks!
RESTRICTIONS: What Can’t You Do With These Materials?
To protect the value of these products, you may not pass on the rights to your customers. This means that your customers may not have PLR rights or reprint / resell rights passed on to them.
You may not pass on any kind of licensing (PLR, reprint / resell, etc.) to ANY offer created from ANY PORTION OF this content that would allow additional people to sell or give away any portion of the content contained in this package.
You may not offer 100% commission to affiliates selling your version / copy of this product. The maximum affiliate commission you may pay out for offers created that include parts of this content is 75%.
You are not permitted to give the complete materials away in their current state for free – they must be sold. They must be excerpted and / or edited to be given away, unless otherwise noted. Example: You ARE permitted to excerpt portions of content for blog posts, lead magnets, etc.
You may not add this content to any part of an existing customer order that would not require them to make an additional purchase. (IE You cannot add it to a package, membership site, etc. that customers have ALREADY paid for.)
Share Now!
Latest Products


Free Sales Funnel Builder

Related Products
Popular & Trending

Featured Products