Facebook Ads Masterclass PLR Course 31k Words
in Facebook PLR , Internet Marketing PLR , PLR Checklists , PLR eCourses , PLR List Building Reports , Premium PLR , Premium PLR Reports , Premium White Label Brandable PLR Coaching Courses , Private Label Rights ProductsChoose Your Desired Option(s)
has been added to your cart!
have been added to your cart!
#facebookads #plrcourse #digitalmarketing #paidadvertising #socialmediamarketing #marketingtraining #plrcontent #onlinebusiness #adstrategy
From Beginner to Pro Marketer – A Complete Done-For-You Facebook Advertising Training You Can Rebrand, Sell, or Monetize Instantly
Facebook advertising remains one of the most powerful tools in digital marketing. Businesses of all sizes use it to generate leads, drive traffic, increase sales, and build brand awareness. Yet many aspiring marketers and business owners feel overwhelmed by ad dashboards, targeting settings, policies, and campaign metrics.
The Facebook Ads Masterclass PLR Course was created to eliminate that confusion.
This comprehensive training program guides learners step-by-step from complete beginner to confident Facebook ads marketer. It explains the fundamentals, breaks down campaign setup, teaches optimization strategies, and introduces advanced tactics that separate amateurs from professionals.
For PLR buyers, this is a high-demand, business-ready digital product that can be rebranded, sold, taught, or turned into premium coaching and consulting offers.
Introducing the…
Facebook Ads Masterclass PLR Course 31k Words
What This Course Is Designed to Do
The objective of this masterclass is clear:
To transform beginners into confident Facebook Ads marketers who can create, launch, optimize, and scale profitable campaigns with ease.
Rather than focusing on theory alone, the course emphasizes:
- Hands-on setup guidance
- Strategic audience targeting
- Conversion-focused ad creation
- Data-driven optimization
- Scalable campaign structures
- Advanced funnel and retargeting strategies
This makes it suitable for:
- Entrepreneurs
- Small business owners
- Freelancers
- Marketing agencies
- Coaches and consultants
- Course creators in the digital marketing space
A Structured Masterclass Designed for Real Results
This course follows a logical progression:
- Build a strong foundation
- Learn targeting and setup
- Create high-converting ads
- Optimize and scale campaigns
- Master advanced pro-level strategies
It is structured to eliminate overwhelm and replace it with clarity and confidence.
Course Overview
Facebook Ads Masterclass: From Beginner to Pro Marketer
5 Modules – 4 Lessons Each
A complete step-by-step roadmap to Facebook advertising success.
Module 1: Getting Started with Facebook Ads
This foundational module ensures learners understand the platform before launching campaigns.
Lesson 1: What Are Facebook Ads & Why Use Them?
Explains the role of Facebook advertising in modern marketing and why businesses rely on it for growth.
Lesson 2: Navigating Facebook Business Manager
A walkthrough of Business Manager setup, account creation, and dashboard overview.
Lesson 3: Setting Up Your Ad Account the Right Way
Covers billing setup, permissions, and configurations to prevent common mistakes.
Lesson 4: Understanding Facebook Ads Policies
Breaks down ad rules and restrictions to avoid rejections and account issues.
This module removes confusion and builds technical confidence.
Module 2: Crafting the Perfect Audience & Campaign Setup
Here, learners begin applying strategy.
Lesson 1: The Power of Audience Targeting
Teaches demographic, interest, and behavior targeting to reach the right people.
Lesson 2: Creating Custom Audiences
Shows how to build audiences from website visitors, customer lists, and engagement data.
Lesson 3: Exploring Lookalike Audiences
Explains how to scale by targeting users similar to existing customers.
Lesson 4: Choosing the Right Campaign Objective
Breaks down traffic, leads, conversions, and other objectives—and when to use each.
This module turns guesswork into precision targeting.
Module 3: Building High-Converting Ad Creatives
Now the focus shifts to conversion.
Lesson 1: Crafting Scroll-Stopping Ad Copy
Proven headline and copywriting frameworks that capture attention fast.
Lesson 2: Designing Images & Videos That Sell
Practical guidance for creating visuals using simple tools like Canva or smartphone videos.
Lesson 3: Understanding Ad Formats
Explains image, video, carousel, and collection ads—and their best use cases.
Lesson 4: Best Practices for Creative Testing
Shows how to test variations to identify winning ads quickly.
This module ensures ads do more than look good—they convert.
Module 4: Running & Optimizing Campaigns Like a Pro
This is where beginners become marketers.
Lesson 1: How to Read Campaign Data & Metrics
Simplifies CTR, CPM, CPC, conversions, and performance reports.
Lesson 2: A/B Testing Made Simple
A structured testing framework for audiences, creatives, and placements.
Lesson 3: Scaling Winning Campaigns
Teaches vertical and horizontal scaling without overspending.
Lesson 4: Troubleshooting Underperforming Ads
Identifies common problems and fast solutions.
This module transforms confusion into confident optimization.
Module 5: Advanced Strategies to Become a Pro Marketer
This final module introduces professional-level tactics.
Lesson 1: Retargeting Strategies That Convert
Bringing back warm leads and maximizing return on ad spend.
Lesson 2: Funnel Building with Facebook Ads
Mapping awareness, consideration, and conversion campaigns.
Lesson 3: Leveraging Facebook Pixel & Conversion Tracking
Setting up tracking for smarter targeting and better data.
Lesson 4: Staying Ahead with Trends & Algorithm Updates
Adapting to platform changes and evolving strategies.
This module elevates learners beyond beginner status.
What Learners Will Achieve
By the end of the course, learners will:
- Understand Facebook Ads from the ground up
- Confidently set up Business Manager and ad accounts
- Target the right audience segments
- Create high-converting ads
- Analyze and optimize campaigns
- Scale profitable campaigns strategically
- Build structured marketing funnels
- Operate like professional Facebook marketers
Additional High-Value Content Included
This PLR package includes powerful supporting materials:
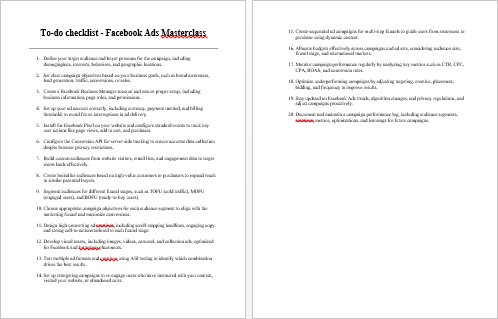
Facebook Ads Masterclass Checklist – 372 Words
A practical checklist that helps learners implement each stage efficiently.
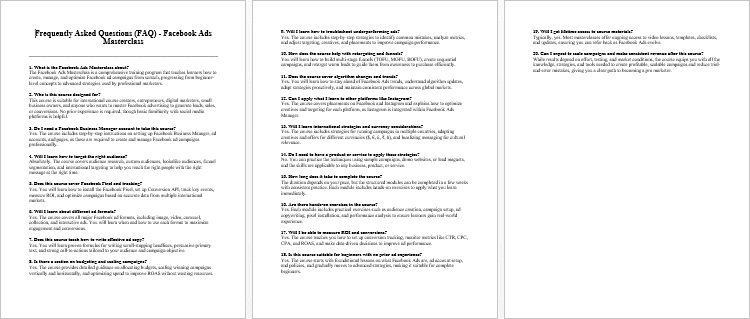
Facebook Ads Masterclass FAQs – 783 Words
A ready-to-use FAQ resource that answers common questions and increases credibility.
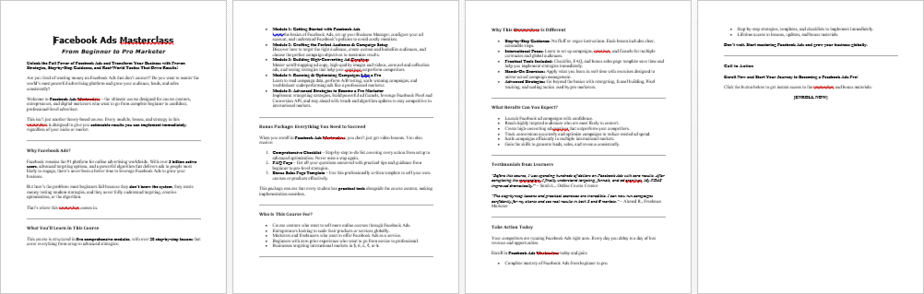
Facebook Ads Masterclass Sales Page – 873 Words
A professionally written sales page buyers can rebrand or customize for their own launch.
Who This PLR Course Is Ideal For
This course is perfect for:
- Digital marketing coaches
- Facebook ads consultants
- Online entrepreneurs
- Agency owners
- Course creators
- Membership site operators
- Freelancers offering ad services
It can be positioned as beginner-friendly training or upgraded into a premium marketing program.
How to Use and Profit from This Facebook Ads PLR Course
This course offers exceptional monetization flexibility.
Sell It as a Standalone Online Course
Rebrand and sell it as a complete Facebook advertising program.
Create a Premium Coaching Program
Use it as the foundation for group coaching or consulting packages.
Turn It into a Multi-Week eClass
Drip the content weekly and charge $297–$497 for guided training.
Add It to a Membership Site
Use it as core content to generate recurring monthly income.
Break It into Smaller Products
Sell individual modules or lessons as mini-courses priced $10–$20.
Convert It into Video or Audio Training
Increase perceived value and pricing with multimedia formats.
Bundle It with Other Marketing Courses
Create packages priced $47–$97 to increase cart value.
Build a Digital Marketing Brand
Launch a branded Facebook Ads training site and scale it into a sellable online asset.
License Terms – What Buyers Are Allowed to Do
Permissions
Buyers may:
- Sell the content with minor edits
- Claim copyright if 75% of the content is substantially modified
- Break content into smaller paid products
- Bundle it with other content for higher-value offers
- Create membership sites with recurring income
- Convert it into multi-week eClasses priced $297–$497
- Turn it into audio, video, or physical products
- Use excerpts as blog posts or lead magnets
- Build a branded product or website and flip it later
License Restrictions – What Buyers Cannot Do
To protect product value:
- PLR or resale rights may not be passed on to customers
- No licensing rights may be transferred
- Affiliate commissions may not exceed 75%
- The full content may not be given away for free in its current state
- The content may not be added to existing paid products without a new purchase
Why Buy This PLR Course from Buy Quality PLR
Buy Quality PLR specializes in delivering high-quality, business-ready PLR products designed for real-world monetization.
This course offers:
- High demand in the digital marketing niche
- Beginner-to-advanced progression
- Practical, implementation-driven lessons
- Strong resale and repurposing potential
- Immediate usability
It saves months of content creation while opening the door to profitable marketing offers.
Get Instant Access Today
The Facebook Ads Masterclass PLR Course is available for instant download.
This is a complete, done-for-you Facebook advertising education system that can be rebranded, sold, taught, or transformed into premium coaching and consulting offers immediately.
Add this powerful PLR course to your Buy Quality PLR library today and start turning Facebook Ads education into a profitable digital asset.
has been added to your cart!
have been added to your cart!
Here A Sample of the Facebook Ads Masterclass PLR Course
Module 1: Getting Started with Facebook Ads
This is the foundation. You’ll learn what Facebook Ads are, how they work, and why they matter.
Lesson 1 — What Are Facebook Ads & Why Use Them?
(A long, detailed, step-by-step lesson for international course creators)
Lesson overview (what learners will gain)
By the end of this lesson learners will understand, in clear practical terms, what Facebook Ads are, how they fit into modern marketing, which ad types and placements are available, and why this platform matters for businesses everywhere — whether they sell digital courses, physical products, or local services. This lesson is designed for an international audience: examples use multiple currency signs ($, €, £, ₹, ¥), date-format awareness (YYYY-MM-DD), and guidance on localizing copy and creatives.
Materials & preparatory notes for instructors
- A demo Meta (Facebook) account and a Business Manager workspace to demo the interface live.
- Example business profiles (local shop, digital course creator, ecommerce store) to personalize examples.
- Sample budgets in a few currencies for role plays (e.g., $50, €45, £40, ₹4,000, ¥5,000).
- Visuals of common ad formats (image, video, carousel, stories/reels).
- A one-page worksheet that asks learners to define their business goal, ideal customer, and a tiny sample budget.
Step-by-step lesson content
Step 1 — Start with a short, plain definition
Begin by saying: “Facebook Ads are paid advertising placements across Meta’s platforms (Facebook, Instagram, Messenger and Audience Network) that let you promote posts, pages, products, offers or events to specific audiences.” Pause and check comprehension: ask two learners to restate that in their own words. Use international examples: “If you’re selling an online course priced at $99 / €89 / ₹7,500, Facebook Ads can help you reach people most likely to buy.”
Instructor tip: Keep the first five minutes simple. Avoid technical terms until learners can describe the basic idea.
Step 2 — Explain the big picture: why paid advertising matters
Walk learners through the three marketing levels where Facebook Ads fit:
- Awareness — Ads that introduce a brand or message to many people.
- Consideration — Ads that get people to engage (visit a website, watch a video).
- Conversion — Ads optimized for direct sales, lead capture, or signups.
Give concrete use-case scenarios: a local bakery wants more foot traffic; a course creator needs email signups; an ecommerce shop wants repeat buyers. Demonstrate how each scenario maps to an objective (awareness, consideration, conversion).
Step 3 — Break down the Meta ecosystem
Explain the parts learners will hear about often:
- Pages & Profiles: public presence for businesses and creators.
- Business Manager / Meta Business Suite: central hub to manage pages, ad accounts, assets and people.
- Ad Account: where billing, payment methods and campaign history live.
- Meta Pixel / Conversion API: tools to measure activity on your website (page views, purchases).
Use simple diagrams or a live screen share to point out each element. For international groups, note the billing currencies: Meta allows billing in many currencies; choose the currency that matches the business bank account to avoid conversion fees.
Step 4 — Describe ad formats and when to use each (practical guidance)
Explain the common ad types and give one short example for each:
- Single Image Ad: quick to produce; good for product spotlight (example: a single image of a handcrafted bag priced at £45).
- Single Video Ad: high engagement; great to tell a short story (example: 15–30s demo of a course lesson).
- Carousel Ads: multiple images/cards; best for showing a product range or step-by-step process.
- Collection / Instant Experience: full-screen mobile experiences; useful when you want immersive shopping.
- Stories / Reels Ads: vertical video for fast, attention-first messaging; ideal for awareness and short offers.
Instructor activity: show examples with different currencies on price tags and have learners decide which format fits a given business goal.
Step 5 — Targeting fundamentals (how to find the right people)
Walk learners through targeting categories:
- Core targeting: demographics (age, gender), location (city, region, country), interests and behaviors.
- Custom Audiences: people who already interacted with you (website visitors, email list).
- Lookalike Audiences: new people similar to your best customers.
Give a step sequence: define customer persona → build a seed audience (email or website visitors) → create a lookalike. For international audiences emphasize geotargeting: targeting a country, region, or a radius around a city and respecting local languages and holidays.
Step 6 — Budgeting and bidding explained simply
Explain daily vs lifetime budgets and bidding basics in plain language:
- Daily budget: how much you want to spend per day. Example: $10/day.
- Lifetime budget: total spend for the campaign duration. Example: €200 over 14 days.
Describe bid strategies (lowest cost, cost cap, bid cap) at a conceptual level: they affect how aggressively Facebook competes in auctions. Use an example budget across currencies for role play.
Small calculation example (showing how to think in numbers):
If you set a lifetime budget of €200 and expect 25 conversions, then Cost Per Acquisition (CPA) = total spend ÷ conversions = 200 ÷ 25 = 8. That means the campaign must deliver conversions at or below €8 each to meet your target.
Step 7 — Key metrics to read and what they mean
Teach essential KPIs in a learner-friendly way:
- Impressions: how many times your ad was shown.
- Clicks: how many times people clicked.
- CTR (Click-Through Rate): clicks ÷ impressions expressed as a percent.
- CPC (Cost Per Click): spend ÷ clicks.
- CPA (Cost Per Acquisition): spend ÷ conversions.
- ROAS (Return On Ad Spend): revenue ÷ ad spend.
Provide a demonstration calculation for ROAS: if ad spend is $120 and resulting revenue is $480, ROAS = revenue ÷ spend = 480 ÷ 120 = 4, or a 4:1 return. Explain this means for every $1 spent you earned $4.
Instructor tip: Use small numbers in class so learners can verify math quickly. Always express monetary figures with the appropriate currency sign students prefer.
Step 8 — Localization, cultural sensitivity and compliance
Because your audience is international, emphasize localization:
- Translate ad copy, not just literal words — adapt idioms and cultural references.
- Use the correct currency sign and format prices appropriately (e.g., $1,000 vs 1.000,00 depending on locale).
- Check for right-to-left (RTL) languages and adjust creatives accordingly.
- Respect local advertising laws and platform policies (sensitive topics, health claims, political ads). Mention privacy rules: ensure compliance with data protection rules (GDPR, CCPA) when collecting personal data.
Step 9 — In-class activities and practical assignment
Give learners hands-on work:
- Quick worksheet (15–20 minutes): Choose a business, define the primary objective (awareness/consideration/conversion), design one ad format and suggest a micro-budget (e.g., $50 / €45 / ₹4,000).
- Targeting exercise (20 minutes): Create a simple audience: location, age bracket, and two interests. Explain why this audience will likely engage.
- Metrics target (10 minutes): Set a KPI: expected CPA and ROAS using small numbers. Example: with a $100 budget, if you estimate 20 conversions then target CPA = 100 ÷ 20 = 5 → $5 per conversion.
Assessment rubric (simple): clarity of objective (30%), logic of audience (30%), realism of budget and KPIs (25%), localization considerations (15%).
Step 10 — Instructor notes and classroom timing
A suggested 60–90 minute structure:
- 10 minutes: warm introduction and definitions.
- 25 minutes: deep dive into formats, targeting and budgets with examples.
- 20 minutes: learners complete worksheet and targeting exercise.
- 10–15 minutes: group presentations and quick feedback.
- 5–10 minutes: summary and Q&A.
Keep the atmosphere collaborative; invite learners to share local examples and currency differences so the whole class benefits from international perspectives.
Closing note for course creators
This lesson is your opportunity to demystify paid social advertising. Keep explanations concrete, use local examples and currency signs so learners can immediately relate to the numbers, and prioritize hands-on practice. When students leave this session they should be comfortable saying, in their own words, what Facebook Ads are, why they work, which ad formats exist, how budgets translate into expectations, and which metrics matter for business decisions.
If you prepare the live demo assets and the worksheet in multiple currency versions (for example $ / € / £ / ₹ / ¥), the lesson will feel instantly practical for international learners and prepare them to launch their first informed, measurable campaigns.
Lesson 2 — Navigating Facebook Business Manager
A hands-on walkthrough of Business Manager setup, account creation, and dashboard tour for international course creators
Lesson overview (what learners will gain)
In this lesson learners will complete a full, practical setup of Meta Business Manager (also known as Business Manager or Meta Business Suite), create or connect the essential assets (Pages, Ad Accounts, Instagram, Pixel), assign people and permissions, and learn how to read the main dashboard areas. Examples use multiple currency signs ($, €, £, ₹, ¥) and include localization tips so this lesson works for global groups.
Materials & preparatory notes for instructors
- A demo Meta account and the ability to demonstrate screen sharing.
- A list of sample businesses (digital course, ecommerce shop, local service) with example budgets in different currencies.
- A one-page worksheet for each student: business name, primary Facebook Page, desired billing currency, time zone, and one team member email to invite.
- Example site URL to use when creating a Pixel for testing.
Step 1 — What is Business Manager and why use it?
Start by explaining the role of Business Manager in plain terms: it’s the centralized administrative hub where organizations manage Pages, ad accounts, people, permissions, payment methods and data sources like the Pixel and Catalogs. Emphasize why it matters:
- Keeps personal Facebook accounts separate from business assets.
- Makes it safe and simple to grant and revoke access to team members or agencies.
- Enables centralized billing, multiple ad accounts and asset sharing across businesses.
For international learners, point out that Business Manager supports multiple currencies and time zones, but those settings are set at the ad-account level (more on that below).
Step 2 — Creating a Business Manager account (step-by-step)
Walk learners through account creation clearly and slowly:
- Sign in with a personal Facebook account (this is required for identity verification).
- Choose “Create Business” (or “Create Account”) and enter: business name, your name, and a business email. Use a business email (not a shared inbox) to keep records clear.
- Complete business details: legal business name, address, phone, and primary industry — encourage learners to enter these exactly as they appear on official documents.
- Confirm email and log in to Business Manager.
Instructor note: clarify that the personal account used to create Business Manager becomes an admin-level user for that business. Recommend creating a separate admin user for long-term management rather than relying on a personal account that may change hands.
Step 3 — Business settings and verification
After creation, show the Business Settings area and the essential fields:
- Business Info: review business name, address, tax ID if applicable. Keep this accurate—platform checks sometimes require matching documents.
- Business Verification: explain that some features (payment methods, API access, or ad account limits) may require verification of business identity. Verification typically involves submitting official documents — the exact requirements vary by country. Advise learners to prepare a business registration document or tax ID if they plan to scale.
Tip for international groups: business names and documents may include diacritics or RTL scripts — instruct learners to enter the Latin-alphabet transliteration if the form requires it and upload local documents during verification.
Step 4 — Adding and claiming assets (Pages, Ad Accounts, Instagram)
Demonstrate the three ways to add assets: create new, add existing (claim), or request access. For each asset type, show examples.
Pages
- Create a new Page if the business has none.
- Add a Page you already own (you will need to be an admin on that Page to claim it).
- Request access if a Page belongs to another business (agency scenarios).
Ad Accounts
- Create a new ad account: name it clearly (e.g., “BrandName — GBP — UK”), choose the ad account currency and time zone carefully (these settings typically cannot be changed later for that ad account).
- Add an existing ad account if you have admin rights on it.
- Request access to an ad account owned by a partner.
Important international note: choose the billing currency to match the business’s bank or card currency to reduce conversion fees. Also choose the time zone that matches your principal market or reporting preference (YYYY-MM-DD examples help demonstrate reporting windows).
Instagram and Catalogs
- Connect an Instagram account to ads for cross-platform posting and creative options.
- Add product Catalogs for ecommerce stores; show how catalogs link to Shops and dynamic product ads.
Step 5 — Creating and configuring an ad account (detailed)
When creating an ad account, walk learners step-by-step:
- Give the ad account a clear name and assign the business asset owner.
- Select the primary currency and time zone. Reiterate: this choice cannot be changed for that ad account later; you must create a new ad account to use a different currency/time zone.
- Set up billing country and billing threshold preferences.
- Add a payment method (credit/debit card, PayPal or regional payment options — availability varies by country).
Use multiple currency examples: “If your business bank is in India choose ₹ to avoid card conversion; if your bank is UK-based choose £.”
Step 6 — Adding people and assigning roles (best practices)
Show how to invite team members by email and assign granular permissions. Explain common roles and their implications:
- Business Manager roles: Admin (full control), Employee (limited access). Keep admin count small.
- Page roles: Admin, Editor, Moderator, Advertiser, Analyst — choose only what’s necessary.
- Ad account roles: Admin (manage billing and people), Advertiser (create and edit ads but not billing), Analyst (view performance).
Demonstrate assigning roles during invitation and explain that each person must accept the invite via their Facebook account. Recommend using email addresses tied to work accounts and requiring two-factor authentication.
Agency workflow: explain how to add partners using Partner ID and grant access to specific assets without sharing admin credentials.
Step 7 — Setting up the Pixel and Events Manager
Show Events Manager and guide learners through Pixel creation:
- Create a Pixel and give it a recognizable name (e.g., BrandName_Pixel).
- Add the Pixel to a website using the manual code snippet, a tag manager, or a plugin (examples differ by site platform).
- Test Pixel activity using the Event Manager’s testing tools and validate that page views and conversions are tracked.
- Enable Automatic Advanced Matching (AAM) if available and obtain user consent where required by local laws.
Explain the Conversion API as a complementary server-side method for sending events to Meta for better measurement and data control — especially useful where browser tracking is limited by privacy regulations.
Privacy reminder: instruct learners to display clear cookie and privacy notices and to consult local regulations (GDPR, CCPA equivalents) about consent for pixel tracking.
Step 8 — Dashboard tour: what you’ll see and where to look
Walk through the main Business Manager dashboard and point out the core sections:
- Home: high-level summary of pages, ad accounts and recent activity.
- Accounts: Pages, Ad Accounts, Instagram Accounts, WhatsApp Accounts.
- People & Partners: invited users and partner connections.
- Data Sources: Pixels, Catalogs, Offline Event Sets, Apps.
- Payments/Billing: billing history, invoices, payment methods and thresholds.
- Security Center: two-factor authentication, suspicious activity alerts.
- Business Settings: the central control panel for managing everything.
For each section demonstrate one common task: e.g., view an invoice in Billing, add a card, validate a Pixel event in Data Sources. Highlight where to find account IDs — useful for agency collaboration.
Step 9 — Security and governance (must-do practices)
Emphasize security and governance for international teams:
- Require two-factor authentication (2FA) for all people with access.
- Keep a minimal number of admins and review access quarterly.
- Use partner invites instead of sharing passwords with external agencies.
- Keep a record of Business Manager IDs, ad account IDs and who has billing control.
Also recommend keeping a central “owner” document with the business registration and the email used to create Business Manager so future audits and ownership transfers are smooth.
Step 10 — Common setup issues and how to fix them
Cover common roadblocks and their fixes:
- Can’t claim a Page or Ad Account: ensure the inviter is an admin and the email used is correct. Try “Request Access” instead of “Add.”
- Currency/time zone mistake: you cannot change them; create a new ad account if required.
- Payment declined: check card country/currency mismatch; try alternative payment method.
- Pixel not firing: verify the code snippet is placed before the closing </head> tag or check Tag Manager configuration.
Prepare a checklist of support items (business ID, screenshots, account IDs) to have ready if you need to contact support or your agency partner.
Practical classroom activities
Include hands-on tasks to cement learning:
- Each learner creates (or simulates creating) a Business Manager entry and fills the worksheet with ad account currency choices and time zone rationale.
- Invite one teammate by email, assign an Ad Account Advertiser role and a Page Editor role.
- Create a Pixel name and draft a plan for where it will be installed on the website.
- Perform a dashboard scavenger hunt: find the ad account ID, locate two invoices, and identify where to add a payment method.
Provide a short rubric to evaluate the work: correctness of asset naming and currency, clarity of role assignment, and Pixel test results.
Closing note for course creators
This lesson is intentionally operational — your learners should leave the session with a functioning Business Manager structure they can manage and scale. Encourage accuracy in business details, careful selection of currency/time zone when creating ad accounts, and strict security hygiene. When learners understand the layout, roles, and basic data sources like the Pixel, they are ready to move on to audience building and campaign creation with confidence.
Lesson 3 — Setting Up Your Ad Account the Right Way
Learn how to configure your account, billing details, and access permissions to avoid problems later.
(A step-by-step, instructor-ready lesson for international course creators. Examples use multiple currency signs: $, €, £, ₹, ¥.)
Lesson overview (what learners will gain)
In this lesson learners will set up an ad account correctly and confidently: choose the right currency and time zone, add payment methods, configure billing preferences, assign roles and permissions safely, and run a small test spend to validate everything. The goal is to prevent avoidable mistakes (wrong currency, misplaced billing access, insufficient security) that cause extra costs, blocked ads, or time-consuming account fixes.
Materials & preparatory notes for instructors
- A demo Meta (Facebook) Business Manager account and screen-share capability.
- Example business scenarios with sample budgets in different currencies (e.g., $200, €180, £150, ₹15,000, ¥20,000).
- A short worksheet: business name, desired billing currency, bank/corporate card details (simulated), time zone, two team member emails.
- A step-by-step checklist handout for learners to keep after class.
Step 1 — Name your ad account clearly and consistently
Good naming saves time and avoids confusion when you scale. Teach an account-naming convention and make it standard across the organisation or course cohort. Example format:
BrandName — Currency — Market — Purpose — YYYYMM
Example: GreenTea — USD — US — Prospecting — 202509
This makes it obvious at a glance which account is which (currency and market are critical). Encourage learners to include the month when accounts are created if they plan frequent account creation.
Step 2 — Choose currency and time zone deliberately (these are important)
When creating an ad account, Meta usually asks you to set the primary currency and time zone. Emphasize these two rules:
- Currency is effectively permanent for that ad account. If you choose €, you cannot change that ad account to $ later — you must create a new ad account.
- Time zone affects reporting and dayparting. Choose a time zone aligned to your main market or reporting preference.
Practical guidance for international learners:
- Use the currency that matches your business bank account or card to reduce conversion fees: choose $, €, £, ₹, ¥ as appropriate.
- If you operate across several markets, consider separate ad accounts per currency/market to keep billing tidy and reporting aligned.
Budget example (showing how to think about daily spend):
Suppose you set a lifetime budget of €200 for 14 days. Calculate per-day spend precisely:
Step-by-step division:
- 200 ÷ 14
- 14 goes into 200 fourteen times because 14 × 14 = 196. That leaves a remainder of 4.
- Convert remainder to decimal: 4 ÷ 14 = 0.285714…
- So 200 ÷ 14 = 14.285714…
Rounded to two decimal places this is €14.29 per day.
Explain how this helps learners plan realistic KPIs and pacing for campaigns.
Step 3 — Add payment methods and understand billing behavior
Walk learners through adding payment methods in Business Manager or the Payments section. Common payment options include credit/debit cards and PayPal, though availability varies by country. For larger advertisers, manual invoicing or bank transfer may be available after business verification.
Best practices:
- Add a card in the currency matching your ad account when possible. This often avoids bank conversion fees.
- Use a business card, not a personal one, so accounting and tax invoices are consistent.
- Keep at least two payment methods on file for continuity (primary and backup).
Billing concepts to explain:
- Daily budget vs lifetime budget — daily budget controls approximate daily spend; lifetime budget is the total for the campaign duration.
- Billing threshold — for some accounts, Meta bills at thresholds (e.g., after you spend a certain amount). This is dynamic; higher-spend accounts may have higher thresholds.
- Account spending limit — you can set a total cap to prevent accidental overspend. Teach learners how to set this as a safety measure.
Tax & invoicing:
- Show learners where to download invoices and store them for local VAT/GST reporting.
- Ask learners to add the appropriate tax or VAT registration number in the billing profile so invoices match local tax requirements.
Step 4 — Configure billing country, legal information and receipts
Billing country and business details should match legal documents. Mistakes here complicate tax filings and verification.
Steps to cover:
- Open Billing Settings and confirm the billing country.
- Enter business name, registered address, and tax/VAT ID exactly as on official paperwork.
- Upload or save invoices for reconciliation and accounting.
Instructor note: advise learners to check local rules: invoice formats and tax treatments vary by country. Encourage storing both PDF invoices and metadata (ad account ID, invoice number, expense category) in bookkeeping software.
Step 5 — Assign roles and permissions with least privilege
Permissions are the common place where mistakes create risk. Teach the principle of least privilege: give people only the access they actually need.
Common roles:
- Admin (Business Manager): full control — limit to owners or trusted senior staff.
- Employee (Business Manager): general access as assigned.
- Ad Account Admin: can manage billing and people.
- Advertiser: create, edit and run ads, but not billing.
- Analyst: view-only access to performance data.
Practical assignment flow:
- Invite by email (use corporate emails tied to users, not shared inboxes).
- Assign the minimal role that allows them to perform their tasks.
- Enforce two-factor authentication (2FA) for every person with elevated access.
Agency workflow:
- Use Partner ID invites to give agency-level access without sharing owner credentials. Show how to grant only the assets they need, e.g., a single ad account and page.
Step 6 — Connect tracking & data sources to the ad account
An ad account is only useful when it can read conversions and feed them back into optimization systems.
Key steps:
- Ensure the Meta Pixel is created in Events Manager and associated with the right ad account or business asset.
- Turn on Automatic Advanced Matching where appropriate (helps match website visitors even when cookies are limited), and ensure you have legal consent to do so.
- If available, consider Conversion API for server-side event reporting to improve measurement accuracy, particularly in regions with strict browser tracking restrictions.
Remind learners to coordinate with web developers or platform admin to install and test the Pixel before launching spend.
Step 7 — Run a payment test and a micro-campaign to validate setup
Before launching a full campaign, run a small test to confirm billing, tracking and permissions:
Suggested test plan:
- Create a very small campaign with a €5–€10 daily budget (or equivalent in your currency) for 3–7 days.
- Use a simple landing page or post engagement objective.
- Confirm: charge appears on the card, Pixel registers page view, and invited team members can view performance.
This live test reveals configuration and billing issues early when fixes are simple.
Step 8 — Troubleshooting common billing and access issues
Prepare learners to solve these typical problems:
- Payment declined: check CVV, expiration, issuer restrictions, card-country vs ad-account-currency mismatch, or bank-blocks for international charges. Adding a backup payment method often resolves interruptions.
- Wrong currency/time zone selected: you cannot change these for an existing ad account; create a new ad account and migrate campaigns if required.
- Invoices missing: verify the billing profile details and ensure the correct business name/tax ID is set.
- Access problems: verify invites were accepted, check email used and enforce 2FA.
Provide a troubleshooting checklist: account ID, invoice number, screenshot of error, billing profile screenshot — these speed up support requests.
Step 9 — Practical classroom activities
Hands-on practice is essential. Suggested activities:
- Worksheet task (20–25 minutes): choose a sample business, decide currency and time zone, and create a naming convention for the ad account. Justify the choices.
- Payment setup (15 minutes): simulate adding a payment method and set an account spending limit. Discuss implications of different currency choices.
- Role assignment (15 minutes): invite one peer and assign an Advertiser role; then revoke access.
- Micro-campaign (optional live demo): launch a €10/day test campaign for 3 days and monitor that billing and Pixel events appear.
Assessment rubric: clarity of naming (20%), correct currency/time zone choice with justification (25%), correct role assignment and security measures (30%), demonstration of a working micro-test (25%).
Closing notes for instructors
A correctly configured ad account removes many future headaches and ensures predictable billing and reporting. Emphasize to international learners: choose currency and time zone carefully, use business payment methods, enforce least-privilege access with 2FA, and always run a small test before scaling. Encourage them to keep a simple ledger — ad account IDs, billing profile, tax ID, and who has billing control — so the business remains auditable and resilient as it grows.
Lesson 4 — Understanding Facebook Ads Policies
Get familiar with ad approval rules and restrictions so your campaigns don’t get rejected.
(A long, step-by-step instructor lesson for international course creators. Examples use multiple currency signs: $, €, £, ₹, ¥.)
Lesson overview (what learners will gain)
In this lesson learners will understand what content Meta allows and disallows, how restricted categories work, what targeting rules to follow (especially to avoid discriminatory practices), how the ad review and appeals process functions, and practical checks to perform before launching ads. By the end of the session students should be able to design ads and landing pages that comply with Meta’s standards and avoid common rejection reasons.
Materials & prep for instructors
- A copy of the platform’s Advertising Standards to reference during the session.
- Examples of ad creatives (approved and rejected) for group review.
- A worksheet with a compliance checklist (creative, copy, targeting, landing page, tracking).
- Several international business scenarios priced in different currencies (e.g., $99, €89, £79, ₹7,500, ¥9,800) so learners can practice localized compliance.
- Access to an ad account to demonstrate a live review or mock rejection and how to appeal.
Step 1 — Why policies matter (frame it practically)
Start by explaining the real cost of ignoring policies: rejected ads, paused campaigns, invoicing surprises, poor account health, or in severe cases, account restrictions. Policies exist to protect users, ensure fair advertising, and comply with local laws. Policy enforcement can be automated or manual, and enforcement decisions are based on both strict rules and contextual judgment.
Step 2 — Prohibited vs restricted content (clear definitions)
Make a sharp distinction early:
- Prohibited content — never allowed. Typical examples: hate speech, explicit nudity, promoting illegal products, facilitating fraud, selling regulated weapons. Ads with prohibited content will be rejected and repeated violations harm account standing.
- Restricted content — may be allowed but only under strict rules. Examples include alcohol, gambling, some financial products, health-related claims (weight-loss, unverified medical claims), and “sensitive” political or social issue ads. These often require additional documentation, targeting limits, or special disclosures.
Use concrete examples: a weight-loss claim that promises “lose 10 kg in 7 days” is likely to be flagged as misleading; a diet program that states realistic, verifiable outcomes and avoids medical claims is less likely to be rejected.
Step 3 — Special categories and discrimination (what to avoid)
Certain ad categories such as housing, employment and credit come with strict targeting limitations to prevent discrimination. Advertisers must not exclude or single out demographic groups unfairly.
Class exercise: present three ad scenarios (housing listing, job opening, loan offer). Ask learners to identify whether each is a Special Ad Category and to rework the targeting and copy so it complies.
Step 4 — Creative and copy rules (practical checks)
Walk through the most common creative and copy issues that cause rejection:
- Misleading claims and guarantees: Avoid absolute promises of outcomes (e.g., “make $5,000 in a week”). Phrase results as examples or testimonials that are clearly labeled.
- Before/after images and exaggerated results: These are often disallowed in sensitive categories (health, beauty). If used, ensure they are realistic and accompanied by clear disclaimers.
- Shocking or sensational imagery: Graphic violence, excessive profanity, and images that exploit shock value are likely to be rejected.
- Personal attributes in copy: Copy that implies knowledge of a person’s race, religion, health, sexual orientation, or other sensitive attributes (e.g., “Are you disabled?”) is prohibited.
- Transparency and truthfulness: Headline, primary text, image and landing page must align — don’t promise one thing in the ad and deliver another on the landing page.
After each rule, show paired examples (non-compliant vs compliant) and have learners rewrite the non-compliant copy.
Step 5 — Targeting rules and audience best practice
Targeting must be lawful and non-discriminatory. Important points to emphasize:
- Avoid targeting that excludes or targets people on the basis of protected characteristics for opportunities like housing, employment and credit.
- Use Custom Audiences responsibly — you must have the right to use the data and comply with privacy laws.
- Lookalike and interest targeting should be used to expand reach but not to create exclusionary audiences for sensitive categories.
Practical classroom activity: give a product and ask learners to design three legally compliant targeting approaches for three different markets (€ market, £ market, ₹ market) with rationale.
Step 6 — Political, social issue and election ads — special rules
Ads that relate to political content, elections or social issues require special authorization in many countries and are subject to transparency rules (disclaimers and ad libraries). The rules differ by region — in some regions there are temporary restrictions or operational changes that affect whether these ads can run at all. Always check the relevant authorization steps and timing before running such campaigns.
Class discussion: in which cases would an educational NGO’s call-to-action be considered a “social issue” ad? How would this change the setup and documentation required?
Step 7 — Landing pages, funnels and transparency
Explain that an ad’s compliance extends to the landing page and the entire conversion funnel:
- Ensure landing pages reflect the ad message and do not contain prohibited claims.
- Don’t cloak content — the page a user sees must match the ad creative and the URL must resolve properly.
- Subscription traps, hidden charges, or poor refund policies will flag ads or generate user complaints which can reduce account trust.
Practical check: run a 10-point landing page audit (headline match, pricing visibility in correct currency, clear refund policy, contact info, privacy/consent notice).
Step 8 — Ad review, timing and appeals (what to expect)
Explain the review lifecycle: when you create or edit an ad it goes into automated review; some ads are escalated to manual review. Most ads are reviewed quickly, but complex or restricted ads may take longer. If rejected, the ad status will include a reason. You can edit and resubmit or file an appeal through Business Support — appeals are reviewed and may be escalated to humans. Keep records of screenshots and policy rationales when appealing.
Role play: show a rejected ad status, read the explanation, then have learners prepare a concise appeal message with evidence and grounding in policy language.
Step 9 — Privacy, tracking and consent (international requirements)
Tracking tools such as the Pixel and conversion API are common but must be used lawfully. In many jurisdictions you must obtain user consent for cookies or tracking pixels and explain how data is used. Learners should include clear cookie/consent banners, a privacy policy in local language, and opt-out mechanisms where required.
Group task: draft a short privacy/consent snippet for a landing page selling an online course for €89 that explains what the Pixel does and how users can opt out.
Step 10 — Account health, repeated violations and enforcement
Help learners recognize that accounts are rated on trust. Repeated policy violations can lead to limits on ad delivery, temporary blocks, or account disablement. Avoid workarounds (like creating new ad accounts to bypass restrictions) — these are violations and escalate enforcement. Maintain good record keeping, follow the appeals process when needed, and remediate the root cause of any rejections.
Pre-launch compliance checklist (practical)
Provide a one-page pre-launch checklist learners must complete before any campaign launch:
- Does the ad avoid prohibited content?
- Is the ad in a restricted category? If yes, do we have required documentation?
- Does the ad and landing page avoid personal attributes or discriminatory language?
- Do headlines, images and landing page match?
- Is the Pixel/Conversion API installed and tested with user consent where required?
- Have payment and billing compliance items been set for the market currency (e.g., €, £, ₹)?
- Have targeting choices been reviewed for fairness and legality?
- Do you have screenshots and policy rationale ready if you need to appeal?
Classroom activities and assessment
- Compliance rewriting lab: learners rewrite three rejected ads to become compliant.
- Targeting audit: review and justify targeting for a campaign in three markets.
- Appeal drafting: craft an appeal for a hypothetical wrongful rejection.
Grading rubric: accuracy of policy interpretation, quality of remediation, clarity in documentation, and localization/privacy handling.
Final remarks for course creators
Policies change and enforcement evolves; emphasize that compliance is a continuous process, not a one-time checklist. Teach students to build compliance into creative and campaign workflows: pre-launch checklist, localization review, and a small test run to validate tracking and messaging in each market ($, €, £, ₹, ¥). When a rejection happens, treat it as data — read the reason, fix the root problem, document the change, and then re-submit or appeal professionally with evidence. For anything legally complex (regulated financial offers, medical claims, political advertising), encourage consultation with local legal counsel in addition to following platform policy documentation.
We’re also giving these extra bonuses
Facebook Ads Masterclass – Checklist
Facebook Ads Masterclass – FAQs
Facebook Ads Masterclass – Salespage Content
Package Details:
Word Count: 30 570 Words
Number of Pages: 131
Facebook Ads Masterclass – Bonus Content
Checklist
Word Count: 372 words
FAQs
Word Count: 783 words
Salespage Content
Word Count: 873 words
Total Word Count: 32 598 Words
Your PLR License Terms
PERMISSIONS: What Can You Do With These Materials?
Sell the content basically as it is (with some minor tweaks to make it “yours”).
If you are going to claim copyright to anything created with this content, then you must substantially change at 75% of the content to distinguish yourself from other licensees.
Break up the content into small portions to sell as individual reports for $10-$20 each.
Bundle the content with other existing content to create larger products for $47-$97 each.
Setup your own membership site with the content and generate monthly residual payments!
Take the content and convert it into a multiple-week “eclass” that you charge $297-$497 to access!
Use the content to create a “physical” product that you sell for premium prices!
Convert it to audios, videos, membership site content and more.
Excerpt and / or edit portions of the content to give away for free as blog posts, reports, etc. to use as lead magnets, incentives and more!
Create your own original product from it, set it up at a site and “flip” the site for megabucks!
RESTRICTIONS: What Can’t You Do With These Materials?
To protect the value of these products, you may not pass on the rights to your customers. This means that your customers may not have PLR rights or reprint / resell rights passed on to them.
You may not pass on any kind of licensing (PLR, reprint / resell, etc.) to ANY offer created from ANY PORTION OF this content that would allow additional people to sell or give away any portion of the content contained in this package.
You may not offer 100% commission to affiliates selling your version / copy of this product. The maximum affiliate commission you may pay out for offers created that include parts of this content is 75%.
You are not permitted to give the complete materials away in their current state for free – they must be sold. They must be excerpted and / or edited to be given away, unless otherwise noted. Example: You ARE permitted to excerpt portions of content for blog posts, lead magnets, etc.
You may not add this content to any part of an existing customer order that would not require them to make an additional purchase. (IE You cannot add it to a package, membership site, etc. that customers have ALREADY paid for.)
Share Now!
Latest Products


Free Sales Funnel Builder

Related Products
Popular & Trending


Featured Products