DIY Renovation Hacks PLR Course 19k Words
in Home Improvement PLR , Home Improvement PLR Ebooks , Home Remodeling PLR , PLR Checklists , PLR eBooks , PLR eCourses , Premium PLR , Premium PLR eBooks , Premium PLR Reports , Premium White Label Brandable PLR Coaching Courses , Private Label Rights ProductsChoose Your Desired Option(s)
has been added to your cart!
have been added to your cart!
#diyrenovation #homeimprovement #plrcourse #renovationhacks #diyprojects #fixityourself #contentmarketing #digitalproduct #homemakeover
Are you ready to turn your home into a masterpiece without breaking the bank? The DIY Renovation Hacks PLR Course is the ultimate guide for homeowners looking to make big changes with small budgets. This comprehensive course covers everything from planning and budgeting to specific DIY hacks for your walls, flooring, kitchen, bathroom, and beyond. Whether you’re a complete beginner or someone looking to upgrade your home, this course provides simple yet effective strategies to achieve professional-looking results without hiring expensive contractors.
By the end of this course, you’ll have all the tools and techniques you need to take on your next home renovation project with confidence, creativity, and budget-friendly solutions.
Presenting…
DIY Renovation Hacks PLR Course 19k Words
What’s Included:
Course Modules Breakdown:
This DIY Renovation Hacks PLR Course is divided into five modules, each with clear, actionable steps that guide you through each stage of your home renovation. From setting goals and choosing the right tools to learning advanced techniques, every aspect of home improvement is covered in this course.
Module 1: Planning Your DIY Renovation
💡 Goal: Set a solid foundation for your renovation project.
The first module focuses on laying the groundwork for your DIY renovation project. Without proper planning, even the most ambitious renovation ideas can turn into a chaotic mess. This module walks you through how to set clear goals, stay within your budget, and avoid unnecessary expenses.
- Step 1: Setting Clear Goals
Start by defining the main objectives of your renovation. Do you want to enhance the aesthetics of your space, improve functionality, or both? By knowing exactly what you want to achieve, you’ll be able to stay focused and make informed decisions. - Step 2: Creating a Budget & Timeline
Learn how to create a budget that works for you, with a breakdown of costs for materials, tools, and any unexpected expenses. Setting a realistic timeline helps ensure your renovation doesn’t become a never-ending project. - Step 3: Gathering Essential Tools & Materials
Get a detailed list of the tools and materials you’ll need to complete your renovation. Whether you’re using basic hand tools or renting specialized equipment, this step ensures you’re fully equipped for the job. You’ll also learn tips on how to rent expensive tools instead of purchasing them. - Step 4: Prepping Your Space
Before you begin, it’s essential to clear the area, cover furniture, and protect your floors. Safety is paramount, so we’ll show you the best practices for ensuring your workspace is safe and organized.
Module 2: Walls & Paint Hacks
💡 Goal: Achieve a smooth, professional finish for your walls.
Your walls are one of the most visible parts of your home, and painting is often the most cost-effective way to update them. This module dives into the best practices for painting and wall improvements, even if you have zero experience with DIY painting.
- Step 1: Prepping Walls for a Smooth Finish
Learn how to clean and prep your walls for a flawless paint job. You’ll be shown how to fill in cracks and holes with spackle, and sand the surface to create a smooth canvas. - Step 2: Choosing the Right Paint & Tools
Not all paints are created equal! We’ll help you choose the right type of paint, based on your space’s needs. Plus, we’ll guide you through the tools required—rollers, brushes, painter’s tape, and more. - Step 3: Painting Like a Pro
Discover the best techniques for applying paint evenly. You’ll learn how to use the “W” or “M” motion when painting, allowing for even coverage and a professional finish. - Step 4: Adding Creative Wall Touches
Want to add some creativity to your walls? Try an accent wall, stenciling, or even peel-and-stick wallpaper. Whether you’re a renter or homeowner, these options allow you to add a unique touch to any room.
Module 3: Flooring Made Easy
💡 Goal: Install and maintain beautiful floors without the cost of a professional.
In this module, we break down the process of choosing and installing flooring that suits your space and budget. You don’t have to spend a fortune to get a high-end look—whether you’re installing laminate, vinyl, or tile.
- Step 1: Choosing the Right Flooring Option
Not all flooring is equal! Learn which materials work best for specific rooms in your home, such as vinyl for kitchens, laminate for living areas, and tile for bathrooms. We’ll cover the pros and cons of each type of flooring. - Step 2: Prepping the Floor for Installation
Preparation is crucial. Before laying new flooring, we guide you through the necessary steps to remove old flooring, clean the surface, and ensure the area is level. - Step 3: Installing Your Flooring Step-by-Step
We provide simple, step-by-step instructions for installing your chosen flooring, whether it’s vinyl planks, laminate, or tile. Learn how to use a click-and-lock system for quick and easy installation or grout tiles for a more permanent solution. - Step 4: Finishing Touches for Durability
Once your flooring is in place, it’s time to protect it. We’ll show you how to seal edges, add trim, and choose the right rugs for high-traffic areas to ensure long-lasting durability.
Module 4: Kitchen & Bathroom Upgrades
💡 Goal: Refresh your kitchen and bathroom with simple, affordable upgrades.
The kitchen and bathroom are two of the most used areas in any home, and small upgrades can make a big difference. In this module, we provide easy, cost-effective hacks for updating cabinets, countertops, and fixtures.
- Step 1: Refreshing Cabinets & Countertops
Learn how to breathe new life into old cabinets with a fresh coat of paint, new handles, or peel-and-stick countertop options. - Step 2: Installing a Backsplash Easily
We show you how to install a backsplash with peel-and-stick tiles or traditional tile-and-grout methods for an updated, stylish look. - Step 3: Upgrading Faucets & Fixtures
Swapping out outdated faucets and light fixtures is an easy, DIY project that will instantly update your space with minimal effort. - Step 4: Organizing & Maximizing Space
Organize your kitchen and bathroom with clever storage ideas such as floating shelves, drawer dividers, and overhead racks.
Module 5: DIY Decor & Final Touches
💡 Goal: Add personality and style to your space with DIY decor.
Once your big renovations are done, it’s time to add those final touches that make your space feel like home. In this module, you’ll learn how to create custom shelves, upgrade lighting, and add creative decor that suits your personal style.
- Step 1: Creating Custom Shelving & Storage
Discover how to make floating shelves or repurpose old crates for additional storage and a stylish look. - Step 2: DIY Lighting Upgrades
Upgrade old lighting fixtures with new ones, or create your own custom lampshades to add a unique touch to your home. - Step 3: Adding Stylish Home Accents
Use DIY projects like wall art, centerpieces, or photo displays to showcase your creativity and make your home feel unique. - Step 4: Keeping Your DIY Work Looking Fresh
Learn how to keep your home looking well-kept with seasonal decor swaps, regular maintenance, and small touch-ups to keep everything looking new.
Bonus Materials Included:
In addition to the DIY Renovation Hacks PLR Course, you’ll receive these helpful bonus materials to assist you in promoting and implementing the course:
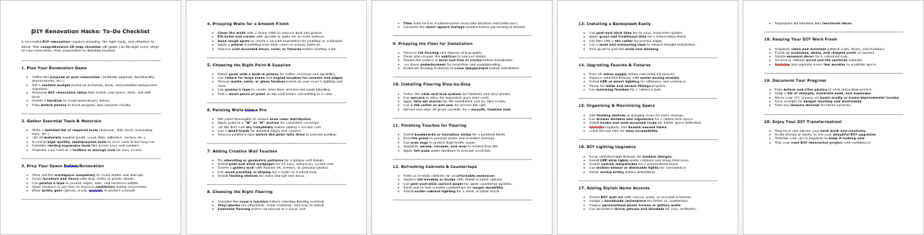
- DIY Renovation Hacks Checklist
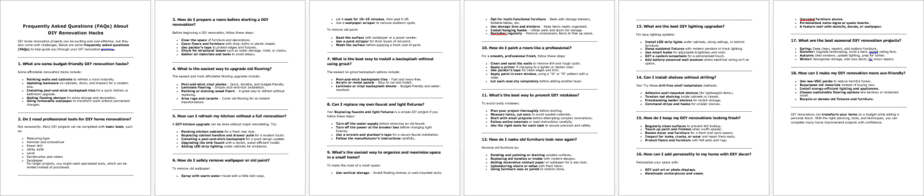
A 1,147-word checklist that summarizes the course’s main points for quick reference. - DIY Renovation Hacks FAQs
A 1,164-word FAQ that answers common questions and provides additional tips. - DIY Renovation Hacks Salespage
A 679-word sales page to help you easily market and sell this course to your audience.
How to Profit From the Course:
The DIY Renovation Hacks PLR Course offers many opportunities to profit in various ways:
- Sell the Course Directly: You can sell the course as a stand-alone product through your website, email list, or social media platforms.
- Create a Membership Site: Use the content to create a DIY home improvement membership site that offers ongoing advice, videos, and exclusive content to subscribers.
- Convert into Video Content: Turn the course into a video series and charge a higher price for the video content.
- Use it as a Lead Magnet: Offer a portion of the course for free to generate leads and then upsell the full course to your new subscribers.
- Bundle it with Other Products: Combine this course with related DIY products to increase its value and sell for a higher price.
Licensing Terms:
With the DIY Renovation Hacks PLR Course, you have the full rights to:
- Sell the course as-is or make changes to customize it to fit your brand.
- Break the course into smaller reports and sell them separately for $10-$20 each.
- Bundle it with other content to create larger, higher-priced products ($47-$97).
- Set up a membership site or eclass and charge monthly fees for ongoing access to DIY renovation tips.
- Create physical products like workbooks, guides, or physical books based on the content and sell them at a premium price.
What You Can’t Do:
- Resell the PLR rights or allow others to resell or license the content.
- Give away the content for free in its current form, though you can excerpt portions for blog posts or lead magnets.
- Offer 100% affiliate commissions. You can offer up to 75% commission for affiliates.
Get Started Today!
If you’re ready to take your DIY renovation skills to the next level, the DIY Renovation Hacks PLR Course is the perfect resource for you. For just $14.99, you’ll get access to a comprehensive, step-by-step guide to renovating your home like a pro.
Click here to purchase the DIY Renovation Hacks PLR Course and start transforming your space today!
has been added to your cart!
have been added to your cart!
Here A Sample of DIY Renovation Hacks PLR Course
Module 1: Planning Your DIY Renovation
Step 1: Setting Clear Goals
Before you grab a hammer or start purchasing materials, it’s essential to define your renovation goals clearly. Many DIYers jump into projects without a plan, which often leads to frustration, overspending, and unfinished work. To avoid these pitfalls, follow this structured approach to setting clear and achievable goals for your renovation.
1. Identify the Purpose of Your Renovation
The first step is to determine why you want to renovate. Ask yourself:
- Are you renovating for better functionality (e.g., creating more storage, improving lighting, making the space more practical)?
- Are you focused on aesthetics (e.g., modernizing outdated elements, changing colors, adding decorative features)?
- Do you want a combination of both—practical improvements with a stylish touch?
- Are you renovating for resale value or to make the space more comfortable for yourself?
Defining the purpose will help you make informed decisions about materials, designs, and budgeting.
2. Write Down Your Ideas and Priorities
Once you’ve determined your purpose, create a list of what needs to be done. This will keep you focused and prevent distractions. Here’s how:
- Make a priority list: Write down all your ideas, then categorize them into must-haves and nice-to-haves.
- Think about practicality: Ask yourself, “Will this change improve my daily life?” If not, it might not be a priority.
- Sketch or create a mood board: If you’re a visual thinker, draw rough sketches or create a digital mood board with colors, textures, and design inspirations.
- Use checklists: Organize your ideas into a structured list so you can track progress.
This step will help you avoid feeling overwhelmed and ensure you stay on track throughout the project.
3. Set a Realistic Timeline and Budget
Renovations can quickly spiral out of control if you don’t set clear boundaries for time and expenses. To keep things manageable:
- Estimate a realistic timeline: Break your project into phases. For example:
- Week 1: Planning, purchasing materials, and preparation
- Week 2: Demolition and structural changes
- Week 3-4: Painting, flooring, finishing touches
- Week 5: Final adjustments and cleanup
- Set a budget with a buffer:
- Research material costs and labor fees (if needed).
- Allocate at least 10-20% extra for unexpected expenses.
- Compare prices across different suppliers before purchasing.
A well-planned budget and timeline will help you stay in control and avoid unnecessary delays.
4. Consider Safety, Regulations, and DIY Limitations
Before starting any work, research whether your renovation project requires permits or follows local regulations. Some key points to consider:
- Building codes and permits: Some renovations, like structural modifications or electrical work, might require permits. Check with local authorities before starting.
- DIY vs. Professional Help: Be honest about your skill level. Certain tasks (e.g., plumbing, electrical work, and structural changes) might require expert assistance.
- Safety precautions: Invest in protective gear (gloves, safety goggles, dust masks) and understand the safe use of tools before operating them.
This step ensures your renovation is not only beautiful but also safe and compliant with legal requirements.
Final Thoughts
Setting clear goals will make your DIY renovation journey smoother and more enjoyable. By identifying your purpose, writing down your ideas, setting a realistic timeline and budget, and considering safety regulations, you’ll be well-prepared for the next steps in your renovation project.
Step 2: Creating a Budget & Timeline
A successful DIY renovation starts with a well-planned budget and timeline. Without proper financial planning and scheduling, projects can easily go over budget, take longer than expected, or even remain unfinished. This step will guide you through determining costs, allocating funds wisely, and setting a realistic timeline to keep your renovation on track.
1. Determine Your Total Budget
Before you start shopping for materials or hiring professionals, decide how much you are willing to spend on your renovation. Here’s how to establish a realistic budget:
- Assess your financial limits: How much money can you comfortably allocate without financial strain?
- Consider the return on investment (ROI): If you’re renovating to increase property value, research which upgrades offer the best return.
- Get cost estimates: Research the average price range of materials and services in your area. Look at both local and international suppliers if applicable.
- Set a buffer for unexpected costs: Always add 10-20% extra to your budget for hidden expenses like structural issues, price fluctuations, or last-minute upgrades.
🔹 Example: If your total budget is $5,000, set aside at least $500-$1,000 for unexpected costs.
2. Break Down Costs by Category
Now that you have a total budget, divide it into different expense categories. This helps ensure that you don’t overspend in one area while neglecting others. A good breakdown includes:
a) Materials & Supplies
- Flooring (tiles, wood, laminate)
- Paint, wallpaper, or wall treatments
- Countertops, cabinets, or fixtures
- Hardware (knobs, handles, hinges)
- Plumbing or electrical components
- Decorative elements (lighting, trims, molding)
b) Tools & Equipment
- Basic tools (hammer, screwdriver, measuring tape, drill)
- Advanced tools (power saw, nail gun, tile cutter)
- Safety gear (gloves, safety goggles, dust mask)
- Rental costs (if you don’t want to buy expensive tools)
c) Professional Help (if needed)
Even in a DIY project, you may need expert assistance for specific tasks.
- Plumbing & electrical work (If you’re not certified, hiring a pro can prevent costly mistakes)
- Structural modifications (Load-bearing walls or major changes might require a professional)
- Permits & inspections (Some regions require permits before starting certain renovations)
d) Unexpected Costs
- Delivery fees for materials
- Waste disposal and cleanup costs
- Small repairs that arise during renovation (e.g., fixing hidden wall damage)
🔹 Tip: Use a spreadsheet or budgeting app to track expenses and prevent overspending.
3. Set a Realistic Timeline
a) Define the Scope of Work
A small project like painting a room may take a weekend, while a full kitchen renovation could take several weeks. Break your project into phases to estimate the total time required.
🔹 Example of a bathroom renovation timeline:
- Week 1: Planning, purchasing materials
- Week 2: Demolition and prep work
- Week 3: Plumbing, electrical, and structural repairs
- Week 4: Installing flooring, cabinets, and painting
- Week 5: Finishing touches, cleanup, and final inspection
b) Factor in Delays
Delays are common in renovations due to material shortages, weather conditions, or unexpected repairs. To avoid frustration:
- Add extra time to each phase (e.g., if tiling takes 3 days, schedule 4-5 days instead).
- Order materials early to prevent waiting on deliveries.
- Schedule professionals in advance if hiring help.
c) Balance Workload with Your Schedule
If you have a full-time job or family commitments, don’t overbook your time with renovation tasks. Instead:
- Plan major work for weekends or days off.
- Break tasks into manageable daily goals (e.g., sanding cabinets one evening, painting the next).
4. Keep Your Budget & Timeline Flexible
Even the best plans need adjustments. Here’s how to stay flexible while maintaining control:
- Monitor spending regularly: Check receipts and update your budget weekly.
- Reallocate funds if necessary: If you overspend in one area, adjust by saving elsewhere (e.g., choose a less expensive light fixture to offset an unexpected plumbing cost).
- Adjust the timeline if needed: If delays occur, prioritize essential work first and schedule decorative finishes later.
Final Thoughts
Creating a budget and timeline ensures your renovation stays on track, within budget, and stress-free. By determining how much you can spend, breaking costs into categories, setting a realistic schedule, and preparing for flexibility, you’ll avoid common renovation mistakes and make the process smoother.
Step 3: Gathering Essential Tools & Materials
Before starting any DIY renovation, it’s crucial to gather all the necessary tools and materials in advance. This step ensures efficiency, prevents delays, and helps you stay within budget. Without the right equipment, you may struggle to complete tasks properly or end up spending more time and money than necessary.
In this step, we’ll cover how to:
- Make a checklist of essential tools
- Choose the right materials for your project
- Decide between buying, renting, or borrowing tools
- Organize tools and materials for easy access
1. Make a Checklist of Essential Tools
Every DIY renovation requires a basic toolkit to handle common tasks like measuring, cutting, assembling, and installing materials. Depending on your project, you may also need specialized tools.
a) Basic Tools for Every DIY Project
These are must-have tools for almost any home improvement project:
✔ Measuring & Marking Tools
- Measuring tape (5m/16ft or longer) – For accurate measurements of spaces and materials.
- Level (bubble or laser level) – Ensures straight and aligned installations (e.g., shelves, tiles).
- Pencil & chalk line – For marking cutting lines on wood, drywall, or flooring.
✔ Cutting Tools
- Utility knife – For cutting drywall, carpets, and packaging.
- Hand saw or circular saw – For cutting wood, plywood, and plastic.
- Tin snips – For cutting metal sheets or wire mesh.
✔ Fastening & Assembly Tools
- Hammer – For driving nails and minor demolition work.
- Screwdrivers (flathead & Phillips) – Essential for assembling furniture and fixing fixtures.
- Power drill & drill bits – For drilling holes and driving screws into various materials.
- Allen wrench (hex key set) – Needed for assembling furniture and fixtures.
✔ Painting & Finishing Tools
- Paint rollers & brushes – For smooth, even application of paint.
- Painter’s tape – For masking off areas to prevent paint from spreading.
- Sandpaper or sanding block – To smooth out surfaces before painting.
✔ Safety Gear
- Safety goggles – Protects eyes from dust and debris.
- Gloves – Prevents cuts, burns, and chemical exposure.
- Dust mask or respirator – Essential when working with paint, chemicals, or sawdust.
- Ear protection (earplugs or earmuffs) – If using loud power tools.
b) Specialized Tools for Larger Projects
Depending on your renovation type, you may need:
✔ Plumbing tools – Pipe wrench, plumber’s tape, basin wrench.
✔ Electrical tools – Voltage tester, wire cutters, electrical tape.
✔ Flooring tools – Tile cutter, rubber mallet, notched trowel.
✔ Carpentry tools – Nail gun, miter saw, chisel set.
Tip: Before purchasing, research whether you truly need a specialized tool or if there’s a workaround using tools you already own.
2. Choose the Right Materials for Your Project
Selecting the correct materials is just as important as having the right tools. The materials you choose should be durable, cost-effective, and suitable for your specific renovation needs.
Here’s how to plan material selection wisely:
a) Identify the Key Materials for Your Project
Different renovations require different materials. Here’s a general guide:
✔ Painting Projects
- Paint (latex or oil-based) – Choose quality, washable paint.
- Primer – Ensures a smooth and long-lasting finish.
- Painter’s tape – Protects trim, ceilings, and fixtures.
✔ Flooring Upgrades
- Laminate, vinyl, or hardwood planks – Easy to install for DIYers.
- Tile & grout – Best for moisture-prone areas (bathrooms/kitchens).
- Underlayment – Provides cushioning and reduces noise.
✔ Kitchen & Bathroom Renovations
- Tiles or waterproof panels – For walls and floors.
- Countertop materials – Wood, granite, quartz, or laminate.
- Plumbing fixtures – Faucets, sinks, and pipes.
✔ Wall & Ceiling Improvements
- Drywall or plaster – For repairing or replacing damaged walls.
- Crown molding & trim – Adds decorative detail.
- Soundproofing panels – Useful in apartments or shared spaces.
b) Compare Material Quality & Pricing
- Research materials: Read reviews, watch tutorials, and compare brands.
- Visit local and online stores: Prices vary by supplier, so check multiple sources.
- Check for sales & bulk discounts: Buying in bulk can save money.
- Look for eco-friendly options: Sustainable materials can be better for indoor air quality and long-term durability.
3. Decide: Buy, Rent, or Borrow Tools?
Purchasing every tool can be expensive and unnecessary, especially if you’re doing a one-time project. Here’s how to decide:
✔ BUY – If you plan to renovate frequently or use the tool long-term.
✔ RENT – For expensive tools you rarely need (e.g., tile cutter, power saw, floor sander).
✔ BORROW – Ask family or friends if they have the tool you need.
Where to Rent Tools Internationally?
Many hardware stores and home improvement centers offer tool rentals. Some well-known options include:
- The Home Depot (USA, Canada) – Wide selection of rental tools.
- Bunnings Warehouse (Australia, New Zealand) – Offers power tool rentals.
- Travis Perkins (UK & Europe) – Provides contractor-grade tools for rent.
- Local rental services – Check hardware stores in your country.
Renting can save money and storage space, especially for tools you won’t use frequently.
4. Organize Tools & Materials for Easy Access
Once you have all the tools and materials, store them in a way that makes your renovation process smoother.
✔ Use storage bins – Group tools and materials by category (e.g., electrical, painting, flooring).
✔ Label everything – Clearly mark containers so you can find what you need quickly.
✔ Keep a mobile toolkit – Store commonly used tools in a tool belt or portable toolbox.
✔ Designate a workspace – Whether it’s a garage, shed, or a corner of a room, having a set workspace will keep things organized.
Final Thoughts
Gathering the right tools and materials before starting your DIY renovation will save time, reduce stress, and help you work efficiently. By making a detailed checklist, selecting materials wisely, renting or borrowing costly tools, and organizing everything properly, you’ll be well-prepared to start your renovation with confidence.
Step 4: Prepping Your Space
Before you begin your DIY renovation, it’s essential to properly prepare your space. A well-prepared workspace will make your project easier, safer, and more efficient. This step ensures that your furniture, floors, and walls are protected from dust, debris, paint, or damage while also setting up a safe environment for working.
In this step, we’ll cover:
- Clearing out the workspace
- Protecting furniture, floors, and walls
- Ensuring safety with proper gear
- Setting up an efficient work area
1. Clearing Out the Workspace
Removing unnecessary items from the renovation area is the first step to creating an organized and hazard-free workspace.
a) Remove All Non-Essential Items
✔ Move out furniture, decorations, and appliances to prevent damage.
✔ If moving is not possible, shift items to the center of the room and cover them (see Step 2).
✔ Take down wall decorations, curtains, or anything that could get in the way.
✔ If you’re renovating a kitchen or bathroom, disconnect and remove small appliances, utensils, and toiletries.
Tip: If you’re working on a large renovation, consider renting a temporary storage unit or using another room in your home to store furniture.
b) Ensure Proper Ventilation
✔ Open windows and doors to allow fresh air to circulate, especially when painting or using adhesives.
✔ If possible, use fans or exhaust vents to remove dust and fumes.
✔ Keep dust-sensitive items (electronics, books, fabrics) in a different room.
2. Protecting Furniture, Floors, and Walls
DIY projects often create dust, debris, and spills. Protecting your furniture, floors, and walls will save you time and effort in cleaning up later.
a) Covering Furniture & Fixtures
✔ Use plastic sheets, tarps, or old bedsheets to cover sofas, tables, and beds.
✔ Wrap light fixtures, ceiling fans, and countertops with protective covers.
✔ Seal cabinets and drawers with masking tape to prevent dust from getting inside.
b) Protecting Floors from Damage
✔ Use drop cloths, cardboard, or plastic sheeting to shield floors from paint, dust, and scratches.
✔ If working with heavy tools, consider using foam padding or plywood sheets to prevent dents.
✔ Secure coverings with painter’s tape to avoid slipping.
c) Safeguarding Walls & Windows
✔ If only working on part of a room, use plastic sheeting and painter’s tape to section off areas.
✔ Apply painter’s tape around trim, baseboards, and window frames for clean paint lines.
✔ Cover mirrors and glass surfaces with newspaper or plastic to prevent splatter.
3. Ensuring Safety with Proper Gear
Safety should always be a priority when doing any renovation. Wearing the right gear and following safety precautions will help prevent injuries.
a) Essential Safety Gear
✔ Gloves – Protect hands from cuts, burns, and chemical exposure.
✔ Safety goggles – Shields eyes from dust, debris, and flying particles.
✔ Dust mask or respirator – Prevents inhalation of dust, fumes, and chemicals.
✔ Ear protection (earplugs or earmuffs) – Necessary when using loud power tools.
✔ Steel-toe boots or closed-toe shoes – Protect feet from falling objects.
Tip: Never wear loose clothing or jewelry while working, as they can get caught in tools.
b) Handling Electrical & Plumbing Safety
✔ Turn off power and water supply before working on electrical or plumbing projects.
✔ Use a voltage tester to ensure wires are not live before touching them.
✔ If unsure about complex electrical or plumbing work, consult a professional.
c) Fire & Hazardous Material Precautions
✔ Keep a fire extinguisher nearby when working with flammable materials.
✔ Store paint, solvents, and adhesives away from heat sources.
✔ Dispose of rags soaked in chemicals properly to prevent spontaneous combustion.
4. Setting Up an Efficient Work Area
A well-organized workspace will help you work faster and reduce frustration. Follow these steps to set up an efficient DIY renovation area.
a) Organize Tools & Materials
✔ Keep frequently used tools within reach on a tool belt or workbench.
✔ Store paint cans, adhesives, and liquids on a sturdy, level surface.
✔ Use small containers or bins for screws, nails, and fasteners to prevent loss.
b) Create a Designated Cutting & Assembly Area
✔ Set up a sturdy work table for measuring, cutting, and assembling.
✔ Keep a dustpan, broom, or vacuum nearby for quick cleanups.
✔ If working with wood or tiles, use sawhorses or a workbench for stable cutting.
c) Keep Emergency Supplies Ready
✔ Have a first aid kit nearby with bandages, antiseptic, and gloves.
✔ Store a flashlight or work light in case of power outages.
✔ Keep a phone or emergency contact list accessible.
Final Thoughts
Properly prepping your space is a crucial step that ensures a safe, organized, and efficient DIY renovation experience. By clearing out unnecessary items, protecting floors and furniture, prioritizing safety, and organizing tools effectively, you’re setting yourself up for a smoother renovation process.
Now that your space is fully prepped, you’re ready for the exciting part—bringing your DIY vision to life!
We’re also giving these extra bonuses
DIY Renovation Hacks – Checklist
DIY Renovation Hacks – FAQs
DIY Renovation Hacks – Salespage Content
Package Details:
Word Count: 16 949 Words
Number of Pages: 86
DIY Renovation Hacks – Bonus Content
Checklist
Word Count: 1147 words
FAQs
Word Count: 1164 words
Salespage Content
Word Count: 679 words
Total Word Count: 19 939 Words
Your PLR License Terms
PERMISSIONS: What Can You Do With These Materials?
Sell the content basically as it is (with some minor tweaks to make it “yours”).
If you are going to claim copyright to anything created with this content, then you must substantially change at 75% of the content to distinguish yourself from other licensees.
Break up the content into small portions to sell as individual reports for $10-$20 each.
Bundle the content with other existing content to create larger products for $47-$97 each.
Setup your own membership site with the content and generate monthly residual payments!
Take the content and convert it into a multiple-week “eclass” that you charge $297-$497 to access!
Use the content to create a “physical” product that you sell for premium prices!
Convert it to audios, videos, membership site content and more.
Excerpt and / or edit portions of the content to give away for free as blog posts, reports, etc. to use as lead magnets, incentives and more!
Create your own original product from it, set it up at a site and “flip” the site for megabucks!
RESTRICTIONS: What Can’t You Do With These Materials?
To protect the value of these products, you may not pass on the rights to your customers. This means that your customers may not have PLR rights or reprint / resell rights passed on to them.
You may not pass on any kind of licensing (PLR, reprint / resell, etc.) to ANY offer created from ANY PORTION OF this content that would allow additional people to sell or give away any portion of the content contained in this package.
You may not offer 100% commission to affiliates selling your version / copy of this product. The maximum affiliate commission you may pay out for offers created that include parts of this content is 75%.
You are not permitted to give the complete materials away in their current state for free – they must be sold. They must be excerpted and / or edited to be given away, unless otherwise noted. Example: You ARE permitted to excerpt portions of content for blog posts, lead magnets, etc.
You may not add this content to any part of an existing customer order that would not require them to make an additional purchase. (IE You cannot add it to a package, membership site, etc. that customers have ALREADY paid for.)
Share Now!
Latest Products


Free Sales Funnel Builder

Related Products

Popular & Trending


Featured Products