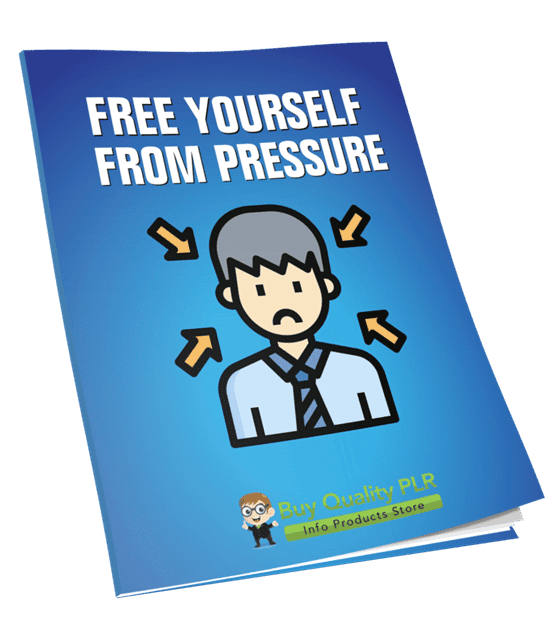
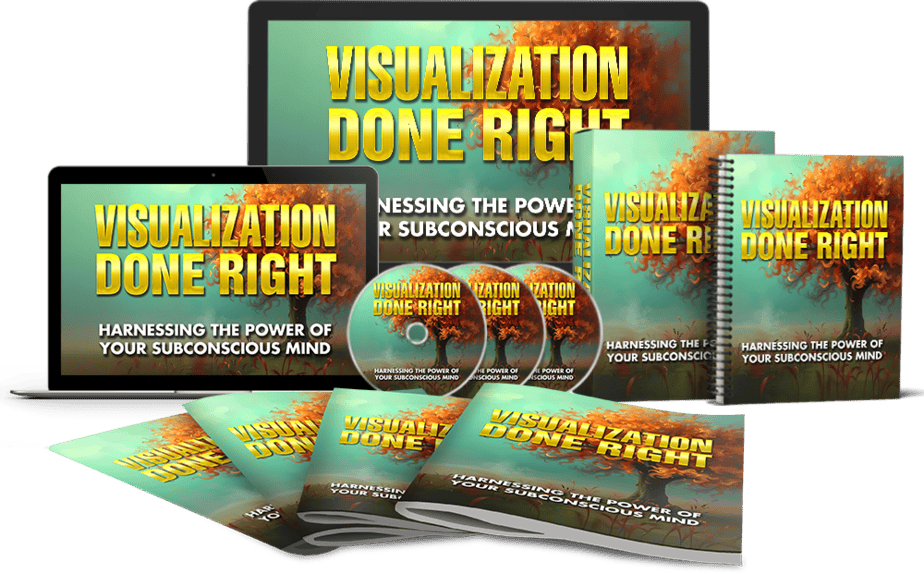
Free Yourself from Pressure PLR Course 33k Words
in PLR eCourses , PLR List Building Reports , Premium PLR , Premium PLR Reports , Premium White Label Brandable PLR Coaching Courses , Private Label Rights Products , Self Help PLR , Self Improvement PLR , Wellness PLRChoose Your Desired Option(s)
has been added to your cart!
have been added to your cart!
#freeyourselffrompressure #plrcourse #stressrelief #mindsetgrowth #wellnessmarketing #personaldevelopment #plrcontent #selfimprovement #mentalwellness
7 Days to Inner Peace – 33,000+ Words of High-Value, Done-For-You Content
Stress is no longer occasional.
For most people, it’s constant.
Deadlines. Expectations. Financial pressure. Family responsibilities. The endless need to “do more” and “be more.” Modern life has created a massive demand for relief — and that demand is only growing.
Now you can step into one of the most profitable and evergreen niches online with a premium, transformation-based product that is ready for you to sell.
Introducing the…
Free Yourself from Pressure PLR Course 33k Words
A complete 33,000+ word PLR course you can brand, customize, package, and profit from.
This is not a thin ebook.
This is not low-quality filler content.
This is a structured, step-by-step personal development program designed to guide students through a powerful 7-day journey from stress and overwhelm to clarity and calm.
And it’s fully editable.
What Makes This PLR Course Different?
Many PLR products are surface-level.
This one is built like a real course.
It’s organized into 5 comprehensive modules with 20 focused lessons that build on each other in a logical progression. Each lesson is short, practical, and actionable — making it ideal for digital courses, memberships, coaching programs, or self-study packages.
Your customers won’t just read it.
They’ll experience transformation.
Inside the Course: 5 Powerful Modules
Module 1: Understanding Pressure and Setting the Foundation
Goal: Recognize where pressure comes from and prepare the mind for peace.
Transformation starts with awareness. In this foundational module, students learn what pressure actually is and why it has such a strong impact on their lives.
Lesson 1: What Pressure Really Is
This lesson explores the difference between internal and external pressure. Students discover how pressure affects their body, mind, emotions, and daily behavior. It breaks down stress in a way that makes it understandable and manageable.
Lesson 2: Spotting Your Triggers
Here, students identify the specific situations, people, thoughts, and habits that trigger stress. Instead of feeling overwhelmed by everything, they learn to pinpoint exactly what creates pressure in their lives.
Lesson 3: The Myth of Productivity Under Pressure
This powerful lesson challenges the common belief that stress improves performance. Students learn why constant pressure actually reduces creativity, clarity, and efficiency — and what works better instead.
Lesson 4: Laying the Groundwork for Change
Students create a clear intention statement for their 7-day journey. This prepares their mindset for transformation and builds commitment from day one.
By the end of Module 1, they understand their stress patterns and feel hopeful about change.
Module 2: Calming the Mind and Body
Goal: Teach simple, practical techniques to quiet mental and physical tension.
This module gives students immediate tools they can use anywhere.
Lesson 1: The Power of the Breath
Simple breathing exercises that instantly calm the nervous system. Easy to implement. Powerful results. These techniques alone can dramatically improve emotional control.
Lesson 2: Relaxation Rituals You Can Start Today
Students create small daily habits — morning stretches, evening wind-down routines, mindful pauses — that reduce stress accumulation.
Lesson 3: Resetting Through Stillness
Short mindfulness practices designed for busy people. Even a few minutes of stillness can shift mental clarity and emotional balance.
Lesson 4: Anchoring Calm into Your Routine
Students choose one calming practice to implement consistently throughout the week. This turns peace from a temporary state into a habit.
Module 2 delivers instant wins — which increases satisfaction and retention if you use it in a membership or course format.
Module 3: Shifting Your Inner Dialogue
Goal: Break free from negative self-talk that creates unnecessary pressure.
Many people aren’t stressed because of circumstances.
They’re stressed because of their internal dialogue.
Lesson 1: Recognizing the Inner Critic
Students learn to identify the harsh, unrealistic voice inside their heads. Awareness weakens its power.
Lesson 2: Reframing Stressful Thoughts
This lesson teaches cognitive reframing techniques that replace pressure-filled thoughts with empowering ones.
Lesson 3: Affirmations for Inner Peace
Students craft personalized affirmations that reduce anxiety and build calm confidence.
Lesson 4: Daily Mental Detox Practice
A structured evening reflection process helps students release lingering negative thoughts before sleep.
This module alone makes the course highly valuable in the mindset and self-development niche.
Module 4: Building Emotional Resilience
Goal: Strengthen emotional stability so pressure loses its grip.
Instead of avoiding stress, students learn how to handle it.
Lesson 1: Understanding Emotional Energy
Emotions are explained as natural waves that rise and fall. Students learn they don’t have to fight emotions — they can ride them.
Lesson 2: Responding Instead of Reacting
Simple pause techniques help students avoid impulsive reactions during high-pressure situations.
Lesson 3: Creating Healthy Boundaries
This lesson teaches the art of saying “no” without guilt. Boundaries reduce unnecessary stress dramatically.
Lesson 4: The Art of Self-Compassion
Students practice kindness toward themselves, replacing self-criticism with emotional strength.
Module 4 increases the long-term value of the program and makes it suitable for higher-ticket offers.
Module 5: Living with Lasting Inner Peace
Goal: Make peace a lifestyle, not a 7-day experiment.
This final module ensures sustainability.
Lesson 1: Your Personal Peace Plan
Students create a customized daily system using the tools that worked best for them.
Lesson 2: Handling Pressure Moments Gracefully
Quick-response techniques help them manage stress in real time.
Lesson 3: Peaceful Living Beyond 7 Days
Long-term lifestyle shifts that protect mental clarity and emotional stability.
Lesson 4: Celebrating Your Transformation
Reflection exercises reinforce progress and build long-term commitment.
By the end of the course, students feel calmer, lighter, and more in control.
Bonus Materials Included
You also receive:
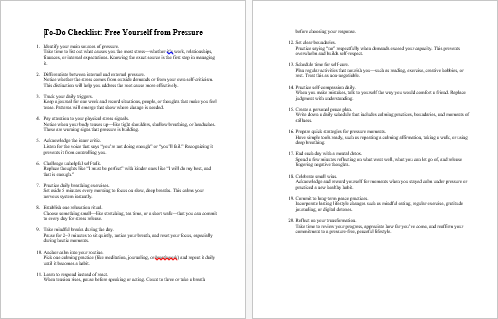
- Free Yourself from Pressure Checklist (512 words)
- Free Yourself from Pressure FAQs (862 words)
- Done-For-You Sales Page (780 words)
These bonuses allow you to launch faster and add value to your offer.
Multiple Ways to Use and Profit From This Course
This product is incredibly flexible.
Here are powerful monetization ideas:
1. Sell as a Self-Study Digital Course
Add branding and minor edits. Price it between $27 and $97 depending on your audience.
2. Break It into Smaller Reports
Sell each module individually for $10–$20. Turn one product into five income streams.
3. Create a Premium Bundle
Combine with productivity, mindfulness, or self-care PLR. Price bundles at $47–$97.
4. Build a Membership Site
Release one module per week. Charge $19–$37 monthly for recurring revenue.
5. Launch a Paid eClass
Convert into a guided multi-week program with worksheets and live calls. Charge $297–$497.
6. Turn It Into Audio or Video
Create an audiobook, guided meditation series, or video training program.
7. Use It as a Lead Generation Funnel
Offer excerpts as free downloads. Upsell the full course.
8. Create a Physical Product
Turn it into a printed workbook or journal and sell at premium pricing.
9. Build and Flip a Niche Brand
Create a stress-relief authority site, grow traffic, and sell the business.
License Terms Summary
You Can:
- Sell the content with minor tweaks
- Rebrand and modify it
- Break it into smaller products
- Bundle it with other content
- Convert it into audio, video, or physical formats
You Cannot:
- Pass PLR or resale rights to your customers
- Offer more than 75% affiliate commission
- Give away the complete product for free
- Add it to existing purchases without requiring a new transaction
These restrictions protect product value and ensure fair use.
Why Buy from Buy Quality PLR?
Buy Quality PLR specializes in:
- In-demand, evergreen niches
- Clean formatting and structured content
- High word counts and real depth
- Products designed for serious marketers
You are not buying generic content.
You are investing in a complete transformation system you can turn into a brand.
The Market Is Growing
Mental health, mindfulness, and stress management are booming industries.
People are actively searching for:
- Stress relief programs
- Inner peace techniques
- Emotional resilience training
- Mindset improvement systems
This course gives you a ready-made solution to meet that demand.
Turn Calm Into Cash
You can launch fast.
You can customize deeply.
You can scale big.
Whether you want quick digital sales or high-ticket coaching offers, this PLR course gives you a solid foundation.
If you’re ready to enter one of the most profitable and meaningful niches online, this is your opportunity.
Get Free Yourself from Pressure – 7 Days to Inner Peace PLR Course today and start building income while helping people reclaim their peace.
has been added to your cart!
have been added to your cart!
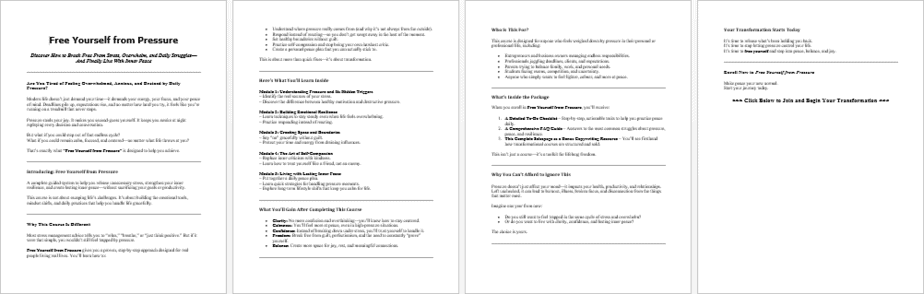
Here A Sample of the Free Yourself from Pressure PLR Course
Welcome to your journey of releasing stress, letting go of pressure, and creating a calm, peaceful state of mind in just 7 days. This course is broken into 5 powerful modules. Each module has 4 short, focused lessons that guide you step by step. Think of it as your personal blueprint to inner peace.
Module 1: Understanding Pressure and Setting the Foundation
Goal: Recognize where pressure comes from and prepare your mind for peace.
Lesson 1: What Pressure Really Is
Goal: Help learners recognise where pressure comes from (internal vs. external) and understand how it affects body, mind, and emotions.
Audience: international course creators — you’ll teach this lesson in culturally diverse groups, so every instruction includes accessible, globally useful facilitation notes.
Learning outcomes (what participants will leave with)
By the end of this lesson participants will be able to:
• Define “pressure” and distinguish it from related ideas like stress and anxiety.
• Identify at least three internal and three external sources of pressure in their own lives.
• Describe one physiological and one psychological consequence of pressure.
• Create a short, personal intention statement for fostering calm.
Why this lesson matters
Pressure is often treated as a personality flaw or an unavoidable side effect of modern life. For course creators working across cultures, understanding pressure is the foundation for designing compassionate learning experiences. When learners (and you) can name where pressure comes from, it becomes possible to reduce unnecessary pressure in course design, communication, and assessment. This lesson gives your learners the language, the framework, and quick-first-aid practices to notice pressure before it escalates.
Preparation (what you need)
→ Time: 75–90 minutes.
→ Materials: downloadable worksheet (Pressure Map), flipchart or shared slide, timer, pens, optional pulse-check tool or smartwatch.
→ Room/online setup: small-group breakout capability for virtual sessions; seating in circles for in-person classes.
→ Accessibility: captions or live transcription enabled; printable-large-font worksheet; offer translations if necessary.
→ Language note: use plain, simple English; avoid idiomatic expressions that don’t translate well.
Step-by-step lesson plan (detailed facilitation script)
Step 1 — Welcome and set the frame (8–10 minutes)
Purpose: create safety and curiosity.
Script suggestion: “Welcome. Today we’ll explore what ‘pressure’ really is — where it comes from, how it affects us, and how to notice it early. This is a safe space: you decide how much to share.”
• Activity: Quick pulse-check. Ask participants to put one hand on their chest for 10 seconds and notice how they feel (silent observation). This primes bodily awareness.
• Tip for international groups: invite people to describe sensations using simple words (tight, heavy, busy) rather than culturally specific metaphors.
Step 2 — Short, teacher-led definition (10–12 minutes)
Purpose: give a clear, shared vocabulary.
Key points to cover (say them slowly and invite note-taking):
• Pressure = perceived demands placed on you that feel compelling and urgent.
• External pressure = demands coming from outside (workload, deadlines, social expectations, institutional rules).
• Internal pressure = demands you place on yourself (perfectionism, self-expectation, fear of judgement).
• Distinction: Pressure is different from chronic clinical anxiety. Pressure is situational and often tied to specific triggers.
Use a simple visual: two overlapping circles labelled EXTERNAL and INTERNAL; where they overlap, label it “compounded pressure.” Display one short cross-cultural example for each category.
Step 3 — Individual reflection: Pressure Map (12–15 minutes)
Purpose: personalise the content.
Instructions for learners: give each person a Pressure Map worksheet with three columns (External, Internal, Physical/Emotional Signals). Ask them to spend 8 minutes filling it in with specific, concrete examples from the past month.
• Facilitation notes: emphasise brevity — one line per item. Encourage concrete moments (e.g., “email from manager asking for overnight edits,” not “work stress”).
• Accessibility note: offer spoken prompts for participants with visual difficulties.
Step 4 — Pair / small group share: Spot the source (15–20 minutes)
Purpose: normalise experiences and build cross-cultural awareness.
• Grouping: triads or pairs. In virtual settings use breakout rooms.
• Prompt: each person takes 3 minutes to describe one internal and one external pressure from their map, plus one physical sign they noticed when under pressure. The partner reflects back what they heard (active listening) for 2 minutes. Rotate.
• International facilitation tip: ask participants to avoid assuming others have the same systems (workplace norms, family structures). Encourage curious questions: “How does that usually happen where you live?” rather than judgement.
Step 5 — Mini-lecture: How pressure shows up in body & mind (10–12 minutes)
Purpose: link subjective experience to observable symptoms.
Key teaching points:
• Physiological responses: increased heart rate, shallow breathing, muscle tension, disrupted sleep, digestive changes.
• Cognitive responses: tunnel vision, difficulties concentrating, rumination, black-and-white thinking.
• Emotional responses: irritability, low patience, sudden sadness, numbness.
• Behavioural signs: withdrawing, overworking, perfectionist revisions, avoidance.
Activity option: quick guided 2-minute body scan (silent), prompting learners to notice where they hold tension.
Step 6 — Demonstration: Quick evidence-based experiment (5–8 minutes)
Purpose: make the mind–body link tangible.
• Ask learners to measure pulse or notice heartbeats for 30 seconds at rest, then imagine a small deadline and check again. Most will notice an increase — a short, safe demonstration of mind-body response.
• Safety: remind participants who have health conditions to skip or observe without inducing stress.
Step 7 — Categorising triggers: Internal vs External (10–12 minutes)
Purpose: build skill in sorting sources of pressure.
• Activity: Facilitator reads a list of mixed triggers aloud (examples should be globally relevant: “last-minute assignment”, “family expectations around success”, “comparison on social media”, “institutional evaluation”). Learners mark each as Internal (I), External (E), or Both (B).
• Debrief: discuss items that fall into “Both” — these are often the most potent because external demands become internalised.
Step 8 — Short practical practice: Create your intention phrase (8–10 minutes)
Purpose: give learners a concrete tool to stabilise attention.
• Instruction: each person writes a 10–12 word intention phrase that acknowledges pressure and sets a compassionate aim (example structure: “When pressure rises, I will notice my breath and choose one small step”).
• Share option: invite volunteers to read their intention. For international groups, model a few variations in neutral language and encourage translation for clarity.
Step 9 — Consolidation and reflection (5–8 minutes)
Purpose: anchor learning and gather feedback.
• Quick round: ask learners to name one new thing they discovered about pressure.
• Suggested closure script: “Thank you for your openness. Today you learned to name pressure and notice its traces. Keep your Pressure Map and intention phrase handy.”
Assessment and evidence of learning
• Formative: Pressure Map + intention phrase submitted digitally or photographed. Look for concrete triggers, clear distinction between internal/external, and realistic intention phrasing.
• Reflective prompt (for homework or LMS): “Describe a recent moment of pressure; identify the source and name one small action you could take next time.” This is low-stakes and culturally neutral.
Facilitation tips for international audiences
✓ Use plain language and avoid idioms. Replace “hit the ground running” with “start quickly.”
✓ Translate key terms into participants’ first languages when possible. Provide a short glossary: pressure, trigger, internal, external, intention.
✓ Invite examples from multiple cultural contexts to show the universal nature of pressure (work, family, education, social media).
✓ Be mindful of power dynamics — in some cultures, public self-disclosure is less comfortable. Offer anonymous options (typed chat, written notes).
✓ Time-zone and fatigue awareness: avoid heavy cognitive work at the very end of long sessions.
Inclusive and safety considerations
• Trauma-sensitive approach: avoid instructions that could retraumatise (e.g., deep exposure to painful memories). Offer opt-outs.
• Confidentiality: remind learners that sharing is voluntary and that group norms for confidentiality apply.
• Health disclaimers: minor physiological demonstrations are educational, not diagnostic. Encourage medical advice when needed.
Common pitfalls and how to avoid them
✖ Pitfall: Over-intellectualising pressure.
→ Avoid by balancing explanation with embodied practices (breath, body scan).
✖ Pitfall: Cultural insensitivity — assuming similar family/work expectations.
→ Avoid by inviting diverse examples and offering anonymous sharing.
✖ Pitfall: Making pressure into blame (e.g., “you cause your pressure”).
→ Avoid with language that separates behaviour from identity: “You experience pressure” rather than “You are pressured.”
Suggested sample phrases for you (neutral, international)
• “Let’s look at pressure as information — it tells us something is important, not that we’ve failed.”
• “When we name the source, we gain choice. Is this coming from outside, or is it an expectation you hold for yourself?”
• “If you prefer not to share aloud, please type your thoughts in the chat or write them on your worksheet.”
This lesson is intentionally experiential and practical. As course creators teaching varied audiences, your role is to give learners the vocabulary and safe practices to notice pressure early, recognise where it originates, and begin to choose calmer responses. Keep the language simple, the activities short and tactile, and the tone compassionate — that combination travels well across cultures and helps learners convert insight into immediate, usable habits.
Lesson 2 — Spotting Your Triggers
Goal: Learn to identify the specific situations, people, or thoughts that pile on stress in your daily life.
Learning outcomes
By the end of this lesson participants will be able to:
- Define what a trigger is and distinguish between situational, interpersonal, and thought-based triggers.
- Identify at least five personal triggers with concrete real-world examples.
- Describe the earliest physical or mental signs that a trigger is activating them.
- Create a short, practical Trigger Response Plan to use the next time a familiar trigger appears.
Why this lesson matters
Triggers are the pressure points in everyday life. For course creators working with global audiences, understanding triggers is essential—both for your own wellbeing and for designing learning environments that do not inadvertently activate stress. When you and your learners can spot triggers quickly, you gain choice: you can pause, apply a calming strategy, or change the situation. This lesson helps people move from reactive habits to deliberate responses.
Preparation
- Time: 75–90 minutes.
- Materials: Trigger Map worksheet (three columns: Situation / Early Signs / Typical Response), sticky notes or digital sticky tool, timer, pens, optional pulse-check tool.
- Room/online setup: breakout rooms for small-group sharing; whiteboard or shared slide for collecting anonymized examples.
- Accessibility: enable captions and provide printable or large-font worksheets; offer verbal read-aloud of prompts; offer translation support for key terms.
- Language note: use plain English; avoid idioms and culture-specific metaphors.
Step-by-step lesson plan (facilitator script and activities)
Step 1 — Opening and intention setting (6–8 minutes)
Purpose: create psychological safety and focus attention.
Script suggestion: “Today we’re learning to spot the moments and cues that trigger pressure for us. This isn’t about blame—this is about building awareness so we can choose how to respond.”
Activity: brief grounding—ask participants to close their eyes for 20 seconds and name silently one thing they hope to get from today’s session. Invite voluntary sharing in the chat or on sticky notes.
Step 2 — Clear definition and categories (8–10 minutes)
Purpose: create a shared vocabulary.
Explain: a trigger is anything that reliably provokes a stress response. Break triggers into three simple categories with examples that translate globally:
- Situational triggers (deadlines, travel delays, financial surprises).
- Interpersonal triggers (critical feedback, high-stakes family conversations, unclear instructions from managers).
- Thought-based triggers (self-critical thinking, “what-if” replaying, comparison on social media).
Facilitation tip: present one short, neutral example per category from different regions—e.g., a last-minute exam in an educational system, an unexpected funding shortfall for a small business, an abrupt change in caregiving responsibilities.
Step 3 — Individual activity: Build your Trigger Map (12–15 minutes)
Purpose: make the lesson personal and concrete.
Instructions: distribute the Trigger Map worksheet. Ask participants to list 5–8 triggers from the past three months, placing each in the appropriate column: Situation / Early Signs / Typical Response. Encourage specificity: date, context, who was there, what happened. Prompt examples: “An email from my supervisor after 8 p.m.,” “Seeing a peer’s launch announcement on social media,” “Having to give a live presentation.”
Facilitation note: for participants who find this emotionally heavy, offer a prompt to list neutral triggers (e.g., noisy workspaces) and offer an opt-out.
Step 4 — Pair exercise: Name the earliest sign (15 minutes)
Purpose: strengthen recognition of early, subtle cues.
Format: pairs or triads. Each person has 4 minutes to read one trigger aloud and describe the very first thing they notice when it begins (tight chest, sudden impatience, blank mind). The partner practices reflective listening and then asks: “If you had to pick one physical or mental sign as your earliest warning, what would it be?” Rotate.
Facilitation tip: emphasize that early signs are often small and easy to miss—practice helps bring them into view.
Step 5 — Group discussion: Common patterns and cultural context (10–12 minutes)
Purpose: normalize experiences and surface cultural differences in triggers.
Prompt: collect highlights on a shared board—common triggers, surprising triggers, and any culturally specific patterns. Discuss how norms (work hours, family roles, educational systems) shape triggers. Encourage curiosity: “How does this typically happen in your country or community?” rather than assuming uniformity.
Step 6 — Short mini-lecture: Why triggers escalate pressure (8–10 minutes)
Purpose: explain mechanisms so learners see the pathway from trigger to full-blown stress.
Key points:
- Triggers activate automatic responses in the brain (attention narrows, threat bias increases).
- Early physical signs are useful signals (fast breathing, sweating, jaw tightness).
- Repeated activation creates habits — both in thought patterns and in behavior (avoidance, overcompensation).
Use a simple diagram: Trigger → Early Sign → Thought Pattern → Typical Response → Outcome. Keep language concrete and free of jargon.
Step 7 — Practical lab: Rehearsing a different response (12–15 minutes)
Purpose: experiment with interrupting habitual reactions.
Activity: choose one real trigger from the map. In small groups, role-play the trigger briefly and rehearse a different response using a three-part method: Notice (name the early sign), Pause (3 slow breaths), Choose (one simple action: ask for time, set a boundary, take a walk). Each role-play should be short (2–3 minutes per person) and safe.
Safety note: instruct participants to keep role-plays to situational descriptions and avoid reliving traumatic events. Offer an observer role for those uncomfortable acting.
Step 8 — Create a Trigger Response Plan (10 minutes)
Purpose: give participants a ready-to-use micro-plan for future triggers.
Template to share:
- Trigger description (one sentence).
- Earliest sign I’ll watch for.
- My 30–90 second calming action (breathing, pause, count to five).
- One practical follow-up action (email template, boundary phrase, walk).
Ask everyone to complete one plan for a trigger they expect to meet in the coming week.
Step 9 — Reflection and consolidation (6–8 minutes)
Purpose: anchor learning and invite commitment.
Prompt: “Name one trigger you hadn’t noticed before today, and one small practice you will try the next time it happens.” Invite brief sharing in chat or aloud. Close by reminding participants to keep their Trigger Map accessible for the week.
Assessment and evidence of learning
- Formative evidence: Completed Trigger Map and one Trigger Response Plan submitted via the learning platform or photographed. Look for specificity in triggers and realistic micro-actions.
- Reflective assignment: short written reflection (150–300 words): “Describe a recent triggered moment. What early signs did you miss? What will you try next time?” This encourages transfer rather than mere recognition.
Facilitation tips for international audiences
- Use simple examples drawn from different regions and sectors (education, small business, caregiving, corporate).
- Avoid cultural assumptions about family roles or workplace norms; invite participants to describe how things typically work where they live.
- Provide multiple ways to participate: speaking, chat, anonymous poll. Some cultures prefer private reflection over public disclosure.
- Consider offering the Trigger Map in multiple languages or with translated key terms where possible.
Inclusive and safety considerations
- Trauma-sensitive practice: some triggers are tied to traumatic experiences. Provide opt-out options and do not require sharing of personal trauma. Offer grounding techniques and a brief safety statement before sensitive exercises.
- Confidentiality: remind groups that sharing is voluntary and what’s shared in the room stays in the room unless agreed otherwise.
- Health disclaimers: physiological demonstrations are educational and not diagnostic. Encourage professional support where repeated or severe reactions occur.
Common pitfalls and how to avoid them
- Pitfall: Encouraging over-sharing of highly personal or traumatic triggers.
Avoidance: Emphasize voluntary sharing and provide anonymous submission options. - Pitfall: Framing triggers as personal failure.
Avoidance: Use neutral, descriptive language: “This triggers me” rather than “You should fix this about yourself.” - Pitfall: Giving overly complex coping strategies that are hard to use under pressure.
Avoidance: Offer micro-practices—30 to 90 seconds—that are easy to remember and apply.
Sample facilitator phrases (neutral, international)
- “A trigger is simply a reliable cue that your system moves into pressure mode—naming it gives you choice.”
- “If you prefer not to speak, please use the chat or the private note option.”
- “Look for the smallest signal you can: a shallow breath, a tightened jaw, a repeating thought.”
- “Your Trigger Map is a practical tool. Keep it visible during the week and update it when new patterns appear.”
Spotting triggers is not a one-time achievement—it’s a skill you build by noticing, testing, and adjusting. As course creators, your sensitivity to triggers will shape the learning environment you design. Teach this lesson with curiosity and kindness: help learners map their pressure points and practice small, reliable responses. That combination produces resilience and creates calmer, more productive learning spaces across cultures.
Lesson 3 — The Myth of Productivity under Pressure
Goal: Discover why “pushing through” pressure doesn’t really make you more effective — and what does instead.
Learning outcomes
By the end of this lesson participants will be able to:
- Explain why acute pressure often reduces quality, creativity, and long-term output despite short bursts of speed.
- Describe at least three cognitive and physiological mechanisms that make pressure counterproductive.
- Test, in a simple group experiment, how pressure affects speed versus accuracy.
- Choose and practise at least two concrete alternatives to “push through” behaviour that improve sustainable productivity.
Why this lesson matters
Many cultures celebrate “grit” and “hustle.” For international course creators, it’s important to be able to challenge these cultural narratives gently and constructively. When learners and facilitators believe that pressure equals productivity, design choices (tight deadlines, punitive feedback, last-minute launches) can unintentionally harm learning, wellbeing, and outcomes. This lesson gives you evidence-based explanation, practical demonstrations, and facilitation-ready activities to show how to replace frantic effort with sustainable, effective practices.
Preparation
- Time: 75–90 minutes.
- Materials: short timed worksheets or online quiz tool, stopwatch, whiteboard or shared slide, breakout room capability, participant handout summarizing “pressure harms & healthy alternatives.”
- Accessibility: captions, printed copies or downloadable PDFs, large fonts, plain-English glossary.
- Language note: use simple, global English; avoid idioms (for example, use “work very hard” rather than “burn the midnight oil”).
Step 1 — Opening and setting the frame (6–8 minutes)
Purpose: prime curiosity and challenge assumptions respectfully.
Script suggestion: “Today we’re going to test a common belief: that pressure makes us more productive. We’ll look at how pressure changes our thinking, try a quick experiment, and learn practical alternatives you can use in course design and in daily work.”
Activity: ask participants to type in chat one word that comes to mind when they hear “pressure.” Collect results and use them to show the range of associations (speed, anxiety, success, focus).
Step 2 — Short instructor-led explanation: what people mean by productivity under pressure (8–10 minutes)
Purpose: define terms and build shared vocabulary.
Explain: People usually mean one of the following when they say “productive under pressure”: working faster, delivering results quickly, or performing well in a crisis. Clarify that these are distinct and that speed does not equal quality or sustainability. Present examples relatable across cultures: finishing a proposal late at night, giving a live presentation without rehearsal, salvaging a project at the last minute with overtime.
Step 3 — Mini-lecture: the science (10–12 minutes)
Purpose: give a simple, memorable account of why pressure backfires. Keep language non-technical.
Key mechanisms to explain:
- Cognitive load overload: Pressure consumes mental resources (worry, self-monitoring), leaving fewer resources for planning and complex problem solving.
- Narrowed attention: Under pressure the brain narrows focus to immediate threats, which can miss important details and reduce creativity.
- Speed–accuracy tradeoff: When asked to go faster, people often make more errors; small errors compound and cost more time later.
- Decision fatigue and depletion: Constant high-pressure decisions reduce the ability to make good choices later in the day.
- Emotional interference: Anxiety and irritability reduce working memory capacity and collaboration quality.
Use an image or simple diagram: Pressure → Less bandwidth for complex tasks → More errors / lower creativity.
Step 4 — Simple in-class experiment: speed vs accuracy (15–18 minutes)
Purpose: make the effect visible and experiential.
Activity instructions (safe, low-stakes):
- Give everyone the same short worksheet (e.g., 12 simple proofreading items or basic mental arithmetic).
- Round A — ask them to complete as many items as possible in 3 minutes (told speed matters). Collect results (or have participants self-report correct count).
- Short break (2 minutes).
- Round B — ask them to complete the same or equivalent worksheet in 5 minutes with instructions to focus on accuracy. Collect results.
Debrief: compare totals and errors across rounds. Ask: “Which felt more stressful? Which results would you rather have for a real project?”
Facilitation note: choose tasks that do not trigger math anxiety or cultural bias; proofreading or pattern recognition tasks often work well internationally.
Step 5 — Group reflection: connect to professional life (10 minutes)
Purpose: move from experiment to relevance.
Prompts: “Think of a recent time you or your team pushed through. What was the outcome a few days later (errors discovered, reduced uptake, burnout)?” Invite short shares in breakout rooms or chat. Encourage participants to think of course-design scenarios (tight launch deadlines, back-to-back live sessions, limited feedback time).
Step 6 — Practical teaching segment: effective alternatives to pressure (15–20 minutes)
Purpose: give course creators tools to replace pressure with better design and practice. Present the alternatives as step-by-step actions. Each alternative includes a short script or template they can use. Emphasize cultural adaptability.
Alternatives — actionable list:
- Design with buffer time
- Action: add modest built-in slack in deadlines (e.g., 10–20% more time than estimated).
- Script: “We’ve built in an extra two days so you can review and revise.”
- Chunk and sequence work
- Action: break complex tasks into 45–90 minute focused chunks with short breaks.
- Script: “Today’s work is the first 45-minute draft; we’ll revise tomorrow.”
- Use micro-deadlines with feedback loops
- Action: set small deliverables and short feedback cycles to catch errors early.
- Script: “Submit a one-paragraph outline by Tuesday; we’ll comment for quick revision.”
- Align tasks with energy cycles
- Action: suggest learners schedule cognitively heavy tasks when they feel most alert.
- Script: “If you’re a morning person, block the first two hours for writing.”
- Teach a simple “Pause” routine
- Action: notice, breathe, choose — a 60-second anchor to interrupt reactivity.
- Script: “When pressure rises, place one hand on your chest and take three long breaths before deciding.”
- Prioritise the vital few
- Action: use a simple priority filter: impact × urgency. Focus on the smallest high-impact step.
- Script: “Ask: which 20% of actions will generate 80% of the result?”
- Normalize revision and iteration
- Action: set expectations that first drafts are rough and revision is part of quality.
- Script: “This is the draft phase; we’ll all expect to revise.”
Step 7 — Role-play or case-study application (10–12 minutes)
Purpose: practice applying alternatives to real scenarios.
Format: small groups choose a posted case (course launch with tight timeline, urgent accreditation review, a live cohort with high attrition). Each group lists what caused pressure and redesigns the plan using two alternatives above. Groups present short solutions.
Step 8 — Personal planning: your pressure audit (8–10 minutes)
Purpose: create a short action promise for the next week.
Prompt: ask each participant to choose one recurring pressure in their work and write a 3-item plan: (1) one design change; (2) one micro-practice to stop reactivity; (3) how they will communicate the change to colleagues or learners.
Step 9 — Consolidation and close (5–7 minutes)
Purpose: anchor learning and invite commitment.
Closing script: “We tested speed versus careful work and saw how pressure can cost more than it gives. Choose one small change this week and notice whether quality, creativity, or wellbeing improves.”
Assessment and evidence of learning
- Formative: worksheet comparison from the class experiment (anonymized summary) and a submitted 3-item personal pressure audit.
- Reflective assignment: 300–500 word reflection: “Describe one pressure-driven decision you made in the past month. Reframe it using two alternatives from this lesson and predict the different outcome.”
Facilitation tips for international audiences
- Use neutral, diverse case studies. For example, an educator in Brazil, a freelance designer in Kenya, a corporate L&D team in Poland. These show that pressure is universal but contexts differ.
- Avoid cultural judgement about work ethic; present alternatives as options rather than moral critiques.
- Offer language supports — provide slide notes and handouts in plain English and consider quick translations of key terms.
- Respect norms around public sharing; offer anonymous channels for sensitive admissions.
Inclusive and safety considerations
- Be mindful that some participants may equate “pressure” with survival-level stress. Emphasize that the lesson addresses everyday productivity pressure, not severe trauma. Provide resources or referrals for those needing deeper support.
- Keep activities voluntary and low-risk. For the experiment and role-plays, offer an observer or written-response option.
Common pitfalls and how to avoid them
- Pitfall: Presenting the science as absolute and dismissing lived experience of people who thrive in crises.
Avoidance: Acknowledge that some perform well in short, intense bursts and that the lesson focuses on sustainability and quality over time. - Pitfall: Replacing one rigid rule with another (“never work late”).
Avoidance: Offer flexible tools and invite participants to adapt strategies to their personal and cultural context. - Pitfall: Overloading participants with too many alternatives.
Avoidance: Encourage choosing one or two practices to test rather than a full overhaul.
Sample facilitator phrases (neutral, practical)
- “Fast work sometimes feels productive because you see immediate output; let’s look at what happens later when errors appear.”
- “Try this experiment as evidence, not as judgement — we’re testing ideas, not people.”
- “If your context requires short-term triage, plan a recovery window afterwards to restore quality.”
- “Small design changes — a buffer day, a micro-deadline, a pause — are often more powerful than heroic effort.”
This lesson reframes productivity from a sprint to a practice: steady, intentional actions that protect attention, quality, and creativity. As a course creator, you will be able to help learners and teams move away from the “push through” reflex and toward design choices and micro-practices that produce better results with less harm.
Lesson 4 — Laying the Groundwork for Change
Goal: Create a simple intention statement for this 7-day journey so your mind is ready to embrace inner peace.
Quick legend (international signs)
✓ = Action to take
→ = Facilitator instruction or script line
✚ = Reflection prompt
Use these simple symbols to guide movement through the lesson. They are neutral, compact, and translate well across cultures.
Learning outcomes
By the end of this lesson participants will be able to:
- Explain the purpose and power of an intention statement.
- Draft a clear, compassionate intention statement tailored to a 7-day inner-peace practice.
- Use at least two methods to refine and translate that intention for different cultural or language contexts.
- Anchor the intention into a micro-practice that they can apply during the week.
Why this lesson matters for international course creators
Intention is not the same as goal-setting. An intention orients attention, creates a gentle container for experience, and shifts the energy of practice away from punishment and toward curiosity. For course creators working with global audiences, teaching intention helps learners from diverse backgrounds enter the 7-day journey without performance pressure. An intention is universally accessible: it need not rely on cultural metaphors, religious language, or long practice histories. This lesson gives facilitators a replicable, respectful, and multi-modal way to guide learners to create short, usable intention statements.
Preparation
- Time: 75–90 minutes.
- Materials: intention worksheet (draft space, prompts, checklist), large visible timer, whiteboard or shared slide, sticky notes or digital sticky tool, pens, optional audio recorder for silent journaling.
- Room/online setup: quiet space for silent writing; breakout capability for small group refinement.
- Accessibility: provide large-font printable worksheet, captions, and read-aloud option. Offer the worksheet in at least one additional language if possible.
- Language note: use plain English. Avoid idioms and culturally loaded metaphors.
Step-by-step lesson plan (facilitator script and activities)
Step 1 — Opening and framing (6–8 minutes)
Purpose: set a compassionate, low-pressure tone.
→ Script: “Today we’ll create a short, practical intention to guide your 7-day practice. An intention is a simple phrase that points your attention; it is not a performance metric.”
✓ Activity: 30-second breathing pause. Invite everyone to place both feet on the floor and notice their breath for three slow breaths. This grounds the group and models a micro-practice they can use later.
Step 2 — Teach what an intention is (8–10 minutes)
Purpose: give clear definition and distinctions.
→ Say: “An intention is: present-tense, kind, and short. It describes how you want to be while you practice, not what you must achieve.”
Key distinctions to present (use visible slide):
- Intention vs. goal: goals are outcomes; intentions are orientations.
- Intention vs. affirmation: affirmations can feel like commands; intentions invite.
- Intention vs. resolution: resolutions can trigger resistance; intentions invite curiosity.
Step 3 — Show examples in multiple styles (6–8 minutes)
Purpose: provide templates that translate easily.
→ Share several neutral examples (one sentence each, varied tone):
- “I will notice my breath and return with kindness.”
- “I will choose one calm action when pressure rises.”
- “I will practice presence for ten minutes a day.”
- “I will treat small mistakes as information, not failure.”
✓ Note: keep statements short (8–15 words) and concrete. Offer 3 style categories: sensory (body/breath), action-based (small doable actions), value-based (compassion, curiosity).
Step 4 — Guided reflection: what matters to you now? (10–12 minutes)
Purpose: surface personal priorities and reduce cognitive load.
✚ Prompt: “Think of what you most want to shift this week—more calm, less reactivity, clearer focus, kinder self-talk. Write one word that sums it up.”
→ Ask participants to write the word on the worksheet and hold it for two minutes. This reduces the search space for wording an intention.
Step 5 — Drafting the first intention (12–15 minutes)
Purpose: move from idea to phrase.
→ Instruction: “Using your single word as an anchor, write three short intention drafts. Keep each under 15 words. Use present tense. Make it kind.”
✓ Provide quick templates to copy and adapt:
- “I will notice my breath before reacting.”
- “I will choose curiosity over judgment.”
- “I will rest for five minutes when I feel overwhelmed.”
Facilitator note: encourage iterations; the first draft is often useful but temporary.
Step 6 — Pair refinement and translation (15–18 minutes)
Purpose: refine clarity and cultural fit.
→ Pair participants in breakout rooms or with a partner. Each person reads two drafts and asks one question: “Which phrase feels most doable and why?” The partner offers one refinement and one translation suggestion for clarity (e.g., replace idiom with plain term).
✓ Encourage translation for clarity: ask partners to suggest a simpler or more locally meaningful verb where needed. If participants share languages, encourage a direct translation to check emotional tone.
Step 7 — Group sharing and micro-feedback (8–10 minutes)
Purpose: normalize variety and gather quick feedback.
→ Invite 6–8 volunteers to read their refined intention aloud. After each reading, the facilitator offers 10–15 seconds of micro-feedback focusing on clarity and kindness (for example: “That’s clear and short; consider swapping ‘control’ with ‘notice’ to reduce pressure.”)
Step 8 — Anchor the intention with a micro-practice (8–10 minutes)
Purpose: connect words to action.
→ Instruction: “Choose one short physical cue you’ll pair with this intention—placing a hand on your chest, rolling your shoulders back, or taking three breaths. Practice that now.”
✓ Lead a 60-second practice: read the intention once, do the chosen cue, then repeat the intention silently. This creates a body-word anchor.
Step 9 — Commit and document (6–8 minutes)
Purpose: make the intention portable and memorable.
→ Ask participants to write their final intention on a sticky note or the digital chat and take a photo for their records. Encourage keeping it visible during the week (on the desk, as a phone lock screen, or on the course platform).
Step 10 — Consolidation (4–6 minutes)
Purpose: close the lesson with a reflective prompt.
✚ Prompt for private reflection: “Which word in your intention feels most important? Why?” Invite silent 90 seconds for journaling. Close by thanking learners for their care in crafting an intention.
Templates and examples (ready to use)
Short formats (4–8 words):
- “Notice breath, choose calm.”
- “Return gently to presence.”
Medium formats (8–15 words):
- “When pressure appears, I will pause and take three slow breaths.”
- “I will tend to my attention with kindness each day.”
Value-based:
- “I will practice curiosity instead of judgement.”
- “I will choose presence and kindness over perfect outcomes.”
Action-based:
- “I will take one minute to breathe before replying.”
- “I will step outside for five minutes when I feel tense.”
Checklist to evaluate an intention
Ask learners to check their intention against these simple markers:
- Present tense.
- Short and memorable (≤ 15 words).
- Non-judgmental language.
- Anchored to a simple action or orientation.
- Feels doable within daily life.
Assessment and evidence of learning
- Formative: participants submit their final intention statement and a one-line description of the physical cue they’ll pair with it.
- Reflective prompt: 100–200 words: “Describe how your intention shifts your relationship to pressure.” Ask for one concrete example the participant expects to try this week.
Facilitation tips for international audiences
- Use plain language and avoid idioms (replace “hold the line” with “maintain calm”).
- Offer multiple participation modes: speaking, chat, or private note. Some cultures prefer written over oral sharing.
- Provide translations or bilingual examples for key words (intention, pause, breathe). Even a simple parallel translation builds confidence.
- Be sensitive to religious or spiritual associations. Offer secular and non-secular wording options and emphasize choice.
- Check non-verbal signals: in some contexts a nod is sufficient affirmation; in others, verbal consent matters. Ask participants their preferred signal.
Inclusive and safety considerations
- Make sharing optional. Intention statements can touch personal struggles; never require disclosure beyond what feels safe.
- Offer opt-out roles (observer, writer) for participants who may feel vulnerable.
- Keep language trauma-informed: avoid commanding phrases like “you must” or “you should.” Use invitational language: “you might try” or “consider.”
- Remember accessibility: provide written prompts and spoken instructions; allow extra time for translation.
Common pitfalls and how to avoid them
- Pitfall: intentions become rigid rules.
Avoidance: reinforce that intentions are flexible guides, not tests. Encourage revising the statement during the week if it doesn’t fit. - Pitfall: wording that implies failure if not achieved.
Avoidance: use compassionate verbs: notice, pause, choose, return. Avoid “fix,” “stop,” or “never.” - Pitfall: overly abstract intentions that are hard to act on.
Avoidance: pair every intention with a tiny, concrete action cue (three breaths, a short walk).
Sample facilitator phrases (neutral, global)
- “An intention is a gentle compass — not a grading rubric.”
- “Short and practical works best; keep it to a line if you can.”
- “If your intention feels heavy or prescriptive, soften the verb — change ‘I must’ to ‘I will notice.’”
- “You may translate your intention into your preferred language and keep both versions.”
Laying this groundwork gives learners a simple, portable anchor for the 7-day journey. The intention is both an invitation and a tool: it helps attention land where it supports inner peace, and it reduces performance pressure by replacing rigid outcomes with present-moment orientation. As a facilitator, guide the drafting process with kindness, offer multilingual support, and pair words with embodied cues so intentions become living habits rather than abstract sentences.
We’re also giving these extra bonuses
Free Yourself from Pressure – Checklist
Free Yourself from Pressure – FAQs
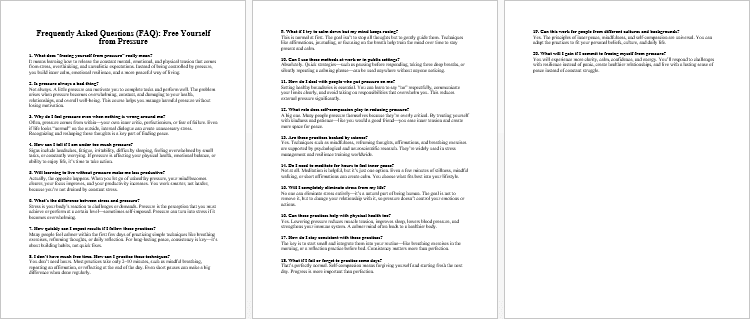
Free Yourself from Pressure – Salespage Content
Package Details:
Word Count: 31 697 Words
Number of Pages: 110
Free Yourself from Pressure – Bonus Content
Checklist
Word Count: 512 words
FAQs
Word Count: 861 words
Salespage Content
Word Count: 780 words
Total Word Count: 33 851 Words
Your PLR License Terms
PERMISSIONS: What Can You Do With These Materials?
Sell the content basically as it is (with some minor tweaks to make it “yours”).
If you are going to claim copyright to anything created with this content, then you must substantially change at 75% of the content to distinguish yourself from other licensees.
Break up the content into small portions to sell as individual reports for $10-$20 each.
Bundle the content with other existing content to create larger products for $47-$97 each.
Setup your own membership site with the content and generate monthly residual payments!
Take the content and convert it into a multiple-week “eclass” that you charge $297-$497 to access!
Use the content to create a “physical” product that you sell for premium prices!
Convert it to audios, videos, membership site content and more.
Excerpt and / or edit portions of the content to give away for free as blog posts, reports, etc. to use as lead magnets, incentives and more!
Create your own original product from it, set it up at a site and “flip” the site for megabucks!
RESTRICTIONS: What Can’t You Do With These Materials?
To protect the value of these products, you may not pass on the rights to your customers. This means that your customers may not have PLR rights or reprint / resell rights passed on to them.
You may not pass on any kind of licensing (PLR, reprint / resell, etc.) to ANY offer created from ANY PORTION OF this content that would allow additional people to sell or give away any portion of the content contained in this package.
You may not offer 100% commission to affiliates selling your version / copy of this product. The maximum affiliate commission you may pay out for offers created that include parts of this content is 75%.
You are not permitted to give the complete materials away in their current state for free – they must be sold. They must be excerpted and / or edited to be given away, unless otherwise noted. Example: You ARE permitted to excerpt portions of content for blog posts, lead magnets, etc.
You may not add this content to any part of an existing customer order that would not require them to make an additional purchase. (IE You cannot add it to a package, membership site, etc. that customers have ALREADY paid for.)
Share Now!
Latest Products

Free Sales Funnel Builder

Related Products
Popular & Trending

Featured Products