AI for Graphics & Art PLR Course 32k Words
in Artificial intelligence PLR , Graphics , PLR eCourses , PLR Graphics , PLR List Building Reports , Premium PLR , Premium PLR Reports , Premium White Label Brandable PLR Coaching Courses , Private Label Rights ProductsChoose Your Desired Option(s)
has been added to your cart!
have been added to your cart!
#aiforgraphics #aiart #plrcourse #graphicdesign #digitalart #creativeai #designmarketing #plrcontent #digitalproducts
Creative Design with Artificial Intelligence
Launch Your Own High-Demand AI Design Course and Profit from the Future of Creativity
Artificial Intelligence is no longer the future of design — it’s happening right now.
From social media graphics and logo creation to digital art, illustrations, and print-on-demand products, AI is revolutionizing how creative work is produced.
Millions of people want to learn how to use tools like MidJourney, DALL·E, and Stable Diffusion to create professional-quality artwork — but most don’t know where to start.
That’s where this opportunity comes in.
The AI for Graphics & Art PLR Course from Buy Quality PLR gives you a complete, professionally written, ready-to-sell training program that teaches exactly how to use AI for creative design.
This is a powerful, done-for-you digital product you can:
• Rebrand
• Sell as your own course
• Bundle into larger offers
• Use for coaching or training
• Add to membership sites
• Convert into videos or workshops
This course saves you hundreds of hours of work and gives you a product you can start selling immediately.
Introducing the…
AI for Graphics & Art PLR Course 32k Words
Why AI Art and Graphic Design Is One of the Hottest Niches Today
Artificial Intelligence has opened the doors for anyone to create professional artwork — even without traditional design skills.
Entrepreneurs, freelancers, marketers, and content creators are actively searching for training that shows them how to use AI tools effectively.
Your customers want to learn how to:
• Create stunning graphics
• Design logos
• Generate digital artwork
• Sell AI art online
• Create social media content
• Launch creative businesses
This PLR course gives you a ready-made solution you can sell to meet this massive demand.
Complete Course Overview
Creative Design with Artificial Intelligence
This course is structured into 5 comprehensive modules and 20 valuable lessons, guiding students from beginner to confident AI creator.
It teaches both creative and practical applications of AI.
Module 1: Getting Started with AI for Creativity
This module introduces students to the exciting world of AI-powered creativity and gives them the foundation they need to begin.
Lesson 1: Introduction to AI in Art & Design
Students discover:
• What AI means for artists and designers
• How AI enhances creativity
• Why AI is a powerful creative partner
• How AI is transforming the design industry
This lesson builds confidence and excitement about using AI creatively.
Lesson 2: Tools You Need to Begin
Students explore the most powerful AI design tools, including:
• MidJourney
• DALL·E
• Stable Diffusion
They learn:
• How each tool works
• Which tools are best for different projects
• How to choose the right platform
Lesson 3: Setting Up Your Creative Workspace
Students learn how to:
• Create accounts
• Access AI platforms
• Prepare their creative environment
• Start generating designs quickly
Lesson 4: Understanding AI Prompts
Prompt writing is the key to AI creativity.
Students learn:
• How to communicate with AI
• How prompts affect results
• How to create specific visual styles
Module 2: Mastering AI Image Generation
This module helps students create professional-quality images.
Lesson 1: Prompt Writing Like a Pro
Students learn advanced prompt techniques to create stunning visuals.
They learn how to guide AI with precision.
Lesson 2: Exploring Styles & Aesthetics
Students experiment with artistic styles such as:
• Watercolor
• Digital painting
• Cyberpunk
• Minimalism
• 3D render
This unlocks creative possibilities.
Lesson 3: Creating Variations & Refinements
Students learn how to:
• Generate multiple versions
• Improve design quality
• Refine artwork
Lesson 4: Upscaling & Enhancing Your Artwork
Students learn how to prepare artwork for:
• Professional use
• Printing
• Digital products
Module 3: AI for Graphic Design Projects
This module focuses on real-world graphic design applications.
Lesson 1: Designing Logos with AI
Students learn how to:
• Create logo ideas
• Generate concepts quickly
• Improve and refine designs
Lesson 2: Social Media Graphics Made Easy
Students learn how to create:
• Social media posts
• Cover images
• Marketing graphics
This saves hours of design time.
Lesson 3: Posters, Flyers & Marketing Material
Students learn how to design promotional content.
Perfect for business and marketing.
Lesson 4: Mixing AI with Canva & Photoshop
Students learn how to combine AI designs with traditional tools to create polished results.
Module 4: Creative Art Projects with AI
This module unlocks artistic creativity.
Lesson 1: Digital Painting & Illustrations
Students learn how to create beautiful digital artwork.
Lesson 2: Concept Art for Storytelling
Students learn how to create:
• Characters
• Fantasy worlds
• Book cover designs
Lesson 3: AI Collage & Mixed Media Art
Students learn creative blending techniques.
Lesson 4: Turning AI Art into Print Products
Students learn how to create products such as:
• T-shirts
• Posters
• Merchandise
• Digital downloads
This opens income opportunities.
Module 5: Taking Your AI Art Skills to the Next Level
This module focuses on monetization and professional growth.
Lesson 1: Ethical Use of AI in Art
Students learn:
• Responsible AI use
• Copyright considerations
• Originality practices
Lesson 2: Building Your AI Art Portfolio
Students learn how to showcase their work professionally.
Lesson 3: Selling AI Artwork Online
Students learn how to sell:
• Digital art
• Graphic design services
• Print products
Lesson 4: The Future of AI in Creative Design
Students learn about future trends and opportunities.
By the End of This Course, Students Will Be Able To:
Use AI tools confidently
Create professional graphics
Generate artwork
Design logos
Create digital products
Sell AI art
This makes the course extremely valuable.
Valuable Bonus Materials Included
This is a complete PLR course package.
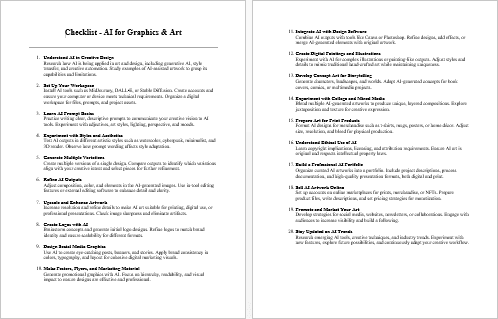
AI for Graphics & Art Checklist
545 Words
Provides step-by-step implementation guidance.
AI for Graphics & Art FAQ
909 Words
Answers common questions.
Professional Sales Page
781 Words
Ready-to-use sales material.
This Is a Complete Done-For-You Digital Product
Everything is ready.
You don’t need to write anything.
You simply rebrand and sell.
How You Can Profit From This PLR Course
This course gives you unlimited business opportunities.
Sell It as Your Own Online Course
You can sell access on your website.
Many course creators sell similar courses for:
$27
$47
$97
$197
$497 or more
Create a Coaching Program
Use the course as part of coaching.
Charge premium prices.
Build a Membership Site
Add it to your membership.
Generate recurring income.
Convert It Into Video Training
Turn the course into videos.
Sell video courses.
Create Workshops or Webinars
Teach live training.
Charge high fees.
Bundle It Into Larger Products
Combine with other PLR content.
Sell higher-priced offers.
Sell Digital Products Created from the Course
Create:
ebooks
guides
reports
Use It to Build Authority
Position yourself as an expert.
Grow your brand.
Full Private Label Rights Included
You can:
Sell and keep 100% profits
Edit and rebrand
Bundle it
Convert formats
Create courses
Create products
This gives you full control.
License Restrictions
You cannot:
Transfer PLR rights
Give away the complete product
Resell with resell rights
You must sell it as a paid product.
Why This Course Is Extremely Valuable
AI is one of the fastest-growing industries.
Millions of people want to learn AI design.
This makes this course easy to sell.
Why Buy from Buy Quality PLR
Buy Quality PLR is a trusted PLR provider.
You receive:
High-quality content
Professional writing
Ready-to-sell products
Instant downloads
We help you grow your business faster.
This Is Your Opportunity to Profit from the AI Revolution
Artificial Intelligence is transforming creativity.
People are actively searching for AI training.
You now have a ready-made product you can sell.
You save time.
You avoid writing content.
You launch faster.
Start Selling Your Own AI Graphics and Art Course Today
The AI for Graphics & Art PLR Course gives you everything you need to launch a high-quality digital product.
Rebrand it.
Sell it.
Keep 100% of the profits.
Download it today and start building your AI digital product business.
has been added to your cart!
have been added to your cart!
Here A Sample of the AI for Graphics & Art PLR Course
Module 1: Getting Started with AI for Creativity
Lesson 1 – Introduction to AI in Art & Design
You’ll discover what AI really means for creative people like us — how it’s not here to replace artists but to supercharge creativity.
Overview (What this lesson is and why it matters)
This lesson introduces course participants to the foundational idea that artificial intelligence is a creative partner, not an automatic replacement for human imagination. Designed for international course creators and diverse learners, the lesson explains key concepts in clear, practical language, demonstrates how AI fits into real-world creative workflows, and offers guided activities that build confidence with minimal technical jargon. The tone is invitational and practical: students should leave feeling curious, safe to experiment, and equipped with the vocabulary they need to participate in subsequent modules.
Learning outcomes (by the end of this lesson learners will be able to)
- Define what AI means in the context of visual art and graphic design.
- Articulate three ways AI complements — rather than replaces — human creativity.
- Identify at least two common AI tools or techniques used in design workflows.
- Create a first simple prompt and generate a basic image or visual variant (demonstration-level).
- Recognize basic ethical and copyright considerations when using AI in creative work.
(Use these outcomes as the checklist ✓ when assessing learner progress.)
Required materials & setup
- Computer with internet access and a modern web browser (Chrome, Edge, Firefox, Safari).
- Presentation slides (PDF or PPT) with visuals showing examples of AI-assisted art.
- Demo accounts or free trial access to one or two AI image tools (teacher demonstration; learners do not need accounts for the conceptual portion).
- Example prompt list document (.docx or .pdf) in multiple languages if possible.
- Headset and microphone for live instruction; captioning or live transcript enabled for accessibility.
- Optional: Graphics tablet for live drawing demonstration.
(International sign usage example: €, £, $ — reference to potential subscription costs when discussing paid tools.)
Lesson duration
Total: 75–90 minutes (adaptable)
- Opening + context: 10 minutes
- Concept explanation: 20 minutes
- Live demo: 20–25 minutes
- Guided hands-on exercise: 15–20 minutes
- Reflection & discussion: 10–15 minutes
Step-by-step lesson plan and instructor instructions
1. Warm welcome & set expectations (0:00 → 0:10)
- Greet learners, introduce yourself, and state the lesson title. Briefly mention your background and why this topic matters to you as a creative professional or educator.
- State the learning outcomes aloud. Ask learners to keep these outcomes in mind as the session progresses.
- Quick housekeeping: explain where resources are (course platform folder), how to ask questions (chat, raise hand), and that captions/transcripts are available.
Script suggestion: “Today we’ll demystify what AI actually does in art and design. By the end you’ll have a clear idea of how to use AI as a creative tool, plus you’ll generate your first simple prompt.”
2. Core concepts — plain-language explanation (0:10 → 0:30)
Break the topic into three digestible parts:
A. What is AI in creative terms?
- Explain that AI is a set of computational methods that can analyze patterns in large datasets (images, art styles, text) and then generate or manipulate new outputs based on learned relationships. Use a simple analogy: “AI learns style patterns the way a musician learns chord progressions — it doesn’t ‘feel’ the music, but it recognizes patterns and can produce new sequences.”
B. Types of AI commonly used in visual creation
- Image generation (text → image models).
- Style transfer and enhancement (applying one aesthetic to another).
- Assistance tools (color palette suggestion, layout generation, automatic background removal).
Mention tool categories rather than brand-deep lists, so the content remains evergreen.
C. How AI augments human creativity — three concrete ways
- Idea generation: AI can quickly produce varied visual options, accelerating ideation.
- Iterative refinement: designers can explore dozens of iterations rapidly, then refine the best ones manually.
- Accessibility and productivity: AI can automate repetitive tasks so creators focus on higher-level decisions.
Use short, international-friendly examples: a book cover designer exploring 12 variations, a small studio automating product mockups to save hours (€£$ savings per project), or a teacher generating visual prompts for students.
3. Live demonstration (0:30 → 0:55)
Purpose: show a real AI workflow from prompt to result. Instructor conducts the demo while narrating steps.
Step A — Contextualize the brief (0:30)
- Present a clear creative brief: e.g., “Create a book cover for a contemporary travel memoir, minimalist, teal-blue palette, modern serif type, single striking image.”
Step B — Compose a simple prompt (0:33)
- Show the stepwise prompt construction:
- Subject: “single human silhouette on cliff”
- Mood: “contemplative, sunrise”
- Style: “minimalist, Scandinavian design”
- Output format: “vertical book cover, 2000×3000 px, high resolution”
Step C — Generate and iterate (0:36)
- Run the prompt and display results. Explain how small prompt edits change outcomes. Demonstrate one iteration that tightens the color palette or changes lighting.
Step D — Quick refinement (0:45)
- Use a simple post-process tool (crop, enhance) to show how to prepare AI output for practical use.
Instructor notes: Keep the demo brisk and focused on the creative decisions rather than technical minutiae. Encourage learners to notice how language affects visual outcomes.
4. Guided hands-on exercise (0:55 → 1:15)
Goal: learners draft their first prompt and reflect on expected outcomes.
Activity structure:
- Provide a worksheet with three sample briefs across different cultural contexts (e.g., festival poster, product label, personal portrait). Include suggested adjectives and style hints in multiple languages or with synonyms to support non-native speakers.
- Ask learners to pick one brief and write a 2–3 sentence prompt using the structure shown in the demo (Subject → Mood → Style → Output). Provide 8–10 minutes for drafting.
- Optional: in an interactive classroom, invite 3–4 volunteers to share prompts; offer constructive feedback and show how to tweak them to change the mood or composition.
Facilitation tip: Use local examples where possible; adapt briefs to respect cultural sensitivity (e.g., avoid symbols that are sensitive in certain regions).
5. Reflection, ethics, and group discussion (1:15 → 1:30)
Conclude with an interactive discussion and essential cautions.
Prompt reflection questions:
- How did changing one descriptive word alter your imagined result?
- Which iteration would you choose to develop further and why?
Ethics & copyright primer (short but critical):
- Explain that AI models are trained on large image datasets; some outputs may resemble existing works. Encourage responsible attribution and transparent disclosure (©, ™ considerations when commercializing work).
- Emphasize respect for cultural motifs and living traditions — when in doubt, consult domain experts.
Instructor delivery: keep this conversational; avoid legalese, but stress the importance of learning platform-specific terms of service before commercial use.
Assessment & informal checks
- Formative check: Did each learner produce a short prompt? Mark “yes/no” on the checklist.
- Peer feedback: one-minute peer critique on prompt clarity.
- Instructor observation: assess whether learners can explain how prompt structure influences output.
Scoring is formative and qualitative — aim for constructive feedback rather than grades on this introductory lesson.
Accessibility & internationalization guidance
- Provide all materials in at least the primary languages represented in your cohort, or include bilingual glossaries for technical terms.
- Use plain, universal icons and avoid culturally specific metaphors that may not translate. For example, use “sunrise” instead of “dawn of a new era” to keep imagery literal.
- Ensure live captions and a transcript are available. Use high-contrast slides and readable fonts for learners with visual impairments.
- Time-zone mindful scheduling: if recording demonstrations, label the recording with UTC time (e.g., Recorded 2025-09-10 UTC+00:00) so international learners can align their schedules.
(International symbol example: UTC ±00:00)
Instructor tips & common learner questions
- Tip: Start with curiosity. Many learners fear that AI will make their role redundant; position the technology as a collaborator that multiplies human judgment and taste.
- Tip: Normalize iteration — the first output rarely wins. Show multiple quick variations to model creative decision-making.
- FAQ — “Do I need to be technical to use AI?” — No. Conceptual understanding and creative direction matter more than programming skills for most visual AI tools.
- FAQ — “Is AI art legal to sell?” — It depends on the tool and your usage rights; always check the tool’s licensing terms and consider attribution when appropriate.
Sample short instructor script (use as a template)
“Welcome. In this lesson we’ll explore what AI can do for artists and designers. Think of AI as a new brush in your toolkit. I’ll show how language shapes images, we’ll try a short prompt together, and you’ll draft your own prompt. Remember — the goal is not perfect output but to understand how to direct the machine. We’ll also talk briefly about ethics so you can create responsibly.”
Closing activity (wrap up)
Ask learners to write one sentence: “One way I can use AI in my creative work is ___.” Collect responses in chat or on a shared board to review common themes and misconceptions for future lessons.
Final note on tone and pedagogy
Use encouragement and a non-technical vocabulary. Prioritize active learning through demonstration and practice. International course creators should emphasize clarity, provide multilingual supports, and be explicit about cultural sensitivity and legal considerations. This lesson establishes a mindset: AI is an amplifier of human creativity — your taste, intent, and judgment remain central.
This lesson is intentionally practical: it gives educators the structure, language, and classroom activities needed to introduce AI to creatives worldwide while centering ethical use and cultural respect.
Lesson 2 — Tools You Need to Begin
We’ll explore popular AI design tools (like Midjourney, DALL·E, and Stable Diffusion) and how each one fits into different creative workflows.
What this lesson covers and why it matters
This lesson gives international course creators a practical, hands-on map of the tools learners will encounter when using AI for visual design. Instead of a laundry list, you’ll get action-oriented comparisons, instructor-friendly demo scripts, and clear advice on which tool to use for which creative task. By the end of the lesson your students should be able to choose the right platform for a brief, start an account or local setup, and understand typical workflows and constraints (cost, privacy, output style).
Learning outcomes (for this lesson)
By the end of the session participants will be able to:
- Describe three different tool categories used for AI image creation (hosted, community/Discord, and local/open-source).
- Create a quick demo in Midjourney, DALL·E, and a Stable Diffusion web UI or explain how to run Stable Diffusion locally.
- Compare strengths and limitations of each tool for common course projects (logos, concept art, mockups, print-ready images).
- Make an informed recommendation about which tool fits a given brief, taking costs and licensing into account.
Required materials & setup (instructor)
- A stable internet connection and a modern browser.
- Midjourney account and Discord (for instructor demo).
- An OpenAI account (for DALL·E demos) or access through ChatGPT if you plan to demonstrate DALL·E 3 via that platform.
- Access to a Stable Diffusion web UI (e.g., a cloud instance) or a local machine with GPU if you plan to show installation.
- Presentation slides showing example outputs from each tool; a short worksheet with briefs for the hands-on activity.
- Headset and captions/transcript enabled for accessibility.
Note on costs: many platforms use subscriptions or pay-as-you-go credits; present currencies as USD (€ £ ¥ etc.) and remind learners that regional pricing and education discounts may apply.
Step-by-step lesson plan and instructor instructions
1. Open with a quick categorization (10 minutes)
Begin by framing the landscape in three simple categories:
- Hosted, managed platforms (cloud services you access through a browser or app).
- Community/Discord-driven platforms (interactive experiences with bot commands and community channels).
- Open-source / local solutions (models you can run on your own hardware or in private cloud instances).
Explain why the distinction matters: control, cost, ease of use, and privacy differ between categories.
2. Tool deep dives (35–40 minutes total)
For each tool below, follow a consistent micro-structure: (a) What it is; (b) How to access it; (c) Strengths; (d) Limitations; (e) Demo script & instructor notes. Use short live demos or pre-recorded clips if bandwidth or time is limited.
Midjourney — community-driven, stylized outputs
What it is: Midjourney is a creative image generator that is often used through community channels (Discord) and emphasizes painterly, highly stylized results.
How to access: Midjourney runs both through a web account and—most notably—via a Discord bot where users invoke commands to generate images.
Strengths: Excellent for concept exploration, stylized art, and mood-driven outputs; fast ideation with simple commands.
Limitations: Results are public in community channels unless you have a plan with private/stealth options; subscription-based access with tiered features.
Demo script (instructor):
- Show logging into Discord and navigating to a Midjourney newbie or private channel.
- Type a simple command:
/imagine A minimalist poster of a coastal lighthouse at dawn, soft pastel palette, clean sans-serif text area --ar 2:3(explain--araspect ratio). - Show result thumbnails, use the “U” (upscale) and “V” (variant) options, and demonstrate how to save or upscale for print.
- Explain privacy/visibility: show where “stealth mode” or private generation options live in the account settings for higher-tier subscribers.
Instructor notes: Keep the demo slow and narrate intent: “I want a minimalist poster — I’ll use these words to guide style, palette, and composition.”
DALL·E (OpenAI) — literal, compositional accuracy, integrated options
What it is: DALL·E is an image generation tool designed to follow prompts with compositional precision.
How to access: Use an OpenAI account and the DALL·E interface or access DALL·E through ChatGPT (some features are tied to Plus or API access).
Strengths: Strong at precise composition, readable text inside images, and integrated editing features (inpainting/outpainting). Good choice for editorial or product-accurate briefs.
Limitations: Platform rules and safety systems can be stricter about copyrighted or trademarked content; access tiering can vary depending on subscription or API usage.
Demo script (instructor):
- Open the DALL·E interface or ChatGPT image generation prompt.
- Use a prompt focused on compositional precision: “Photorealistic product shot of a ceramic mug on a wooden table, soft window light, shallow depth of field, space for logo on mug.”
- Demonstrate inpainting: upload a base image and ask DALL·E to replace or refine specific parts (e.g., change background color, remove an object).
- Save and review metadata/license notes shown by the platform.
Instructor notes: Emphasize how DALL·E’s literal rendering can be an advantage when the brief demands fidelity.
Stable Diffusion — open-source, flexible, private
What it is: Stable Diffusion is a family of open-source generative models. It can be used through vendor-hosted services or installed and run locally for maximum control.
How to access: Options include cloud-hosted UIs or local installations using web UIs such as AUTOMATIC1111. Local setup requires familiarity with Python, model checkpoints, and often a capable GPU.
Strengths: Full control over models, weights, and pipelines; excellent for fine-tuning, private datasets, batch production, and plugin-driven pipelines. Cost-effective if you have hardware resources.
Limitations: Local installs require technical knowledge; cloud instances incur compute costs; model quality varies by checkpoint and parameters.
Demo script (instructor):
- For a low-technical demo, show a hosted Stable Diffusion UI and run a “text → image” prompt.
- Show more advanced options: sampling steps, CFG scale (how tightly the model follows the prompt), and seed control. Explain each parameter in plain language.
- If demonstrating local use, briefly show folder structure, model checkpoint load, and the web UI prompt area (keep installation details to an optional appendix or recorded tutorial).
Instructor notes: Emphasize that Stable Diffusion is ideal for workshops where learners want custom models, local privacy, or to iterate programmatically.
3. Quick comparison — choose by task (10 minutes)
Provide a simple decision guide for learners:
- Rapid concept ideation / stylized art → Midjourney
- Precise composition, inpainting, and editing → DALL·E
- Custom models, data privacy, and scriptable pipelines → Stable Diffusion
Show this visually in a slide or chart for clarity.
4. Guided hands-on exercise (20 minutes)
Activity: split learners into small groups or pairs. Provide three short briefs (e.g., festival poster, product mockup, character concept). Each group chooses one brief and either:
- Drafts prompts tailored for three tools (one prompt per tool) and predicts differences, or
- If accounts are available, generate one image in one tool and note how they would adapt the prompt for the other tools.
Wrap up with 3–4 volunteer prompt shares and a short instructor critique focusing on how language maps to style and composition.
5. Assessment & practical checks
- Formative check: each learner produces at least one prompt and explains which tool they’d use to execute it and why.
- Peer review: learners give one strength and one improvement suggestion for a peer’s prompt.
- Instructor checklist: verify learners can explain access path (Discord for Midjourney; OpenAI/ChatGPT for DALL·E; hosted vs local for Stable Diffusion).
Ethics, licensing & practical cautions (brief)
Remind learners that platform licensing, acceptable-use policies, and the broader legal context are evolving. Encourage students and course creators to:
- Read the terms of service and usage rights for any platform before commercialization.
- Avoid directly copying identifiable copyrighted characters or trademarked logos.
- Consider privacy implications when uploading proprietary or personal images to cloud services.
Accessibility & internationalization tips
- Provide examples and glossaries in learners’ primary languages where possible.
- Avoid culturally specific idioms in prompts; prefer clear descriptive language (colour names, mood adjectives, aspect ratios).
- When mentioning pricing, present currencies in USD and also use symbols such as €, £, ¥ and clarify that local tax or VAT may apply.
Instructor FAQ (short)
Q: Do students need powerful computers?
A: Not to use hosted services; yes for local Stable Diffusion with GPU. Offer cloud alternatives or demonstration sessions if many students lack hardware.
Q: Which tool is best for course projects?
A: It depends on the brief: choose Midjourney for stylized concept art, DALL·E for compositional accuracy and editing, Stable Diffusion for customization and privacy.
Closing remarks for instructors
Keep this lesson practical and hands-on: learners grasp tool differences by trying prompts and comparing outputs. Provide optional resources for deeper technical installation steps (local Stable Diffusion) and keep a short list of platform policy notes for learners who plan to commercialize their work.
Lesson 3 — Setting Up Your Creative Workspace
You’ll learn how to set up accounts, install tools if needed, and make your design environment smooth and ready to use.
Overview
This lesson guides international course creators through a practical, repeatable process to prepare a robust creative workspace. It covers account setup and security, choosing and installing tools, hardware considerations, organizing files and assets, cross-platform best practices, and privacy/licensing checks. The instructions are step-by-step and written so you can teach this lesson live or include it in an asynchronous course module.
Learning outcomes
By the end of this lesson learners will be able to:
- Create and secure accounts required for common AI design tools.
- Install or access hosted and local AI tools with confidence.
- Configure a consistent folder, file, and versioning system for design projects.
- Choose appropriate file formats, color profiles, and export settings for web and print.
- Apply privacy and licensing checks before uploading images to cloud services.
Materials & prerequisites
- Device(s): desktop or laptop (Windows, macOS, or Linux).
- Internet connection.
- Optional: GPU-equipped machine for local model work (see hardware section).
- Accounts: email address for sign-up, password manager (recommended), and a communication tool (Slack, Teams, or similar) for collaboration.
- Course materials: checklist PDF, sample folder structure, and prompt examples for hands-on practice.
- Currency reference for subscriptions: $, €, £, ¥, ₹.
Step-by-step setup instructions
Part A — Preparation: accounts, security, and subscriptions
- Decide the primary email address you’ll use for course-related services.
- Use a professional address (example: yourname@yourdomain.com) if possible. This helps with branding and avoids mixing personal and course notifications.
- Install and configure a password manager before creating accounts.
- Create a master password you can remember; store per-account credentials immediately as you register.
- Enable two-factor authentication (2FA) on every account that supports it.
- Use an authenticator app (time-based one-time passwords) rather than SMS where possible for stronger security.
- Create accounts for the key platforms you plan to teach or use:
- Hosted AI image tools (example: cloud-based generators) — create test accounts to demo paid and free tiers.
- Community/Discord accounts if demonstrating community-driven tools.
- Image-editing and layout tools (Canva, Figma, or desktop editors) depending on your curriculum.
- Cloud storage and collaboration spaces (shared drive, team folder).
- Optional: developer/API account if you plan to demo programmatic access.
- Choose subscription tiers with awareness of costs and regional pricing.
- Present costs in common currency symbols for clarity: $ / € / £ / ¥ / ₹. Note VAT/GST may apply in different regions.
- Review privacy settings on each account and set the default to private for work that involves student data or proprietary material.
Part B — Hardware and performance considerations
- Assess whether your course requires local model execution or can rely on hosted services.
- Hosted services: minimal hardware needed; a modern CPU and stable internet suffice.
- Local execution (e.g., Stable Diffusion locally): GPU with dedicated VRAM improves performance. As a guideline:
- Light use / experimentation: 6–8 GB VRAM can produce many images but with limitations.
- Comfortable working set: 8–12 GB VRAM for smoother performance.
- Heavy or large-batch work: 16 GB+ VRAM for comfortable throughput and larger models.
- If learners lack local GPUs, plan cloud options or recorded demos.
- Ensure adequate storage and backups.
- Use a combination of local (external SSD/HDD) and cloud backup. Implement the 3-2-1 backup rule: three copies, two different media, one offsite (cloud).
- Configure displays and color management.
- If color fidelity matters, use at least one calibrated monitor; set color profile to sRGB for web work and to CMYK workflow tools for print. Provide guidance on calibration options per platform.
Part C — Installing and accessing tools
Follow this checklist when installing or accessing a new tool for your teaching environment:
- Create the account using your course email and add it to the password manager.
- Immediately enable 2FA and configure recovery options (backup codes, recovery email).
- Select the appropriate subscription level if required, note billing currency ($ / € / £ / ¥ / ₹) and set up receipts in a shared folder if institutional billing is used.
- Download desktop clients where available (image editors, collaboration tools). For community tools that run in chat environments, confirm the correct channel and permissions.
- For local installations (high-level steps):
- Ensure your machine has required dependencies (Python version, driver updates for NVIDIA GPUs, sufficient disk space).
- Create a virtual environment to keep project dependencies isolated.
- Download model files and place them in the designated folder. Keep model files organized by version names.
- Launch the local web UI and test a small example prompt to confirm successful setup.
- Save a screenshot of the working interface for course documentation.
- Document installation steps in a step-by-step guide that you can distribute to learners; provide both a quick-start checklist and an extended troubleshooting appendix.
Part D — Workspace organization: folder structure, naming and versioning
A predictable workspace reduces friction. Teach this folder structure and have students fork it for their projects.
Naming conventions:
- Use ISO-style dates for versions:
YYYYMMDD_v1_projectname.png(e.g.,20250910_v1_lighthouse-cover.png). This sorts files chronologically across platforms. - Include dimensions and purpose in filenames:
20250910_v2_productmockup_1200x900.jpg.
Versioning: - Save iterative source files in the
/03_Design-Files/versions/folder with short notes about changes. For collaborative projects, combine versioning with a short changelog filechanges.txtor use built-in version history in cloud services.
Part E — File formats, color profiles and export settings
Teach students what to export for different use-cases.
- Web & social:
- Formats: JPG (photographic), PNG (images with transparency), SVG (vector graphics).
- Resolution: choose pixel dimensions appropriate to the platform; use sRGB profile.
- Compression: balance quality and file size; export previews for quick review.
- Print:
- Formats: TIFF or high-quality JPG; vector elements as PDF or SVG where possible.
- Color profile: set to CMYK for printers that require it; otherwise export in sRGB and confirm printer requirements.
- Resolution: 300 DPI for most print work; adjust based on physical size.
- Working files:
- Keep editable source files (PSD, XCF, AI, Figma files) in
source-files/and never overwrite originals.
- Keep editable source files (PSD, XCF, AI, Figma files) in
- Metadata:
- Include creator name, copyright and license notes in file metadata or in an accompanying
READMEfile.
- Include creator name, copyright and license notes in file metadata or in an accompanying
Part F — Collaboration, communication and handoffs
- Set up a shared drive or collaboration project and assign roles: editor, reviewer, approver, publisher.
- Use a project brief template that captures deliverables, dimensions, color preferences (with international notation for decimals and dates), deadline (include timezone), and budget in chosen currency symbols.
- Use version control or comments in collaborative tools (Figma, Google Drive) rather than emailing files back and forth. Maintain a single source of truth.
Part G — Privacy, ethics and licensing checks
- Teach a short checklist before uploading or releasing images:
- Do you have consent for any personal likenesses?
- Are you using copyrighted elements or trademarks? If so, do you have permission?
- Have you read the platform’s acceptable-use and licensing terms? (Remind learners these terms vary by vendor.)
- For student projects involving real people, collect signed model releases and store them in the
/05_Admin/folder. - When using pre-trained AI models, encourage students to document prompts and settings that produced final deliverables to support reproducibility and attribution.
Part H — First-run checklist for instructors and learners
Before you begin a live demonstration or ask learners to generate images, verify:
- Accounts are active and 2FA is tested.
- Software is installed and updated.
- Project folder created from the template and shared with learners.
- Display color profile is set for the activity (sRGB for web demos).
- Backup systems are in place (cloud sync enabled).
- A short troubleshooting guide is available (common errors and fixes).
Accessibility and international teaching notes
- Localize examples: use brief templates that can be translated easily and avoid idioms.
- Provide transcripts and captions for recorded demos.
- Use clear numeric and date formats; when referring to dates, include the time zone (for example: 2025-09-10 UTC+05:30).
- When demonstrating pricing or payment, show currency symbols ($, €, £, ¥, ₹) and note that tax/VAT may differ.
Instructor tips
- Run a “smoke test” on your setup prior to live sessions: open the web UI, run one prompt, export one image, and confirm you can share the screen without exposing private keys or account dashboards.
- Keep a separate demonstration account for public sessions; avoid exposing your primary billing account.
- Encourage students to use trial accounts initially; show them how to upgrade when ready and how to manage spend.
Wrap-up
A clean, secure, and well-documented workspace reduces friction and keeps the focus where it belongs: creativity. This lesson equips learners to set up accounts, install tools if needed, organize assets, and follow practical checks for privacy and licensing. As an instructor, prepare templates and a troubleshooting appendix so learners with differing hardware and regional constraints can participate confidently.
Lesson 4 — Understanding AI Prompts
We’ll practice writing simple prompts so you can “speak” to AI in a way that produces the kind of designs you’re imagining.
Overview
This lesson teaches course creators how to instruct generative image models with clear, repeatable language. The goal is that learners move from vague requests like “make a nice poster” to precise, testable prompts such as “minimalist concert poster, silhouette of a violinist at sunset, teal and gold palette, bold sans-serif title area, 2:3 aspect ratio.” You’ll get a teaching script, practical exercises, prompt templates, common adjective lists, and troubleshooting tips so students across time zones and languages can start creating reliable outputs.
Learning outcomes
By the end of this lesson learners will be able to:
- Break a creative brief into core prompt components (subject, mood, style, detail, format).
- Write a concise 2–4 sentence prompt that produces predictable variations from AI tools.
- Use basic parameters (aspect ratio, seed, iterations) to control output layout and repeatability.
- Troubleshoot common prompt misunderstandings and refine language for clarity.
- Adapt prompts for different target deliverables (logo, poster, product photo, illustration).
Required materials
- A projector or screen for live demos and slide deck.
- Access to at least one image-generation tool (hosted, Discord, or local).
- Prompt worksheet with templates and a list of style keywords.
- Multilingual glossary or quick-translation cheat sheet for non-native speakers.
- Currency and notation examples for international learners: €, £, $, ¥, ₹.
Teaching structure and timing
Total: 75–90 minutes (flexible)
- Warm-up and concept framing: 10 minutes
- Prompt anatomy & examples: 20 minutes
- Live demo (generate + iterate): 20 minutes
- Guided practice and pair work: 20 minutes
- Reflection, Q&A, assessment: 10–15 minutes
Step-by-step lesson plan (instructor script)
1. Warm-up — why prompts matter (0:00 → 0:10)
Open by asking: “Have you ever described an idea and someone pictured something different?” Relate this to AI: the model doesn’t guess your intention — it interprets language literally. Share one quick before/after example: a vague prompt that produced cluttered results vs. a refined prompt that produced a usable design. State the lesson goals.
Suggested line: “We’ll learn a simple structure that helps us ‘talk’ to AI so it returns images closer to what we imagine.”
2. Teach the prompt anatomy (0:10 → 0:30)
Explain a compact, repeatable structure:
- Subject — the main thing in the image. (person, object, scene)
- Action / composition — what’s happening and how it’s arranged. (close-up, centered, overhead)
- Mood / lighting — emotional tone and lighting style. (melancholic, cinematic backlight)
- Style / reference — art style, camera type, or artist reference. (watercolor, 3D render, Bauhaus)
- Detail / finishing touches — textures, color palette, typography space, props.
- Format / technical constraints — aspect ratio, resolution, file format. (16:9, 1024×1536 px, PNG)
Show one composite example and highlight each component in the sentence:
“An artful flat-lay of a breakfast table (subject), photographed from above with shallow depth of field (composition), warm morning light and soft shadows (mood), in a Scandinavian minimalist style (style), with a teal and ochre palette and negative space on the right for text (detail), square 1:1 for social post (format).”
Emphasize simplicity: shorter prompts with clear elements are often more reliable than long, rambling descriptions. But a few precise adjectives can change results dramatically.
3. Live demo — prompt → iterate (0:30 → 0:50)
Run a live generation to demonstrate iterations.
Demo steps:
- Present the brief: “Create a promotional Instagram image for a small bakery’s new sourdough.”
- Start with a basic prompt: “fresh sourdough loaf on wooden board.” Generate and show output.
- Point out mismatches: maybe lighting is wrong or the loaf looks industrial.
- Refine using the anatomy: “Artisanal sourdough loaf on rustic wooden board, soft morning window light, crumbs visible, shallow depth of field, warm golden palette, natural texture, space on top for logo, 1:1.” Generate again.
- Show how small edits affect outcomes: change “soft morning window light” to “dramatic studio light” and compare.
Narrate your thought process to model prompt reasoning: “I changed the light because I want a cozy feel for a local audience; I added ‘space for logo’ because this is a marketing image.”
4. Guided practice — write and test (0:50 → 1:10)
Activity design:
- Provide three short briefs (poster, product photo, character concept).
- Learners draft a prompt for one brief using the anatomy sheet. Encourage pairing so one writes and the other critiques.
- If tools are available, run 1–2 prompts per pair and ask groups to note what changed between versions.
Give exact time checkpoints: 10 minutes to write, 8 minutes to generate/iterate, 2 minutes to prepare one-sentence takeaway.
Facilitator tip: circulate and suggest single-word swaps that can improve specificity (e.g., “vintage” → “1970s film grain, muted color palette”).
5. Troubleshooting and refinement strategies (1:10 → 1:20)
Teach quick fixes for common issues:
- Output too cluttered → add “minimalist,” “negative space,” or reduce the number of elements.
- Text in images unreadable → add “space for text,” “large empty top margin,” or generate vector-friendly elements and add text later in a design tool.
- Unwanted styles or artifacts → add or remove style references; try “photorealistic” or “digital painting” explicitly.
- Skin tones or cultural features incorrect → specify descriptors respectfully and precisely: age, ethnicity-neutral descriptors or cultural context as needed. Avoid stereotypes; be sensitive and consult cultural experts if in doubt.
Explain the role of technical parameters (optional for beginners):
- Aspect ratio controls layout (e.g.,
--ar 1:1or specify “square 1080×1080”). - Seed sets determinism — the same seed with same prompt yields repeatable results.
- CFG scale / sampling strength (word for power users) adjusts how strictly the model follows the prompt — higher values mean closer adherence.
Make clear these parameters differ across platforms; focus on language first, parameters later.
6. Prompt templates and adjective bank (1:20 → 1:30)
Provide ready-to-use templates:
- Poster / Flyer: “Subject, composition, mood, style, detail, format.” Example: “Outdoor jazz festival poster, saxophonist silhouette centered, sunset gradient background, retro 1970s graphic style, bold blocky type area at bottom, portrait 2:3.”
- Product Photography: “Product on surface, lighting, background, props, use-case space, format.” Example: “Ceramic tea mug on linen cloth, soft window light, shallow depth of field, spare props (spoon, tea leaves), clean white background, 1200×1200 px.”
- Character Concept: “Character, pose, clothing, mood, reference style, color accents.” Example: “Young explorer, three-quarter pose, leather jacket and scarf, windswept hair, cinematic moody lighting, detailed sketch style, teal accents.”
Share a short adjective bank grouped by category (Mood: serene, energetic, melancholic; Lighting: rim-lit, backlit, soft window; Style: photorealistic, watercolor, low-poly; Texture: grainy, glossy, tactile).
7. Assessment — check for competence (1:30 → 1:40)
Ask learners to submit one prompt and a one-paragraph rationale explaining why each component was chosen. Evaluate on clarity, completeness, and whether the prompt is actionable. Provide formative feedback focused on tightening ambiguous words and confirming format constraints.
8. Reflection & classroom discussion (1:40 → 1:50)
Have learners share discoveries: which single word change had the biggest visual impact, and why? Discuss cross-cultural language issues — some metaphors don’t translate; favor literal descriptors for global audiences.
Exercises & practice set (examples you can assign)
- Draft three prompts for the same brief aimed at three different styles (photorealistic, retro illustration, minimal vector). Note differences and expected outcomes.
- Convert a vague client brief into the six-part prompt anatomy.
- Given an AI output that is “too busy,” write three revision prompts that simplify composition.
Accessibility & international teaching notes
- Provide the prompt anatomy in plain language and in at least one translated version for non-native English speakers.
- Avoid idioms and culture-specific metaphors—use literal descriptions (e.g., “red brick wall” instead of “old-world charm”).
- When sharing audio or recordings, include transcripts with the exact prompts typed out for learners to copy.
Ethics, bias and copyright considerations
- Remind learners to avoid instructing models to recreate recognizable copyrighted characters or trademarked logos unless they have clear rights.
- Discuss biases in datasets: a model’s output can reflect stereotyped representations; encourage verification and respectful representation of people and cultures.
- Document prompts and provenance when outputs become commercial deliverables.
Instructor tips & common questions
- Tip: Keep a “prompt journal” during the course — collect successful prompts and variations that you can reuse as templates.
- Q: “How many words is a good prompt?” A: Quality matters more than length. Aim for 10–40 focused words; use extra adjectives only if they add specific direction.
- Q: “What if a model ignores an instruction?” A: Isolate the instruction and test it alone; sometimes models prioritize nouns over adjectives, so rephrase (e.g., “minimal background” before “soft lighting”).
Closing thought
Prompting is a creative skill. Like any language, practice sharpens precision. Your role as a course creator is to give learners a simple, repeatable grammar for prompts, plenty of guided practice, and a safe space to iterate. With the anatomy, templates, and troubleshooting strategies in this lesson, students will gain confidence in directing AI to produce designs that reflect their taste, intention, and cultural sensitivity.
We’re also giving these extra bonuses
AI for Graphics & Art – Checklist
AI for Graphics & Art – FAQs
AI for Graphics & Art – Salespage Content
Package Details:
Word Count: 30 591 Words
Number of Pages: 141
AI for Graphics & Art – Bonus Content
Checklist
Word Count: 545 words
FAQs
Word Count: 909 words
Salespage Content
Word Count: 781 words
Total Word Count: 32 826 Words
Your PLR License Terms
PERMISSIONS: What Can You Do With These Materials?
Sell the content basically as it is (with some minor tweaks to make it “yours”).
If you are going to claim copyright to anything created with this content, then you must substantially change at 75% of the content to distinguish yourself from other licensees.
Break up the content into small portions to sell as individual reports for $10-$20 each.
Bundle the content with other existing content to create larger products for $47-$97 each.
Setup your own membership site with the content and generate monthly residual payments!
Take the content and convert it into a multiple-week “eclass” that you charge $297-$497 to access!
Use the content to create a “physical” product that you sell for premium prices!
Convert it to audios, videos, membership site content and more.
Excerpt and / or edit portions of the content to give away for free as blog posts, reports, etc. to use as lead magnets, incentives and more!
Create your own original product from it, set it up at a site and “flip” the site for megabucks!
RESTRICTIONS: What Can’t You Do With These Materials?
To protect the value of these products, you may not pass on the rights to your customers. This means that your customers may not have PLR rights or reprint / resell rights passed on to them.
You may not pass on any kind of licensing (PLR, reprint / resell, etc.) to ANY offer created from ANY PORTION OF this content that would allow additional people to sell or give away any portion of the content contained in this package.
You may not offer 100% commission to affiliates selling your version / copy of this product. The maximum affiliate commission you may pay out for offers created that include parts of this content is 75%.
You are not permitted to give the complete materials away in their current state for free – they must be sold. They must be excerpted and / or edited to be given away, unless otherwise noted. Example: You ARE permitted to excerpt portions of content for blog posts, lead magnets, etc.
You may not add this content to any part of an existing customer order that would not require them to make an additional purchase. (IE You cannot add it to a package, membership site, etc. that customers have ALREADY paid for.)
Share Now!
Latest Products
Free Sales Funnel Builder

Related Products
Popular & Trending
Featured Products