Budget Home Decorating PLR Course 26k Words
in Home Decor PLR , Home Improvement PLR , Home Improvement PLR Ebooks , Home Remodeling PLR , PLR Checklists , PLR eBooks , PLR eCourses , PLR List Building Reports , Premium PLR , Premium PLR eBooks , Premium PLR Reports , Premium White Label Brandable PLR Coaching Courses , Private Label Rights ProductsChoose Your Desired Option(s)
has been added to your cart!
have been added to your cart!
#budgetdecorating #homedecorideas #diyhome #interiorstyling #plrcontent #affordableliving #homeimprovement #plrcourse #lifestylemarketing
Turn “Small Budget” into “Big Style” — and Sell the Dream of Affordable Home Makeovers
Everyone loves a beautiful home — but not everyone can afford to hire an interior designer. That’s where Budget Home Decorating PLR Course comes in. It’s a complete, ready-to-sell training course that shows people how to make their home look stunning without breaking the bank.
With full Private Label Rights, you can rebrand, resell, or repurpose this entire course and launch your own product, workshop, or home decor brand—without starting from scratch.
Whether your audience is first-time homeowners, renters, or creative DIY lovers, this course gives them practical, step-by-step decorating guidance — and gives you a profitable, evergreen niche product to grow your income.
Introducing the…
Budget Home Decorating PLR Course 26k Words
Why This Niche Is Perfect
🏡 Huge Audience Demand: Millions of people want affordable ways to upgrade their homes.
💡 Evergreen Topic: Decorating trends come and go, but budget home styling never goes out of fashion.
📈 Cross-Niche Appeal: Perfect for lifestyle bloggers, DIY creators, personal finance audiences, and interior design lovers.
💰 Easy to Sell: Home decor is emotional — people want results they can see and feel.
Course Overview
Budget Home Decorating is written in a friendly, conversational style. It’s easy to read, engaging, and designed to inspire confidence in learners—no interior design degree required!
This 5-module course walks readers through every step of decorating a home beautifully on a tight budget, room by room.
🧩 Module 1: Getting Started with Budget Decorating
Find your style, set your budget, and get inspired!
- Step 1: Define Your Style Without the Stress
Helps readers identify their personal decor vibe (modern, rustic, boho, or minimalist) and stay true to it. - Step 2: Assess What You Already Have
Encourages reuse, repurposing, and creative makeovers using existing furniture and decor. - Step 3: Set a Realistic Decorating Budget
Teaches how to plan room-by-room spending wisely using a simple tracker and priority checklist. - Step 4: Get Inspired the Smart Way
Shows how to create mood boards and gather affordable inspiration online—without comparison overload.
Outcome: Readers feel confident starting their decorating journey with clarity, creativity, and a practical budget.
🛋 Module 2: Living Room Makeover on a Budget
Transform your living space with creativity—not cash.
- Step 1: Rearranging for a Fresh Feel
Simple furniture layout changes can make a room look brand new—without buying anything! - Step 2: Budget-Friendly Wall Transformations
Learn about removable wallpaper, gallery walls, washi tape frames, and DIY art displays. - Step 3: Cushions, Curtains, and Color Tricks
Use affordable textiles and color pops to breathe life into the room. - Step 4: Add Personality with Thrifted Finds
Explore local flea markets and online second-hand stores for unique decor that tells a story.
Outcome: Learners see how small, inexpensive changes can completely refresh a living room.
🛏 Module 3: Bedroom Bliss on a Budget
Create a cozy retreat that feels luxurious, not costly.
- Step 1: Create a Cozy Bed Setup
Layer sheets, throws, and pillows for a high-end hotel look—on a low-end budget. - Step 2: DIY Nightstands and Headboards
Use repurposed items, pallets, or fabric panels for a custom-made focal point. - Step 3: Soft Lighting Magic
Learn to use string lights, bedside lamps, and soft bulbs to set a calming atmosphere. - Step 4: Organize with Style
Turn storage into decor using trays, baskets, and labels that look intentional and chic.
Outcome: Learners design a stylish, restful bedroom that feels truly theirs—without overspending.
🍽 Module 4: Kitchen and Dining Area Creativity
Revamp your kitchen and dining space affordably.
- Step 1: Declutter to Discover Space
Reorganize and simplify to make the kitchen feel instantly bigger and cleaner. - Step 2: Update Cabinets and Countertops Creatively
Learn low-cost tricks with paint, peel-and-stick paper, and new knobs. - Step 3: Small Decor with Big Impact
Add affordable touches—plants, bowls, signs, and chalkboard art—for instant personality. - Step 4: Cozy Up Your Dining Spot
Use thrifted tablecloths, DIY centerpieces, and mix-and-match dishware to create inviting meals.
Outcome: Every mealtime feels more beautiful and intentional, no renovation needed.
🚿 Module 5: Budget-Friendly Bathroom & Final Touches
Add freshness, function, and spa-like calm.
- Step 1: Bathroom Decor that’s Fresh & Functional
Turn storage solutions and simple accents into designer-level details. - Step 2: Affordable Towel and Curtain Swaps
See how small textile updates can completely refresh the bathroom’s look. - Step 3: Add Scents and Spa Vibes
Incorporate candles, oils, and scents for a relaxing daily escape. - Step 4: The Final Walkthrough: Layer, Adjust & Love It
Review each room, tweak details, and admire your budget-friendly transformation.
Outcome: Learners finish the course with a cohesive, welcoming home they’re proud of—without financial stress.
What’s Included
When you purchase the Budget Home Decorating PLR Course, you get everything you need to start selling immediately:
- 🏠 Complete 24,611-word course content — Five modules, clearly structured, engaging, and beginner-friendly.
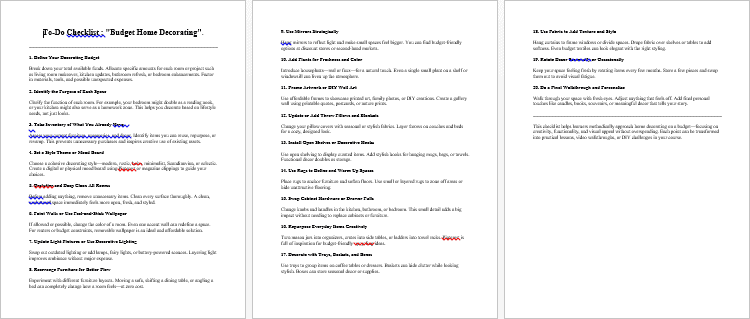
- 📝 Budget Home Decorating Checklist (681 words) — Printable guide to track progress and stay organized.
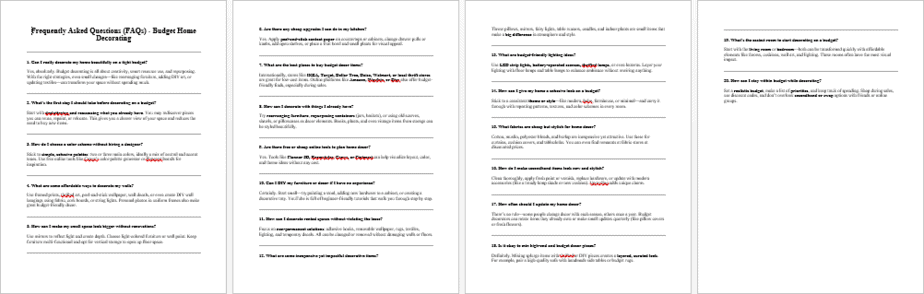
- 💬 Budget Home Decorating FAQs (806 words) — Answers to common decorating questions your customers will have.
- 💻 Done-for-You Sales Page (796 words) — Professional copy ready to plug into your website.
- 💡 Full Private Label Rights License — Rebrand, edit, and sell it as your own.
Who This PLR Course Is Perfect For
- Lifestyle and DIY Bloggers – Turn your audience’s love for home decor into profit.
- Interior Design Coaches or Influencers – Use it as a starter course or coaching material.
- Home Organization Experts – Add this course to your offerings or workshops.
- PLR Sellers & Digital Product Creators – Resell as a high-quality home improvement course.
- YouTubers & Instagram Creators – Turn modules into videos, reels, or tutorials.
How You Can Profit from This PLR Course
- 💰 Sell it as a complete home decorating course for $47–$97.
- 🎥 Convert it into a video masterclass and charge $197–$297.
- 🧰 Bundle it with other home or DIY PLR products for an irresistible offer.
- 📚 Create mini eBooks or guides from each module and sell for $10–$20 each.
- 💡 Offer it as a 5-week decorating challenge with weekly lessons and live Q&A sessions.
- 🏡 Use parts as blog posts or lead magnets to grow your email list.
- 🛍 Add it to a lifestyle membership site for recurring revenue.
- 🖋 Flip it as a branded website complete with the course, checklist, and ready-to-go funnel.
License Terms
You CAN:
✅ Edit, rebrand, and sell this course as your own.
✅ Convert it into videos, eBooks, or workshops.
✅ Add to paid memberships or bundles.
✅ Use excerpts for blog posts, freebies, or marketing funnels.
✅ Sell physical versions (printed guides or workbooks).
You CANNOT:
❌ Pass on PLR or resale rights to customers.
❌ Give away the full unedited content for free.
❌ Offer 100% affiliate commission.
❌ Add to existing paid products without a new purchase.
Why Budget Home Decorating PLR Stands Out
✨ Visually Engaging Topic – Decorating content naturally grabs attention on social media and YouTube.
🧩 Practical and Actionable – Each step is hands-on, easy to apply, and instantly rewarding.
💬 Emotionally Driven Niche – People love creating beautiful homes they can be proud of.
🎯 Ready-to-Launch – You get a full course, checklist, FAQ, and sales page—done for you.
🌱 Evergreen Profit Potential – The topic stays relevant year-round.
Your Customers Will Love This Course Because…
It’s fun, practical, and results-driven.
They’ll see visible changes in their homes—and feel proud they did it affordably.
You’re not just selling information; you’re selling the joy of transformation, the confidence of creativity, and the satisfaction of saving money while beautifying life.
Start Selling This Beautiful, Evergreen Course Today
With over 24,000 words of detailed, high-quality content, plus ready-to-go assets, the Budget Home Decorating PLR Course is your ticket to launching a profitable product in one of the most loved and lucrative lifestyle niches.
Transform your business — while helping others transform their homes.
🏡 Grab Your Copy of the Budget Home Decorating PLR Course Now — and Start Selling Today!
has been added to your cart!
have been added to your cart!
Here A Sample of the Budget Home Decorating PLR Course
Welcome to Budget Home Decorating — your go-to guide for turning any space into a stylish, cozy, and personalized haven without spending a fortune. Whether you’re decorating a rented apartment, your own home, or just a single room, this course will walk you through simple, practical, and budget-friendly techniques to transform every corner beautifully.
Module 1: Getting Started with Budget Decorating
Step 1: Define Your Style Without the Stress
Decorating your home on a budget doesn’t mean sacrificing style. In fact, working with limitations often brings out the most creative and personal results. But before you begin rearranging furniture, buying decor, or even pinning images on Pinterest, it’s essential to define your unique style—the one that makes you feel grounded, inspired, and truly at home. This foundational step not only guides your decisions moving forward but also saves you from spending on things that don’t truly reflect your personality or comfort.
Let’s walk through this step-by-step so that by the end of this lesson, you’ll know what design style speaks to you—and how to translate that into a home that feels like you, without the stress and overwhelm.
Why Defining Your Style is the Key Starting Point
Imagine walking into a home décor store without any clear sense of what you like. Everything seems appealing—but also confusing. You might buy things impulsively and later feel disappointed when they don’t quite fit your space.
Defining your style upfront eliminates this confusion.
You’ll be able to:
- Focus your time and budget on things you actually love.
- Make cohesive choices for each room.
- Express your personality in a consistent yet flexible way.
- Avoid common decorating mistakes (like mismatched themes or wasted purchases).
And the best part? You don’t need to be a design expert or hire a stylist. You just need clarity—and we’re going to find that together.
Step-by-Step Guide: Discovering Your Personal Home Decor Style
Let’s explore the journey of discovering your style through 5 mini-exercises. These are practical, fun, and completely stress-free.
1. Explore, Don’t Decide — Browse to Find What You’re Drawn To
Before jumping into labels like “modern” or “boho,” take time to notice what appeals to you emotionally. Visit platforms like:
- Home décor websites (like Houzz, Apartment Therapy, or IKEA)
- Online furniture stores (check West Elm, Wayfair, or your local sites)
As you scroll through images, ask yourself:
- Which rooms make you feel relaxed?
- Which colors do you notice yourself liking again and again?
- What textures, furniture shapes, or layouts appeal to your eye?
Pro Tip: Create a visual inspiration board (physical or digital). Save about 20–30 images that you like—even if you’re not sure why yet.
2. Look Around You — Your Style Often Lives in What You Already Own
Sometimes the easiest way to discover your style is by taking a fresh look at the things you already own and love.
Go around your home and list:
- 3 to 5 items you genuinely love (could be a lamp, artwork, vase, rug, etc.)
- Why do you love them? Is it the shape, texture, color, or emotional connection?
Then ask yourself:
- Are these pieces vintage, modern, handmade, colorful, neutral, bold, or simple?
- Is there a recurring theme (e.g., natural elements, geometric shapes, bold prints, etc.)?
These little clues help form the foundation of your true style.
3. Match to a Style Category — But Keep it Flexible
Now that you have a sense of what you’re drawn to and what you already love, it’s time to explore where that fits into broader design categories. Don’t overthink this part—this is not about putting yourself in a box, but about using terms to guide your decorating decisions.
Here are some common international home décor styles, simplified:
- Minimalist – Clean lines, neutral colors, clutter-free, functional pieces.
- Scandinavian – Bright, airy spaces; simple wood accents; whites and pastels.
- Modern Farmhouse – Rustic charm meets clean modern lines; wood, whites, cozy textures.
- Bohemian (Boho) – Eclectic, colorful, full of plants and global textiles.
- Industrial – Exposed brick, metal accents, raw finishes, greys and blacks.
- Traditional/Classic – Rich textures, symmetry, warm colors, ornate detailing.
- Coastal – Light blues, whites, breezy fabrics, natural textures.
- Mid-century Modern – Vintage-inspired pieces, tapered legs, geometric forms.
- Cottagecore – Soft, romantic, vintage, floral, lace, handcrafted elements.
- Eclectic – A blend of styles with a strong personal and curated look.
Match your preference to one or two of these categories. If you’re unsure, pick the top three that resonate and blend elements from each.
Important: You’re allowed to mix. A “Scandi-Boho” living room or “Modern Rustic” bedroom are common hybrid styles. Your home should reflect you, not a showroom catalog.
4. Define Your Color Language
Color plays a huge role in how your home feels. You don’t need to paint every wall or buy new furniture to use color effectively. Even a few pops—like throw pillows, rugs, or curtains—can define your space.
Here’s a quick process for identifying your color comfort zone:
- Do you like warm or cool tones?
- Warm = reds, oranges, yellows, beige
- Cool = blues, greens, purples, greys
- Are you drawn to bold, saturated colors or muted, soft shades?
- What neutrals do you love?
- Not all neutrals are equal. Some prefer crisp whites and blacks; others lean toward soft creams and taupes.
- What colors do you wear often and feel good in?
- Your fashion choices can reflect your interior style.
Once you know your core colors, use them as your base. Add accent colors in small touches—like cushions, vases, or wall art—to add life without financial strain.
5. Create a Simple Style Statement
Now that you’ve gathered visuals, observed your space, explored style categories, and identified your colors—it’s time to pull it all together in a simple style statement. This helps you stay focused every time you shop, rearrange, or DIY.
Here’s a simple template:
“My style is [main style] with a touch of [secondary style], using [neutral base colors] with [accent colors]. I love [textures, patterns, or moods] and want my space to feel [adjective like cozy, clean, vibrant, elegant].”
Example:
“My style is Scandinavian with a touch of rustic farmhouse. I use whites and soft greys as my base, with touches of natural wood and sage green. I love cozy textures, warm lighting, and want my home to feel peaceful, airy, and welcoming.”
Keep your style statement handy—it becomes your north star when you’re decorating on a budget.
Common Style Traps to Avoid
While defining your style, here are some things to watch out for:
- Overbuying based on trends: Just because something is trendy doesn’t mean it fits your style or lifestyle.
- Confusing clutter for personality: Personal touches are great, but too much can overwhelm a small space.
- Copying someone else’s home completely: Inspiration is helpful—but your home should reflect your life and story.
- Getting stuck on labels: Use style categories as a guide, not a rulebook.
Your Style is Allowed to Evolve
One last reminder: Your style today might be different a year from now—and that’s okay. Homes, like people, grow and change. What matters is starting with a foundation that reflects where you are now. Over time, as you add more pieces, DIY projects, or seasonal updates, your home will become a living journal of your taste and journey.
End of Step 1 Summary
By now, you should have:
- A Pinterest board or folder full of images you love.
- A short list of décor items in your home that reflect your style.
- A general sense of one or two styles you lean toward.
- A color scheme you’re drawn to.
- A personal style statement that will guide the rest of this course.
You’re now ready to start decorating room-by-room—confidently, creatively, and with a clear vision that saves money and reflects your personality.
Step 2: Assess What You Already Have
One of the biggest misconceptions about home decorating is that it requires shopping trips, a hefty wallet, and entirely new things. The truth? You already have a goldmine of potential décor inside your home—you just haven’t looked at it that way yet. Before we move forward with any shopping list, theme plans, or DIY projects, we’re going to pause and take a long, mindful look at what’s already around you.
In this step, we’ll walk through a guided, room-by-room process to identify, assess, and creatively rethink your existing items. You’ll be surprised by how many forgotten, unused, or overlooked objects can be transformed into meaningful design elements without costing you anything. We’ll call this your “Treasure List”—a personalized inventory of reusable, repaintable, or repurposable items that will fuel your budget decorating journey.
Why This Step is Crucial in Budget Decorating
Here’s the truth: skipping this step leads to overspending, clutter, and decor fatigue. Many people purchase items without realizing they already own something similar—or even better. By thoroughly assessing what you already have, you’ll:
- Avoid unnecessary purchases.
- Discover hidden potential in items you’ve stopped noticing.
- Clear out things that no longer work, creating mental and physical space.
- Stimulate creative ideas for DIY projects and reimagined use.
- Build confidence in your resourcefulness.
This isn’t just about saving money—it’s about shifting your mindset from “I need more” to “Let me see what I already have and how I can use it beautifully.”
Step-by-Step Process: How to Assess Your Existing Inventory
Let’s walk through a systematic way to assess your space and belongings with fresh eyes. You’ll need:
- A notebook (or digital notes app)
- A phone or camera for taking photos
- A measuring tape
- A positive, curious mindset
We’ll do this one room at a time so you don’t get overwhelmed.
1. Start With a Clean Slate – Tidy and Declutter First
Before we can assess what’s useful, we need to remove what’s in the way. Begin by tidying up the room you’re starting with. This doesn’t have to be a deep clean—it’s just about seeing the space and items clearly.
- Clear off countertops, tables, and open surfaces.
- Fold and put away any laundry or personal items.
- Dust off shelves and forgotten corners.
This allows you to observe items in their “natural state” and evaluate their design potential without being distracted by everyday mess.
2. Do a Walkthrough with New Eyes
Imagine you’re a guest in your own home. Walk slowly around the room and look at each item as if you’ve never seen it before. Ask yourself:
- Do I actually like this item?
- Does it fit the style I identified in Step 1?
- Is it functional or purely decorative?
- Could I use it in a different way or room?
- Would this item look better painted, rearranged, or refreshed?
Note your answers in your notebook. Snap quick photos of items you think have potential but aren’t currently working. These images will help when brainstorming later.
3. Create Your “Treasure List”
Now that you’ve done your walkthrough, it’s time to make your Treasure List—a curated list of items that can be reused, repurposed, or modified.
Use the following categories to organize your list:
a. Furniture That Can Be Reimagined
Ask:
- Can this side table be painted or used as a plant stand?
- Could that stool work as a nightstand?
- Is this bench more useful in the entryway than in the bedroom?
Examples:
– Wooden coffee table that can be sanded and stained
– Small drawer chest that can become a hallway console
– Dining chairs with good bones that just need reupholstering
b. Decor That Needs a New Purpose
Ask:
- Is this vase too boring in the living room but perfect in the kitchen?
- Can I group a few small decor pieces together for more impact?
Examples:
– Empty picture frames for a gallery wall
– Trays that can hold bathroom items stylishly
– Mason jars for candles or plants
c. Textiles That Can Be Reused
Ask:
- Do I have throws or bedsheets I can use as curtain panels?
- Are there extra pillowcases that could be sewn into cushion covers?
Examples:
– A scarf used as table runner
– Fabric napkins turned into wall art
– Old curtains trimmed and dyed for a new look
d. Lighting Fixtures and Lamps
Ask:
- Can I move this lamp to a darker room where it’s more needed?
- Would a new lampshade or bulb temperature change the vibe?
Examples:
– Floor lamp from bedroom moved to reading nook
– Small desk lamp used as a bedside light
– Bulbs replaced to emit warm light instead of harsh white
e. Art and Wall Decor
Ask:
- Are there unused art prints in storage?
- Can I rearrange the current layout for better balance?
Examples:
– Maps or calendars used as framed art
– DIY pressed flower art using recycled frames
– Kids’ drawings turned into a colorful gallery
4. Measure and Document Key Items
After you’ve listed your treasure pieces, take measurements of the larger items—especially if you plan to move them between rooms. This ensures they’ll actually fit and function in the new spot.
Record in your notebook:
- Height, width, and depth of furniture
- Dimensions of decorative pieces (like mirrors or framed art)
- Notes on condition or what needs improvement (e.g., “paint chipped,” “needs new cushion”)
Take clear photos of the items. This will be helpful when visualizing how they can work together—or when you’re shopping for add-ons like knobs, paint, or fabric.
5. Identify Unused or Forgotten Items
Go beyond the room you’re working on. Check closets, attics, storage bins, and under beds. You might find:
- Lamps you forgot you had
- Vintage trays or containers
- Old wall art
- Seasonal décor that could work year-round
Often, these “forgotten pieces” become standout design elements when brought back with a new twist.
6. Reassess and Eliminate What No Longer Serves You
While this step is focused on what you can reuse, it’s also an ideal time to let go of what doesn’t fit your style, space, or life anymore. Ask:
- Is this item outdated beyond saving?
- Am I keeping this out of guilt or habit?
- Could someone else use this more than I do?
Create a donation box or list items to sell online. The extra money can go toward paint, supplies, or new pieces later.
Letting go of the wrong things creates space for the right ones—without increasing clutter or expense.
7. Experiment with Rearrangement
Once you have your treasure list, try playing with placement. You don’t need to commit yet—just test ideas.
- Move a side table into the entryway
- Try an old mirror above the sofa
- Drape a blanket over a chair to test color and texture
- Group 3 small vases for a centerpiece
This kind of “visual testing” helps you get comfortable with the idea that decorating is fluid—not fixed.
You’ll learn that small shifts can create powerful effects.
Bonus Tips for Reusing What You Already Own
- Paint is magic: Old wooden frames, trays, baskets, and stools can be transformed with a coat of spray paint or chalk paint.
- Fabric makes a difference: A neutral sofa can come alive with bold cushions or a throw.
- Think vertically: Floating shelves, hooks, or wall organizers can turn forgotten items into art.
- Create vignettes: Group 3–5 objects (varying height and texture) on a tray or shelf for an instantly styled look.
- Lighting elevates everything: Sometimes a new bulb or repositioning a lamp completely transforms a space.
End of Step 2 Summary
By the end of this step, you should have:
- Tidied and cleared your space to prepare for assessment.
- Walked through each room with fresh eyes.
- Created a detailed Treasure List of reusable, repurposable items.
- Measured and documented key pieces.
- Identified unused or forgotten items from other spaces.
- Eliminated items that no longer work for your style.
- Started experimenting with rearrangement and fresh placement.
This process will empower you to decorate intentionally, creatively, and affordably—making your home reflect your personality without the pressure to spend.
Your home is already filled with design potential. All it takes is a little time, a new perspective, and a willingness to explore. The “new” home you’re looking for might already be inside the one you’re living in.
Step 3: Set a Realistic Decorating Budget
When it comes to home decorating, especially on a budget, one of the biggest mistakes people make is jumping into purchases without a clear spending plan. You see a beautiful rug online, or a stylish lamp at the store, and you convince yourself it’s a great deal. But without a budget, it’s easy to overspend, buy items that don’t fit your overall plan, or—worse—run out of funds before the project is finished.
That’s where this step comes in. Together, we’ll create a realistic decorating budget—room by room—so that you feel in control of your money, confident in your choices, and free from guilt or buyer’s remorse.
You’ll also receive a simple budget tracker template you can use again and again to monitor your expenses, prioritize purchases, and stretch your creativity.
This isn’t about restricting yourself. It’s about giving your ideas structure and ensuring every dollar works hard toward making your home feel beautiful and complete.
Why a Budget is Essential in Creative Home Decorating
Think of your decorating budget as a roadmap. Without it, you might head in the right direction, but you’ll likely take a few expensive wrong turns. With a budget, you’ll:
- Spend more mindfully and avoid impulse buying.
- Identify opportunities for DIY, repurposing, and prioritizing.
- Break large projects into smaller, manageable goals.
- Make room for splurges where they really count.
Even if you have very limited funds, a well-structured budget allows you to do more with less.
Step-by-Step Guide: How to Set Your Decorating Budget
Let’s walk through this process one clear step at a time. This section is designed for international learners, so we’ll keep all terms general and adaptable to your local currency and cost of living.
1. Know Your Total Available Amount
Start by asking the simplest (and sometimes hardest) question:
How much can I realistically spend right now, without financial stress?
This number will be different for everyone. For some, it might be $100. For others, $1,000 or more. What matters is:
- It’s a number you’re comfortable spending.
- It doesn’t interfere with essential expenses like rent, groceries, savings, or emergencies.
- It includes a small buffer (around 10%) for unexpected costs or last-minute tweaks.
Write this number down. This is your Total Decorating Budget.
Example: I can afford to spend $600 total over the next 2 months for decorating.
This total will be broken down across the rooms or zones you want to work on.
2. List the Rooms You Want to Decorate
Make a list of the rooms or areas you plan to work on. This might include:
- Living Room
- Bedroom
- Bathroom
- Kitchen
- Entryway
- Balcony/Outdoor Space
- Home Office
- Children’s Room
You don’t have to do everything at once. Prioritize based on what will give you the biggest daily impact or satisfaction.
Next to each room, rate the urgency and importance:
- Urgency = How soon does it need improvement? (Scale of 1 to 5)
- Importance = How often do you use the space or how much it affects your mood? (Scale of 1 to 5)
This will help you allocate more funds to high-priority areas.
3. Break Down Expenses by Category
For each room, there are usually 4 main categories of spending:
- Furniture – This includes big pieces like sofas, beds, tables, chairs.
- Decor – Wall art, rugs, vases, mirrors, candles, and accent pieces.
- Textiles – Curtains, bedding, cushions, throws, rugs.
- DIY & Materials – Paint, brushes, glue, nails, wallpaper, tools, etc.
Optional categories:
- Lighting – Lamps, light fixtures, bulbs.
- Storage – Baskets, shelves, organizers.
Create a sheet or use the tracker to list these categories for each room.
Example for Living Room:
Furniture: $150
Decor: $60
Textiles: $90
DIY Materials: $30
Lighting: $40
Total: $370
Once you’ve done this for each room, make sure the total for all rooms does not exceed your overall budget.
Adjust amounts as needed to balance the plan. Remember to add a 10% buffer at the end.
4. Prioritize High-Impact, Low-Cost Improvements
When decorating on a budget, it’s essential to spend where it will make the biggest difference. Some improvements are low-cost but completely change the feel of a room. Prioritize those.
Here’s what usually offers the best value:
- Paint: A fresh wall color or even painting furniture can transform a space.
- Textiles: New curtains, cushions, or throws add instant coziness and color.
- Lighting: A well-placed lamp or warm-toned bulb can make a room feel new.
- Wall Decor: Rearranged or DIY wall art creates personality and interest.
Avoid spending too much on:
- Trendy items you might tire of quickly.
- Fragile or poor-quality decor that won’t last.
- Duplicate items you already own (covered in Step 2).
Use your Treasure List from the previous step to reduce costs here—many items you already have can fill these categories.
5. Use the Budget Tracker Template
To keep everything organized, use a simple spreadsheet or notebook with the following columns:
| Room | Category | Item | Estimated Cost | Actual Cost | Notes |
| Living Room | Decor | Framed artwork | $30 | $28 | Bought online |
| Bedroom | Textiles | Curtains | $45 | Waiting for sale | |
| Kitchen | DIY | Paint | $20 | Planning to repaint cabinets |
At the top of the sheet, track:
- Total Budget
- Spent So Far
- Remaining Balance
Update the sheet as you go. This will help you stay in control, avoid going over budget, and quickly see where adjustments are needed.
6. Explore Budget Sources Internationally
No matter where you live, there are options for finding affordable home décor. Here are ideas based on various global settings:
Online Marketplaces
- Facebook Marketplace
- Craigslist
- OLX (India)
- Gumtree (UK, Australia)
- Mercari, eBay
Second-Hand & Thrift Stores
- Local charity shops
- Consignment stores
- Flea markets
- Estate sales
- Garage sales
Budget Retailers
- IKEA
- Target
- Dollar stores
- Miniso, Daiso
- Walmart
- HomeSense or TK Maxx (UK)
DIY & Upcycling
- Use leftover wood, fabric, or paint from old projects.
- Repurpose containers, crates, old drawers, and pallets.
- Turn clothing into cushion covers or wall hangings.
Localize your sources based on what’s available in your country. A little research can go a long way.
7. Set a Timeline for Spending
One of the best ways to avoid overspending is to spread out your decorating budget over time. You don’t need to buy everything in a single week.
Create a timeline:
- Week 1–2: Finalize your plan and use what you already own.
- Week 3–4: Purchase essential items only.
- Week 5–6: Add decor and DIY improvements.
- Week 7+: Evaluate what’s missing and fill the gaps gradually.
This slow-and-steady approach:
- Allows you to find better deals.
- Reduces decision fatigue.
- Keeps your budget in check.
8. Plan for DIY and Free Enhancements
DIY projects stretch your decorating budget further than almost anything else. You can create:
- Artwork using canvas and paint
- Accent walls using masking tape and leftover paint
- Candle holders from glass jars
- Decorative trays from old picture frames
Most of these can be done with minimal materials and effort. List out 2–3 small DIY ideas and allocate a portion of your budget to basic supplies (usually under $20 per project).
Don’t forget the free transformations:
- Rearranging furniture
- Decluttering and simplifying
- Swapping items between rooms
- Deep cleaning and polishing existing furniture
These are the most budget-friendly ways to refresh your space—and they’re often the most satisfying.
End of Step 3 Summary
By now, you should have:
- Identified your total decorating budget.
- Listed the rooms and prioritized them by urgency and importance.
- Broken down spending into categories per room.
- Created a budget tracker to monitor your spending.
- Discovered high-impact, low-cost opportunities.
- Explored sources for affordable items in your local and global context.
- Set a realistic timeline for spending and decorating.
- Planned for DIY and free enhancements.
You’re no longer decorating blindly—you’re making strategic, empowered decisions. This step sets the tone for the rest of your decorating journey: intentional, thoughtful, and fully within your control.
Your space doesn’t need to be expensive to feel extraordinary. It just needs you, a plan, and the power of creativity guided by a smart budget.
Step 4: Get Inspired the Smart Way
(Learn how to gather mood board ideas from Pinterest, Instagram, and magazines without falling into the comparison trap. We’ll make your inspiration come to life—on your budget.)
Introduction: Inspiration is Everywhere (But It Can Also Be Overwhelming)
Decorating your home on a budget starts with imagination. But inspiration, when unfiltered and unlimited, can sometimes feel more like pressure than pleasure. You scroll Pinterest for five minutes and suddenly feel like you need marble countertops, designer lamps, and bespoke furniture to feel “stylish.” Pause right there.
This step is about guiding you to smart inspiration—the kind that lights your creative fire without making you feel inadequate or pushing you to overspend. We’re going to explore how to build a vision board (a mood board) for your space in a focused, friendly, and financially conscious way. No more saving hundreds of conflicting pins or screenshots you’ll never use. Instead, you’ll learn how to pull together a cohesive look that works for you, your lifestyle, and your budget.
Let’s break it down.
Step-by-Step Instruction
Step 1: Choose Your Platforms Wisely (Start with a Purpose)
Before jumping into Pinterest, Instagram, or flipping through that pile of home décor magazines, ask yourself: What am I looking for? Are you gathering ideas for your small kitchen? Updating your living room? Trying to make your rented bedroom feel cozy? Setting a goal will help you scroll with intention.
Here’s how to streamline:
- Pinterest – Best for organizing ideas by rooms, color themes, or design trends. You can create separate boards such as “Budget Living Room Ideas” or “DIY Decor for Bedrooms.”
- Instagram – Excellent for discovering real people’s home transformations. Use hashtags like #BudgetDecor, #SmallSpaceStyle, #ThriftedHome, or #DIYHomeDecor.
- Magazines – Great for tactile learners. Tear out pages and make a real collage. Or take photos and save them to your digital mood board.
Quick Tip: Don’t try to build the perfect board in one sitting. Inspiration is like layering – it builds over time. Revisit your board every few days and refine it.
Step 2: Curate, Don’t Collect (Avoid Overloading)
One of the most common mistakes people make when building mood boards is saving everything. But if you pin 150 ideas, you’ll only end up confused, not inspired. Instead, curate.
Use this checklist to keep your board focused:
- Does this image reflect my style from Step 1?
- Is it realistic for my current home or lifestyle?
- Could I recreate this with what I have or with a small budget?
- Does it feel warm, authentic, and personal?
If the answer is yes, save it. If you love a certain style but it feels too high-end or doesn’t fit your space, let it go—or save it in a separate board just for admiration.
This is not about copying someone else’s home. It’s about interpreting what you love in a way that fits your story, your budget, and your home.
Step 3: Build a Vision Board (Digital or Physical)
Once you’ve curated around 15-30 solid inspiration pieces, it’s time to make your vision board. This is where everything comes together visually, and it becomes a powerful tool to guide your actual decorating.
You can choose:
- Digital Mood Board Tools:
- Canva – Use a free account to create a grid collage. Upload your saved photos from Pinterest, Instagram, and even product listings.
- Milanote – A popular mood board app that lets you drag and drop images, add notes, and organize by zones (living room, kitchen, etc.).
- PowerPoint / Google Slides – Simple but effective. Paste your images, color swatches, and even budget ideas.
- Physical Board (if you’re tactile):
- Print your favorite pins or cut them from magazines.
- Pin or paste them to a corkboard or poster board.
- Include fabric samples, paint swatches, or snapshots of your existing items.
What to include in your mood board:
- Color palette: primary and accent colors
- Furniture style: modern, rustic, industrial, etc.
- Textures: soft fabrics, metals, wood tones
- DIY or budget-friendly versions of décor items
- Storage or space-saving inspirations
Reminder: The mood board is a guide, not a rulebook. It’s meant to spark ideas, not limit you.
Step 4: Filter Out the Pressure (Comparison Trap Alert)
It’s incredibly easy to fall into the trap of thinking your home should look like a magazine or influencer’s Instagram reel. But here’s the truth: those photos are curated, styled, filtered, and sometimes not even real (hello, 3D renders). Your goal isn’t perfection—it’s personal joy, comfort, and creativity within your means.
Here are 3 mindset tips to keep comparison at bay:
- Focus on Function First: Your space needs to work for your lifestyle. That trendy open shelf kitchen might look pretty, but if you’re a clutter-prone person or live in a dusty area, it may not be for you. Choose what fits your life, not what fits a feed.
- Progress Over Perfection: Decorating doesn’t have to be done in one weekend. Your room is allowed to evolve. You might only add one DIY vase or thrifted lamp this month—but that’s progress.
- Celebrate Originality: That wall art your niece painted? Or that old trunk your grandfather used? Those are one-of-a-kind, meaningful, and priceless pieces that no algorithm can offer. Personal touches bring soul to a space.
Mini Exercise: Your Inspiration Homework
- Create your main inspiration board:
- Label it clearly (e.g., “Budget Living Room Refresh”).
- Collect 20 images MAX that truly speak to you.
- Write down your key elements:
- What 3 colors show up most often?
- What kinds of furniture or accessories are repeated?
- Are there any textures or lighting styles that attract you?
- List 3 budget-friendly versions:
- If you see a designer light fixture, look for a dupe or a DIY option.
- If you love a high-end bookshelf, think: can I thrift and repaint one?
- Use Pinterest’s visual search tool to find similar budget items.
Closing Thought: Inspiration Should Empower, Not Intimidate
The best homes are not the ones with the biggest budgets. They’re the ones that reflect the people who live in them. When your décor mirrors your memories, your energy, and your creativity, it feels like home. Don’t chase Pinterest-perfect. Aim for a place that feels like you.
So, as you move forward, remember: take only what truly inspires you, ignore the noise, and let your imagination do the decorating. Even with a limited budget, your ideas are limitless.
Inspiration is not a destination—it’s the starting point for your beautifully imperfect, soulfully styled home.
We’re also giving these extra bonuses
Budget Home Decorating – Checklist
Budget Home Decorating – FAQs
Budget Home Decorating – Salespage Content
Package Details:
Word Count: 24 611 Words
Number of Pages: 99
Budget Home Decorating – Bonus Content
Checklist
Word Count: 681 words
FAQs
Word Count: 806 words
Salespage Content
Word Count: 796 words
Total Word Count: 26 894 Words
Your PLR License Terms
PERMISSIONS: What Can You Do With These Materials?
Sell the content basically as it is (with some minor tweaks to make it “yours”).
If you are going to claim copyright to anything created with this content, then you must substantially change at 75% of the content to distinguish yourself from other licensees.
Break up the content into small portions to sell as individual reports for $10-$20 each.
Bundle the content with other existing content to create larger products for $47-$97 each.
Setup your own membership site with the content and generate monthly residual payments!
Take the content and convert it into a multiple-week “eclass” that you charge $297-$497 to access!
Use the content to create a “physical” product that you sell for premium prices!
Convert it to audios, videos, membership site content and more.
Excerpt and / or edit portions of the content to give away for free as blog posts, reports, etc. to use as lead magnets, incentives and more!
Create your own original product from it, set it up at a site and “flip” the site for megabucks!
RESTRICTIONS: What Can’t You Do With These Materials?
To protect the value of these products, you may not pass on the rights to your customers. This means that your customers may not have PLR rights or reprint / resell rights passed on to them.
You may not pass on any kind of licensing (PLR, reprint / resell, etc.) to ANY offer created from ANY PORTION OF this content that would allow additional people to sell or give away any portion of the content contained in this package.
You may not offer 100% commission to affiliates selling your version / copy of this product. The maximum affiliate commission you may pay out for offers created that include parts of this content is 75%.
You are not permitted to give the complete materials away in their current state for free – they must be sold. They must be excerpted and / or edited to be given away, unless otherwise noted. Example: You ARE permitted to excerpt portions of content for blog posts, lead magnets, etc.
You may not add this content to any part of an existing customer order that would not require them to make an additional purchase. (IE You cannot add it to a package, membership site, etc. that customers have ALREADY paid for.)
Share Now!
Latest Products


Free Sales Funnel Builder

Related Products

Popular & Trending


Featured Products