Photography Basics PLR Course 20k Words
in Photography PLR , PLR Checklists , PLR eBooks , PLR eCourses , PLR List Building Reports , Premium PLR , Premium PLR eBooks , Premium PLR Reports , Premium White Label Brandable PLR Coaching Courses , Private Label Rights ProductsChoose Your Desired Option(s)
has been added to your cart!
have been added to your cart!
#photographybasics #photographytips #beginnerphotography #creativecontent #plrcourse #learnphotography #photographyplr #plrcontent
Photography Basics PLR Course – Step-by-Step Guide to Capturing Stunning Images
Are you ready to unlock your creative potential and master the art of photography? Whether you’re a complete beginner or looking to improve your skills, the Photography Basics PLR Course is your ultimate roadmap to understanding, practicing, and excelling in photography.
With 19,136 words of expert content, this course is perfect for PLR resellers, photography coaches, bloggers, and online entrepreneurs who want a ready-made, high-value training program they can sell, teach, or repurpose.
Presenting…
Photography Basics PLR Course 20k Words
Why Photography Basics Matters
Photography is more than pointing a camera and pressing a button. To create stunning, professional-quality images, you need to understand:
- How to use your camera effectively, including settings, exposure, and composition.
- The principles of light, color, and framing.
- How to shoot in different environments—indoor, outdoor, and low light.
- Techniques for creative expression and storytelling through images.
Learning these fundamentals helps build confidence, improve your portfolio, and create photos that stand out. This course gives learners step-by-step guidance, making it easy to learn at your own pace.
What Learners Will Achieve
This course is structured in five modules, each with four steps, designed to gradually build skills from basic understanding to creative mastery.
Module 1: Understanding Your Camera and Equipment
Before taking photos, you need to know your tools. This module covers:
- Getting to Know Your Camera
Explore different types of cameras, from smartphones to DSLRs, and understand their features. - Camera Settings Basics
Learn about aperture, shutter speed, ISO, and how they affect exposure and depth of field. - Choosing the Right Lens
Understand lens types and focal lengths to capture everything from landscapes to portraits. - Essential Accessories
Discover tripods, filters, memory cards, and other tools that make photography easier and more professional.
Module 2: Mastering Exposure and Lighting
Proper exposure and lighting are the foundation of any great photo. This module focuses on:
- Understanding Light
Learn how natural and artificial light affects your images and how to work with different lighting conditions. - Exposure Triangle Simplified
Discover how to balance aperture, shutter speed, and ISO for perfect exposure every time. - White Balance and Color Temperature
Correct color tones for vibrant and accurate images. - Using Flash and Reflectors
Enhance your photos in low-light situations or to create dramatic effects.
Module 3: Composition and Framing
Composition makes a photo visually compelling. This module teaches:
- Rule of Thirds and Beyond
Use classic and advanced composition techniques to frame subjects effectively. - Leading Lines and Patterns
Guide the viewer’s eye and create depth in your images. - Angles and Perspectives
Explore how different viewpoints transform ordinary scenes into dynamic shots. - Storytelling Through Photography
Convey emotion, narrative, and mood through thoughtful framing and subject placement.
Module 4: Capturing Different Types of Photography
Every type of photography requires unique skills. This module covers:
- Portrait Photography
Tips for flattering lighting, posing, and capturing personality. - Landscape and Nature Photography
Techniques for capturing expansive views and natural beauty. - Action and Sports Photography
Freeze motion or create dynamic blur for high-energy shots. - Macro and Close-Up Photography
Capture the tiny details with clarity and creativity.
Module 5: Post-Processing and Sharing Your Work
Great photos often need finishing touches. This module guides learners through:
- Introduction to Editing Software
Learn how to use Lightroom, Photoshop, or free alternatives for photo enhancement. - Basic Editing Techniques
Adjust brightness, contrast, color, and cropping to improve images. - Advanced Retouching Tips
Remove distractions, enhance subjects, and create professional-quality results. - Sharing and Publishing Your Work
Best practices for social media, online portfolios, and print publications.
Bonus Materials
This PLR course includes ready-to-use bonus resources, making it easier for you to sell, teach, or repurpose:
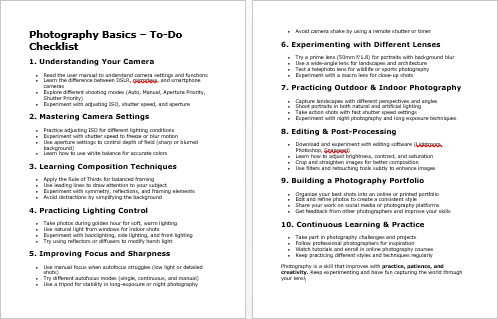
- Photography Basics – Checklist (413 words)
Step-by-step guidance to ensure learners practice and apply all essential skills. - Photography Basics – FAQs (1,080 words)
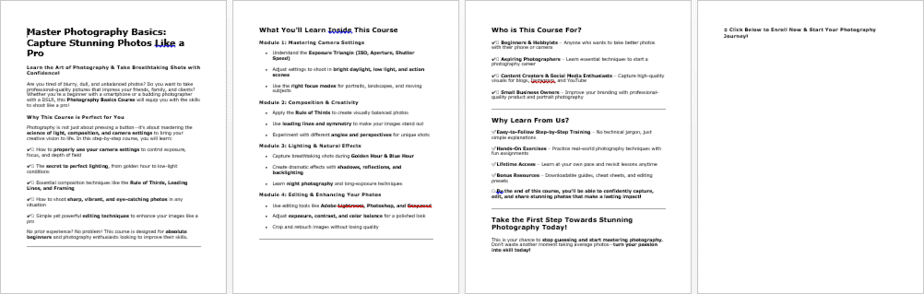
Answers common questions about equipment, techniques, and common mistakes. - Photography Basics – Salespage (509 words)
High-converting copy ready to promote the course to your audience.
How to Use and Profit From This PLR Course
This course is fully editable and comes with reseller rights, giving you multiple ways to monetize:
- Sell as a Complete Course: Offer as an eBook, PDF, or online video program.
- Break Into Smaller Modules: Sell individual modules or lessons for $10–$20 each.
- Bundle With Other Courses: Create premium packages for $47–$97.
- Membership Sites: Include in subscription programs to earn recurring revenue.
- Workshops or Webinars: Host live or recorded sessions using course content.
- Convert to Audio or Video: Offer as guided audio lessons or video tutorials.
- Lead Magnets & Email Campaigns: Share portions of the course to grow your email list.
- Flip a Photography Website: Launch a site featuring this course as the main product.
Who Should Use This PLR Course
- Photography Coaches and Educators: Teach beginners with a structured curriculum.
- PLR Resellers: Sell a high-quality course immediately.
- Bloggers & Influencers: Offer actionable, authoritative photography tips to your audience.
- Entrepreneurs in the Creative Industry: Package as part of a creative skills program.
- Beginners in Photography: Gain a structured path to learn all fundamentals.
Licensing and Usage Rights
Permissions:
- Sell content as-is or customize with minor edits.
- Substantially modify 75%+ to claim copyright and create unique offerings.
- Break into modules, bundle, or convert to audio/video content.
Restrictions:
- Cannot pass on PLR rights to customers.
- Maximum affiliate commission: 75%.
- Cannot give full content away for free.
- Cannot include in pre-paid packages without an extra purchase.
Take Action Today
The Photography Basics PLR Course is your ready-to-use, high-value training program. With this course, you can:
- Empower learners to capture stunning, professional-quality images.
- Provide structured guidance from beginner to advanced photography techniques.
- Launch a profitable digital product instantly with minimal effort.
✅ Purchase the Photography Basics PLR Course today and give your audience—or yourself—the tools to master photography and create stunning images with confidence.
has been added to your cart!
have been added to your cart!
Here A Sample of Photography Basics PLR Course
Master the Fundamentals and Capture Stunning Photos with Confidence!
Module 1: Understanding Your Camera
Before diving into photography, let’s get familiar with your camera and its settings!
Step 1: Get to Know Your Camera
Before you can take stunning photos, you need to be completely comfortable with your camera. Whether you are using a DSLR (Digital Single-Lens Reflex), a mirrorless camera, or a smartphone, understanding your device’s buttons, dials, menus, and basic functions is essential. This step will guide you through getting familiar with your camera, exploring its settings, and understanding the key differences between camera types.
1. Pick Up Your Camera and Turn It On
The first step in mastering photography is to physically interact with your camera. This means holding it, turning it on, and getting used to how it feels in your hands.
Step-by-Step Guide:
- Locate the Power Button:
- On DSLR and mirrorless cameras, the power switch is typically near the shutter button.
- On smartphones, pressing the power button will wake up the device. Some models have a shortcut to open the camera instantly by double-tapping the power or volume button.
- Grip the Camera Properly:
- Place your right hand around the grip with your index finger resting on the shutter button.
- Support the camera body or lens with your left hand for stability.
- Ensure your elbows are close to your body for better balance and reduced camera shake.
- Turn On the LCD Screen or Viewfinder:
- Many cameras default to LCD mode, but DSLRs and some mirrorless cameras also have an optical or electronic viewfinder (EVF).
- Experiment by toggling between the viewfinder and LCD screen to see which works best for you.
- Check the Battery and Memory Card:
- If your camera doesn’t turn on, ensure the battery is charged and inserted properly.
- Insert a compatible memory card and format it before taking photos.
2. Explore the Buttons, Dials, and Menus
Your camera has multiple buttons and dials that allow you to control different settings. Take time to press each button and understand its function.
Step-by-Step Guide:
- Find the Shutter Button
- The shutter button (usually on the top right of the camera) captures images.
- Half-press the shutter button to focus before fully pressing it to take a photo.
- Identify the Main Mode Dial
- This dial allows you to select different shooting modes:
- Auto (Green Mode): The camera makes all decisions for you.
- P (Program Mode): Semi-automatic, where the camera chooses settings but allows some adjustments.
- A/Av (Aperture Priority): You control aperture, and the camera adjusts shutter speed.
- S/Tv (Shutter Priority): You control shutter speed, and the camera adjusts aperture.
- M (Manual Mode): Full control over all settings.
- Auto (Green Mode): The camera makes all decisions for you.
- Explore the ISO, Aperture, and Shutter Speed Controls
- These settings control exposure, which we will cover in detail later.
- Locate the ISO button, aperture control dial, and shutter speed dial on your camera.
- Check the Menu System and Settings
- Press the Menu button to access camera settings.
- Browse through settings like image quality (RAW vs. JPEG), white balance, autofocus modes, and picture styles.
- Experiment with the Focus Modes
- Find the AF/MF (Autofocus/Manual Focus) switch on the lens or in the settings.
- Try switching between single-focus mode (AF-S/One-Shot AF) and continuous focus (AF-C/AI Servo AF).
3. Learn the Differences Between DSLRs, Mirrorless, and Smartphones
Understanding how different types of cameras work helps you choose the best tool for your photography needs.
DSLR (Digital Single-Lens Reflex) Cameras
✔ Uses a mirror and optical viewfinder to show the real-time scene.
✔ Larger interchangeable lenses for flexibility.
✔ Longer battery life but heavier in weight.
✔ Best for professional and enthusiast-level photography.
Mirrorless Cameras
✔ No mirror—uses an electronic viewfinder (EVF) or LCD screen.
✔ Lighter and more compact than DSLRs.
✔ Faster autofocus system and silent shooting modes.
✔ Great for travel, vlogging, and modern digital photography.
Smartphone Cameras
✔ Always with you—portable and convenient.
✔ AI-based processing for quick, high-quality photos.
✔ Limited manual controls but excellent computational photography.
✔ Best for casual shooting and social media content creation.
Activity: If you have access to different camera types, compare how each one feels and functions by taking the same photo with all three.
4. Read the Camera Manual (Yes, Really!)
Many beginners overlook the user manual, but it is an invaluable resource. Every camera model is different, and the manual provides exact instructions tailored to your device.
How to Use Your Manual Effectively:
- Start with the Basics:
- Read sections on button functions, shooting modes, and exposure settings.
- Keep the manual handy while testing out settings.
- Find Quick Reference Guides:
- Most manuals include shortcut lists for important functions.
- Bookmark pages that cover ISO, autofocus settings, and custom functions.
- Watch for Hidden Features:
- Some cameras have custom buttons, advanced autofocus tricks, or special shooting modes that are only explained in the manual.
- Explore Wi-Fi, Bluetooth, and app connectivity features for easy file transfers.
- Keep It for Future Reference:
- You might not need every feature right now, but as you progress, you’ll find new tools that enhance your photography.
- Download a digital version of your manual for quick access on your phone or tablet.
Activity: Set aside 30 minutes to read through the first few pages of your manual and try out the settings mentioned.
Conclusion: You’re Now Familiar with Your Camera!
By completing this step, you have gained a solid foundation in handling your camera, understanding its buttons and menus, recognizing different camera types, and utilizing your manual for guidance.
What’s Next?
- Now that you are comfortable with your camera, it’s time to move on to Module 2: Mastering Exposure – The Key to Well-Lit Photos.
- In the next step, you will learn how ISO, aperture, and shutter speed work together to create well-exposed images.
Keep your camera handy and practice adjusting the basic settings as you move forward!
Step 2: Master the Basic Camera Settings
Now that you are familiar with your camera’s buttons, dials, and menus, it’s time to take control of how your photos look. The key to achieving the right exposure (the brightness or darkness of an image) is understanding the three fundamental settings that make up the Exposure Triangle:
- ISO – Controls how sensitive your camera sensor is to light.
- Aperture (f-stop) – Controls how much light enters through the lens.
- Shutter Speed – Controls how long the camera sensor is exposed to light.
By mastering these three elements, you will have full creative control over your photography, whether you want to capture bright, sharp images or create beautiful background blur (bokeh).
1. Understanding the “Big Three” Camera Settings: ISO, Aperture, and Shutter Speed
Each of these settings affects how light interacts with your camera sensor. Let’s break them down one by one.
ISO – Adjusting Your Camera’s Light Sensitivity
ISO determines how sensitive your camera sensor is to available light. A lower ISO means less sensitivity (darker image), while a higher ISO increases sensitivity (brighter image).
✔ Low ISO (100 – 400) → Best for bright daylight; produces clear, noise-free images.
✔ Medium ISO (800 – 1600) → Suitable for indoor and low-light conditions.
✔ High ISO (3200 – 6400 and above) → Useful for very low-light environments but may cause grainy noise in images.
How to Adjust ISO:
- Locate the ISO button or ISO setting in your camera’s menu.
- Select a low ISO (100-200) for outdoor shots in daylight.
- Increase ISO (800-3200) when shooting in low light or indoors.
- Test different ISO settings to see how they affect brightness and noise in your photos.
Activity: Take three photos of the same subject in a dimly lit room using ISO 100, ISO 800, and ISO 3200. Compare the results to see how noise increases as ISO gets higher.
Aperture – Controlling Depth of Field and Light Intake
Aperture refers to the size of the lens opening that allows light into the camera. It is measured in f-stops (f/1.8, f/5.6, f/11, etc.). The aperture setting controls two key things:
✔ How much light enters the lens (affects brightness).
✔ Depth of field (controls how much of the background is in focus).
✔ Wide Aperture (Low f-number: f/1.8, f/2.8, f/4) → More light, blurred background (shallow depth of field).
✔ Narrow Aperture (High f-number: f/11, f/16, f/22) → Less light, more of the scene in focus (deep depth of field).
How to Adjust Aperture:
- Turn your camera to Aperture Priority Mode (A or Av).
- Select a low f-stop (f/1.8 – f/4) for portraits with a blurry background.
- Select a high f-stop (f/8 – f/16) for landscape shots where you want everything in focus.
- Take multiple photos at different f-stops to see how background blur changes.
Activity: Take two photos: one at f/2.8 (wide aperture) and another at f/11 (narrow aperture). Compare how the background sharpness changes.
Shutter Speed – Controlling Motion and Light Exposure
Shutter speed determines how long your camera sensor is exposed to light. It is measured in fractions of a second (1/200s, 1/500s, 1/30s, etc.).
✔ Fast Shutter Speed (1/1000s, 1/500s, 1/250s) → Freezes motion, great for sports or wildlife photography.
✔ Slow Shutter Speed (1/30s, 1s, 10s, etc.) → Captures motion blur, ideal for night photography and light trails.
How to Adjust Shutter Speed:
- Turn your camera to Shutter Priority Mode (S or Tv).
- Select a fast shutter speed (1/1000s) to capture fast-moving subjects.
- Select a slow shutter speed (1/30s or longer) for motion blur effects.
- Use a tripod when using very slow shutter speeds (long exposures) to avoid camera shake.
Activity: Capture a moving object twice:
- First, use a fast shutter speed (1/500s) to freeze the motion.
- Then, use a slow shutter speed (1/30s or slower) to create motion blur.
2. Learn How These Settings Work Together to Control Exposure
ISO, aperture, and shutter speed work together to create a well-exposed image. When you change one setting, you must adjust the others to maintain proper brightness.
✔ If you increase ISO, you may need a faster shutter speed to avoid overexposure.
✔ If you open the aperture (f/1.8), you may need a faster shutter speed to balance the light.
✔ If you use a slow shutter speed, you may need a low ISO to avoid excessive brightness.
Activity:
- Set your camera to Manual Mode (M).
- Adjust ISO to 400, Aperture to f/5.6, and Shutter Speed to 1/250s.
- Take a photo and review the brightness.
- Change the aperture to f/2.8, then reduce ISO to 200, and see the difference.
3. Experiment with Auto Mode vs. Manual Mode
Auto Mode (Fully Automatic)
✔ Camera makes all decisions (ISO, aperture, shutter speed).
✔ Best for quick shots and beginners.
✔ May not always produce the best results.
Manual Mode (Full Control)
✔ You set ISO, aperture, and shutter speed manually.
✔ Allows full creative control.
✔ Requires practice but leads to better photography skills.
How to Experiment:
- Take a photo in Auto Mode and note the settings the camera chooses.
- Switch to Manual Mode and input the same settings.
- Adjust the settings slightly (increase ISO, change aperture) and compare results.
- Repeat this process in different lighting conditions to see how settings impact your shots.
Conclusion: You Now Control Exposure!
By understanding ISO, aperture, and shutter speed, you now have the ability to adjust your camera settings based on lighting conditions and creative needs.
✔ ISO affects brightness and image noise.
✔ Aperture controls depth of field and light intake.
✔ Shutter Speed determines motion blur or freeze effects.
What’s Next?
In the next module, we will explore how to compose your shots effectively using framing techniques, rule of thirds, and lighting principles. Keep practicing with your camera settings until you feel comfortable making adjustments confidently!
Step 3: Understanding Lenses and Focal Lengths
Now that you have a solid understanding of camera settings, it’s time to explore one of the most important tools in photography—lenses. The type of lens you use greatly impacts how your photos turn out, affecting factors such as field of view, depth of field, and how close or far your subject appears.
In this step, we will cover:
- Types of Lenses – Understanding different lens categories and their uses.
- Focal Length Explained – How focal length affects composition and perspective.
- Practical Experimentation – Switching between lenses (if available) to see the difference.
By the end of this step, you’ll have a clear understanding of how different lenses influence your photography and how to choose the right one for each situation.
1. Learn About Different Types of Lenses
Lenses come in different shapes, sizes, and focal lengths, each serving a different purpose. Let’s break them down into key categories.
1.1 Standard (Kit) Lenses
✔ Common focal length: 18-55mm (for APS-C cameras) or 24-70mm (for full-frame cameras).
✔ Best for: General-purpose photography, travel, and beginners.
✔ Why?: Offers flexibility, allowing both wide-angle and slight zoom options.
Activity: If you have a kit lens, set it at 18mm, take a shot, then zoom to 55mm and take another shot. Compare how the scene changes.
1.2 Wide-Angle Lenses
✔ Common focal length: 10-24mm.
✔ Best for: Landscapes, architecture, group photos, and interiors.
✔ Why?: Captures more of the scene in a single frame but may cause distortion.
Tip: A wide-angle lens exaggerates distance, making objects near the camera appear much larger than those farther away.
1.3 Telephoto Lenses
✔ Common focal length: 70-200mm or more.
✔ Best for: Wildlife, sports, portraits, and events.
✔ Why?: Allows you to zoom in on distant subjects while compressing the background for a flattering look.
Activity: If you have a zoom lens, try taking a picture at 70mm, then zoom in to 200mm. Notice how the background appears closer to the subject.
1.4 Prime Lenses (Fixed Focal Length)
✔ Common focal length: 35mm, 50mm, 85mm.
✔ Best for: Portraits, street photography, and low-light situations.
✔ Why?: Offers sharp images, a wide aperture (f/1.8, f/1.4) for great background blur (bokeh), and better low-light performance.
Activity: If you have a 50mm prime lens, take a portrait at f/1.8, then switch to f/5.6. Notice how the background blur changes.
1.5 Macro Lenses
✔ Common focal length: 60mm, 100mm.
✔ Best for: Extreme close-ups of flowers, insects, jewelry, and fine details.
✔ Why?: Provides life-size magnification and crisp details.
Tip: A macro lens has a short minimum focusing distance, allowing you to capture intricate details of tiny subjects.
2. Understanding Focal Length and How It Affects Your Composition
Focal length refers to the distance (in millimeters) between the camera sensor and the lens’s optical center. It determines:
✔ Field of View – How much of the scene is captured.
✔ Perspective – How objects appear in relation to one another.
2.1 Short vs. Long Focal Length
✔ Short Focal Length (Wide-Angle: 10-35mm) – Captures more of the scene, making it ideal for landscapes and interiors.
✔ Long Focal Length (Telephoto: 70mm and above) – Zooms in on distant subjects, often used for portraits, wildlife, and sports.
2.2 How Focal Length Changes Composition
✔ A wide-angle lens (e.g., 16mm) makes subjects appear smaller and exaggerates perspective.
✔ A telephoto lens (e.g., 200mm) compresses the background, making it look closer to the subject.
Activity: Take two photos of the same subject—one at 18mm and another at 100mm. Compare how the subject and background change in relation to each other.
3. Try Switching Between Lenses (If You Have Them) to See the Difference
If you have multiple lenses, experiment with different focal lengths to see how each lens changes the perspective and composition.
Practical Exercise:
- Landscape Test:
- Use a wide-angle lens (10-24mm) to capture a vast scene.
- Compare with a standard lens (35mm or 50mm).
- Portrait Test:
- Take a portrait at 35mm → Background appears natural.
- Take a portrait at 85mm → Background appears more blurred, subject looks more flattering.
- Zoom Test:
- Photograph a subject at 70mm, then zoom to 200mm.
- Observe how background compression changes the look of the image.
Conclusion: Choosing the Right Lens for the Right Shot
Understanding lenses and focal lengths is essential for improving your photography. Different lenses serve different purposes, and choosing the right one can transform the way your photos look.
✔ Wide-angle lenses are great for capturing more of a scene.
✔ Standard lenses provide natural-looking images.
✔ Telephoto lenses help you zoom in and create background compression.
✔ Prime lenses offer high-quality images with beautiful background blur.
✔ Macro lenses let you capture intricate details.
What’s Next?
Now that you know how lenses impact composition, the next step is learning how to frame your shots effectively using composition techniques like the Rule of Thirds, Leading Lines, and Symmetry. Keep experimenting with different lenses and focal lengths to develop your unique photography style!
Step 4: Adjusting White Balance & Shooting in RAW vs. JPEG
Photography isn’t just about capturing a scene; it’s about capturing it accurately—especially when it comes to colors. Two key settings determine how colors appear in your photos:
- White Balance – Ensures the colors in your image are true to life.
- RAW vs. JPEG – Affects how much control you have over editing and quality.
By mastering these two aspects, you’ll take your photography skills to a professional level.
1. Learn What White Balance Is and How It Affects Colors in Your Photos
What is White Balance?
White Balance (WB) is a camera setting that adjusts the colors in your image to make whites appear white under different lighting conditions.
✔ Have you ever taken a photo indoors, and it looked too orange or yellow?
✔ Or taken a picture in the shade, and it appeared too blue?
This happens because different light sources have different color temperatures, measured in Kelvin (K). The camera must be set to the correct White Balance to neutralize these color casts.
1.1 Understanding Color Temperature (Kelvin Scale)
Every light source has a temperature measured in Kelvin (K):
✔ 1,000K – 3,000K → Warm tones (Candlelight, Tungsten bulbs) → Orange/Yellow cast
✔ 4,000K – 5,500K → Neutral tones (Fluorescent, Daylight) → Balanced colors
✔ 6,000K – 10,000K → Cool tones (Shade, Overcast) → Blue cast
Your camera has preset White Balance settings to help adjust for these conditions.
1.2 White Balance Presets and Their Uses
Most cameras include the following White Balance options:
✔ Auto WB (AWB) – The camera automatically adjusts colors. Works well in most situations.
✔ Daylight (Sunny) – 5200K – Best for bright sunlight.
✔ Cloudy – 6000K – Adds warmth to images taken under cloudy skies.
✔ Shade – 7000K – Warms up cool blue shadows.
✔ Tungsten (Incandescent) – 3200K – Corrects yellow-orange light from indoor bulbs.
✔ Fluorescent – 4000K – Neutralizes green/blue tones from office lighting.
✔ Flash – 5500K – Balances colors when using a camera flash.
✔ Custom WB – Manually set using a gray card for perfect accuracy.
2. Discover Why Shooting in RAW Gives You More Editing Control
Every digital camera allows you to save images in RAW or JPEG format. The choice between these two affects image quality, editing flexibility, and file size.
2.1 What is RAW?
✔ A RAW file is an unprocessed image that retains all details from the camera sensor.
✔ Think of RAW as a digital negative—it needs editing before final use.
✔ RAW files allow extensive color correction, white balance adjustments, and exposure recovery without loss of quality.
2.2 What is JPEG?
✔ A compressed image format that applies automatic color correction, contrast, and sharpening.
✔ Smaller file size, but less editing flexibility compared to RAW.
✔ Best for quick sharing but loses quality if edited repeatedly.
2.3 RAW vs. JPEG: Which One Should You Use?
| Feature | RAW | JPEG |
| File Size | Large | Small |
| Editing Flexibility | High | Limited |
| White Balance Adjustments | Can be changed | Fixed |
| Image Quality | Highest | Compressed |
| Storage Space | Takes up more space | Saves storage |
| Best for | Professional photography, editing | Social media, fast sharing |
✔ If you want full control over editing, shoot in RAW.
✔ If you need quick, ready-to-share images, shoot in JPEG.
3. Try Adjusting Your White Balance Settings to See the Effect on Images
3.1 Step-by-Step White Balance Adjustment
- Set up your camera in different lighting conditions (e.g., indoors, outdoors, shade).
- Take a photo using Auto White Balance (AWB).
- Switch to different White Balance presets (Daylight, Cloudy, Tungsten, etc.).
- Compare the images and observe how each setting changes the color tones.
- For advanced users: Use the Custom WB option by photographing a gray card under your light source and setting it as a reference in the camera menu.
3.2 Step-by-Step RAW vs. JPEG Comparison
- Set your camera to save images in both RAW and JPEG format (if available).
- Take the same photo using both formats.
- Upload the images to your computer.
- Open the RAW file in a photo editing software (Adobe Lightroom, Photoshop, Capture One, etc.).
- Adjust White Balance, Exposure, and Shadows.
- Compare the edited RAW file with the JPEG.
- Observe the difference—notice how the RAW file retains more detail and allows greater flexibility in edits.
Conclusion: Why White Balance & RAW Matter
By understanding White Balance and shooting in RAW, you gain complete control over how your final images look. These skills allow you to produce professional-quality photos that accurately represent colors and lighting conditions.
✔ White Balance ensures natural colors by compensating for different light sources.
✔ RAW format gives you the flexibility to fine-tune your photos during post-processing.
✔ Experimenting with different settings will help you develop a deeper understanding of color correction in photography.
We’re also giving these extra bonuses
Photography Basics – Checklist
Photography Basics – FAQs

Photography Basics – Salespage Content
Package Details:
Word Count: 19 136 Words
Number of Pages: 99
Photography Basics – Bonus Content
Checklist
Word Count: 413 words
FAQs
Word Count: 1080 words
Salespage Content
Word Count: 509 words
Total Word Count: 21 138 Words
Your PLR License Terms
PERMISSIONS: What Can You Do With These Materials?
Sell the content basically as it is (with some minor tweaks to make it “yours”).
If you are going to claim copyright to anything created with this content, then you must substantially change at 75% of the content to distinguish yourself from other licensees.
Break up the content into small portions to sell as individual reports for $10-$20 each.
Bundle the content with other existing content to create larger products for $47-$97 each.
Setup your own membership site with the content and generate monthly residual payments!
Take the content and convert it into a multiple-week “eclass” that you charge $297-$497 to access!
Use the content to create a “physical” product that you sell for premium prices!
Convert it to audios, videos, membership site content and more.
Excerpt and / or edit portions of the content to give away for free as blog posts, reports, etc. to use as lead magnets, incentives and more!
Create your own original product from it, set it up at a site and “flip” the site for megabucks!
RESTRICTIONS: What Can’t You Do With These Materials?
To protect the value of these products, you may not pass on the rights to your customers. This means that your customers may not have PLR rights or reprint / resell rights passed on to them.
You may not pass on any kind of licensing (PLR, reprint / resell, etc.) to ANY offer created from ANY PORTION OF this content that would allow additional people to sell or give away any portion of the content contained in this package.
You may not offer 100% commission to affiliates selling your version / copy of this product. The maximum affiliate commission you may pay out for offers created that include parts of this content is 75%.
You are not permitted to give the complete materials away in their current state for free – they must be sold. They must be excerpted and / or edited to be given away, unless otherwise noted. Example: You ARE permitted to excerpt portions of content for blog posts, lead magnets, etc.
You may not add this content to any part of an existing customer order that would not require them to make an additional purchase. (IE You cannot add it to a package, membership site, etc. that customers have ALREADY paid for.)
Share Now!
Latest Products


Free Sales Funnel Builder

Related Products
Popular & Trending


Featured Products